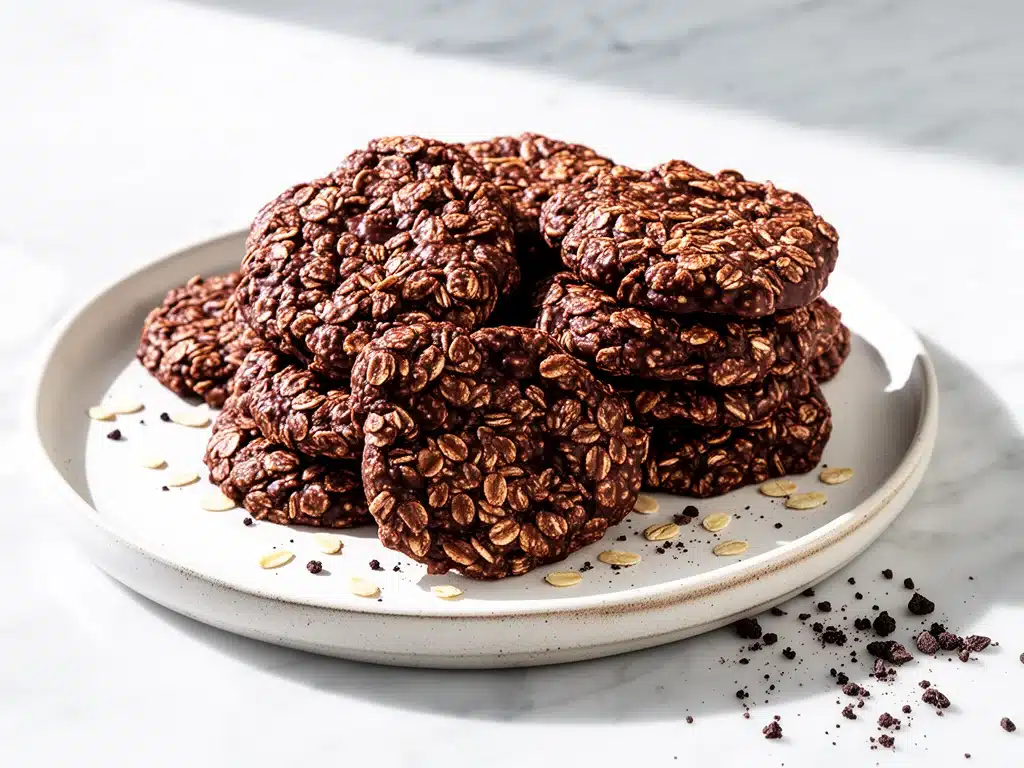
It was 10:30 PM on a Tuesday. My daughter had a soccer tournament the next morning, my husband was complaining about a headache, and I was staring into the fridge like it held the secrets to the universe. We needed something sweet. Not a complicated cake that required three bowls and an hour of cleanup. Not store-bought cookies that tasted like cardboard and regret. We needed something chocolatey, comforting, and fast. I had ten minutes before they went to bed, and I had exactly five ingredients in my pantry.
So I threw together these no-bake chocolate oat fudge cookies. I didn’t expect much. I expected a weird, sticky mess that would stick to the roof of my mouth. Instead, I got a batch of chewy, fudgy, chocolatey perfection that my kids devoured in under three minutes. They were so impressed they actually asked for the recipe before they even brushed their teeth.
I’ve made these cookies dozens of times since that random Tuesday night. Sometimes when I’m stressed. Sometimes when I’m trying to hide the fact that I forgot to buy dessert. Sometimes just because I crave chocolate and don’t want to turn on the oven. They have become my go-to solution for late-night cravings, last-minute party favors, and healthy(ish) snacks for the kids. They are stupid simple, they come together in one pot, and they taste like you spent hours in the kitchen (you didn’t).
If you’ve ever been in a sugar crisis with only 15 minutes to spare, you need to know about this recipe. It’s the kind of dessert that feels like a cheat code. No baking, no mess, no stress. Just pure, fudgy chocolate goodness. Let me show you how to make them.
Why You’ll Love This No-Bake Cookie Recipe
Look, I’m not going to stand here and tell you these are going to replace your grandmother’s secret family recipe. But what I will tell you is that they will save your dinner plans, your sanity, and your sweet tooth all at once. Here’s why I keep making these no-bake chocolate oat fudge cookies on repeat:
Lightning Fast — Seriously, if you can boil water, you can make these. From start to finish, including cooling time, it takes about 30 minutes. But active cooking time? Maybe 10 minutes. I make these on weeknights when I get home from work exhausted and still want something homemade.
One-Pot Wonder — This is huge for me. I hate dishes. These cookies require one saucepan, one spoon, and maybe a baking sheet for cooling. That’s it. No mixing bowls, no whisking, no flour dusting the counters. The cleanup is a joke. Literally, I just rinse the spoon while the cookies set.
Pantry-Friendly — You probably have 90% of these ingredients already. Oats, sugar, cocoa powder, butter, milk. If you have a pantry, you have the base. The only thing you might need to grab is the cocoa powder if you’re out. I keep a big canister in my cabinet specifically for these nights.
Kid-Approved — My kids are picky. Like, they’ll eat white bread and nothing else kind of picky. But these cookies? They love them. The texture is chewy but soft, and the chocolate flavor is strong enough to satisfy any sweet tooth. I’ve made these for school bake sales (when the rules allow no-bake items) and they always sell out first.
Budget-Smart — These are incredibly cheap to make. You’re using oats and sugar, which are dollar-store prices. Feeds a family of four for under $5. That’s less than a single trip to the bakery. When money is tight, these are my lifesaver.
This is my go-to when I need dessert to just work. No complicated techniques, no weird ingredients, just reliable, delicious food that makes everyone happy. Plus, they’re great for meal prep. Make a batch on Sunday, and you have snacks for the week.
Ingredients You’ll Need
Here’s the best part: this list is short. Like, embarrassingly short. But I’m particular about three things here, so listen up if you want these to turn out perfect.
Old-Fashioned Rolled Oats (3 cups / 270g) — Do not use instant oats. Do not use steel-cut oats. You need old-fashioned rolled oats. They have the right texture to hold the cookie together without turning into mush. I use Quaker brand because it’s consistent, but any generic store brand works fine. Just make sure they’re the flat, flaky kind.
Unsalted Butter (½ cup / 113g) — This adds richness and helps bind everything. I use unsalted so I can control the saltiness, but if you only have salted, reduce any added salt (though there isn’t any in this recipe anyway). Don’t use margarine. It doesn’t melt the same way and leaves a weird aftertaste.
Granulated Sugar (2 cups / 400g) — Yes, two full cups. It’s a lot, but it’s balanced by the cocoa and oats. Don’t try to reduce this drastically or the cookies won’t set. If you’re worried about sugar, you can try a half-and-half mix with coconut sugar, but the texture might change slightly.
Unsweetened Cocoa Powder (½ cup / 45g) — This is the chocolate flavor. Use good quality here. I prefer Hershey’s Special Dark for a deeper, less acidic chocolate taste, but regular Hershey’s works too. Do not use Dutch-processed cocoa unless you adjust the acidity, but honestly, regular is easier to find and works perfectly. Sift it if it’s lumpy.
Milk (½ cup / 120ml) — Whole milk is best for creaminess, but 2% works too. I’ve tried skim, and it’s fine, just less rich. Don’t use plant-based milk unless you’re dairy-free (see variations below), as the fat content helps with the texture.
Vanilla Extract (1 teaspoon) — Pure vanilla makes a huge difference. I use Nielsen-Massey or McCormick. If you’re in a pinch, you can skip it, but I don’t recommend it. It adds that warm, bakery smell.
Salt (¼ teaspoon) — Just a pinch. It enhances the chocolate flavor. If your butter is salted, you might want to skip this or use less.
Optional Add-ins:
I love adding a handful of mini chocolate chips on top after you drop the cookies. It makes them look fancy and adds extra chocolatey bites. Chopped nuts (walnuts or pecans) also work great if you want some crunch. I usually leave them out for the kids, but add them for myself.
Equipment Needed
You don’t need fancy equipment for this. Here’s what I actually use.
Medium Saucepan — I use a 2-quart stainless steel pot. It needs to be big enough to hold the mixture without boiling over. Non-stick works too, but I prefer stainless because it’s easier to clean and doesn’t scratch.
Wooden Spoon or Heat-Proof Spatula — For stirring. You’ll be stirring constantly while it boils, so you need something sturdy. Silicone spatulas are great because they won’t melt.
Baking Sheets — Two standard sheets work best. Line them with parchment paper or wax paper. Do not skip the lining. These cookies stick like crazy if you don’t line the sheets. Parchment paper is my preference because it’s less messy to remove.
Measuring Cups and Spoons — Standard stuff. Dollar store versions work fine for dry ingredients. For the milk and butter, use liquid measuring cups for accuracy.
Cooling Rack — Optional. I usually just let the cookies cool on the counter. But if it’s humid, a rack helps them set faster.
Ice Cream Scoop or Tablespoon — For dropping the cookies. An ice cream scoop makes them uniform and pretty. If you don’t have one, a tablespoon works, but they’ll be irregular shapes. I don’t mind that; it adds to the homemade charm.
How to Make No-Bake Chocolate Oat Fudge Cookies
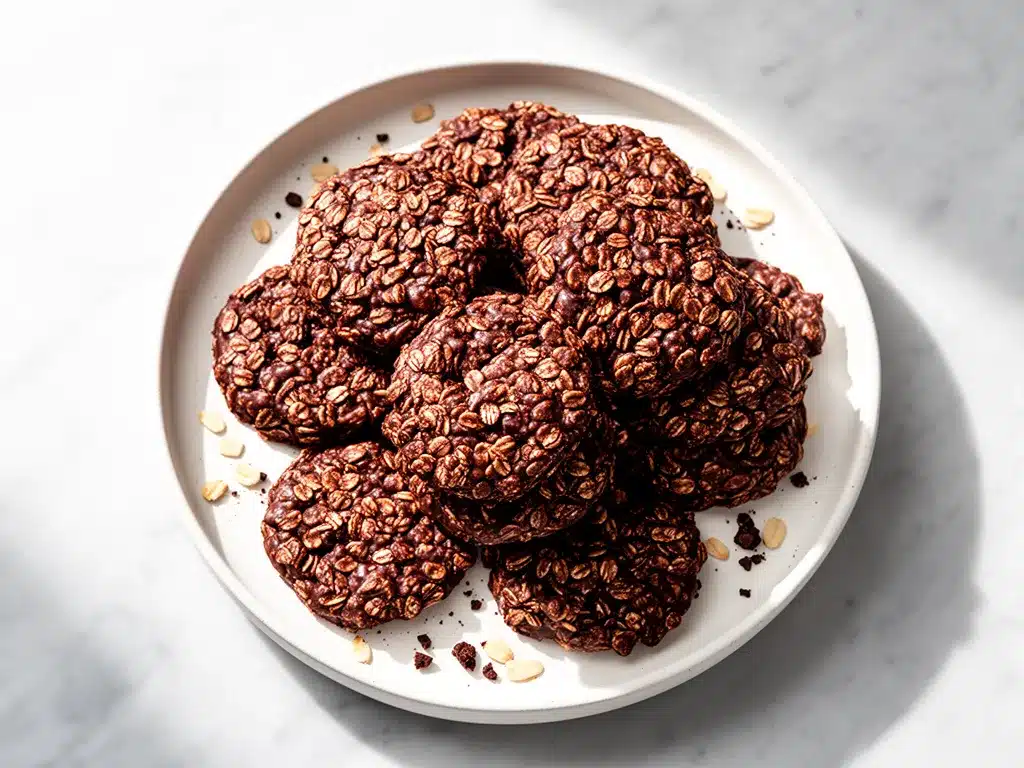
Alright, let’s make this! I’m walking you through exactly how I do it, including the little tricks I’ve picked up over the years.
Step 1: Prep Your Station (2 minutes)
Before you turn on the stove, line your baking sheets with parchment paper. This is crucial. If you wait until the mixture is ready, you’ll be rushing and making a mess. Set out your measuring cups too. Once the mixture is boiling, things move fast.
Step 2: Combine and Boil (5-7 minutes)
In your saucepan, combine the butter, sugar, cocoa powder, and milk. Stir everything together over medium heat. You want the butter to melt and the sugar to dissolve. This takes about 3-4 minutes. Once it starts to bubble, keep stirring. You want a rolling boil. Let it boil hard for exactly one minute. Do not skip this step, and do not boil it longer. If you boil it too long, the cookies will be hard. If you don’t boil it long enough, they won’t set. One minute is the sweet spot.
Step 3: Remove from Heat and Stir (1 minute)
Take the pot off the heat immediately after one minute. Stir in the vanilla extract and salt. Then, add the oats. Stir vigorously until all the oats are coated in the chocolate mixture. This should take about 30 seconds. The mixture will look thick and glossy. If it looks too runny, you might have under-boiled it. If it looks like a solid block, you over-boiled it. Aim for a thick, pourable consistency.
Step 4: Drop the Cookies (5 minutes)
Using your ice cream scoop or tablespoon, drop mounds of the mixture onto your prepared baking sheets. Leave about an inch between each cookie because they spread slightly. You should get about 20-25 cookies depending on the size. Work quickly because the mixture starts to cool and thicken fast. If it gets too hard to scoop, you can put the pot back on low heat for 30 seconds to loosen it up, but be careful not to melt it again.
Step 5: Cool and Set (15-20 minutes)
Let the cookies sit at room temperature until they firm up. This usually takes 15-20 minutes. You can speed this up by putting them in the fridge for 10 minutes, but they’re best at room temperature for texture. Do not touch them while they’re cooling, or they’ll stick to your fingers. Once they’re firm to the touch, they’re ready to eat.
Total Time: About 30 minutes (10 minutes active, 20 minutes cooling)
Expert Tips & Tricks
Here’s everything I’ve learned from making these dozens of times. These tips will save you from my mistakes.
The One-Minute Rule is Sacred
This is the most common mistake people make. They forget to time it. Set a timer on your phone as soon as the mixture starts boiling. One minute, hard boil. Not 30 seconds. Not two minutes. One minute. This is what activates the sugar to set the cookies.
Don’t Overcrowd the Pot
If your pot is too small, the mixture will boil over. Use a pot that’s at least 2 quarts. If you’re doubling the recipe, use a larger pot. Boiling over is a nightmare to clean and ruins the cookies.
Work Fast
The mixture hardens as it cools. Have your scoop and baking sheets ready before you take the pot off the heat. If you’re slow, you’ll end up with a solid brick of chocolate oats. I keep my scoop in the dry ingredients bowl so it’s ready to go.
Humidity is the Enemy
If you live in a humid climate, these cookies might not set as well. In that case, put them in the fridge to speed up the setting process. Also, make sure your baking sheets are completely dry. Any moisture will prevent them from setting.
Storage is Key
Store these in an airtight container at room temperature. They last up to a week. If you’re in a hot house, keep them in the fridge. They’ll firm up even more, which some people prefer.
Variations & Substitutions
Once you’ve nailed the basic version, here’s how you can mix it up. I’ve tried all of these.
Chocolate Chip Fudge
Stir in ½ cup of mini chocolate chips after you remove the pot from heat. This makes them extra chocolatey. My kids go crazy for this version.
Peanut Butter Swirl
Add 2 tablespoons of peanut butter to the boiling mixture. It adds a nice salty-sweet contrast. Or, swirl a teaspoon of peanut butter on top of each cookie before it sets.
Coconut Oat
Add ½ cup of shredded coconut to the oats. It adds a tropical twist and chewy texture. Great for summer.
Nutty Crunch
Add 1 cup of chopped walnuts or pecans. This makes them more like a traditional no-bake cookie with crunch. I love this version for texture.
Vegan Version
Use vegan butter (like Earth Balance) and almond milk. The sugar and cocoa are usually vegan, but check labels. These set slightly differently, so you might need to chill them longer in the fridge.
Gluten-Free
Use certified gluten-free oats. Regular oats are often processed in facilities with wheat, so if you’re celiac, this is important. Everything else is naturally gluten-free.
Serving & Storage
How to Serve:
I usually serve these straight from the baking sheet. They look rustic and homemade. But here are other ways I’ve enjoyed them:
Side Dishes:
These are dessert, so they go well with coffee or milk. I also serve them with a glass of cold milk or a cup of tea. They’re perfect for afternoon snacks.
Gift Idea:
These make great gifts. Put them in a nice tin or a cellophane bag with a ribbon. They travel well and don’t melt easily (unlike chocolate bars).
Storage Instructions:
Refrigerator:
Store in an airtight container for up to 2 weeks. Layer them with parchment paper if you stack them. They stay fresh and chewy.
Freezing:
Yes, you can freeze these! Place them in a freezer-safe container with parchment between layers. They last up to 3 months. Thaw at room temperature for 15 minutes before eating. They taste just as good frozen, actually.
Pro Tip:
If they get a bit soft, put them in the fridge for 10 minutes. They’ll firm right up.
Nutrition Information
I’m not a nutritionist, but here’s the breakdown if you’re tracking. Keep in mind, these are treats, so enjoy them in moderation.
Per Cookie (based on 20 cookies):
| Calories | 180 |
| Protein | 3g |
| Carbs | 28g |
| Fiber | 2g |
| Sugar | 18g |
| Fat | 7g |
| Saturated Fat | 4g |
| Sodium | 50mg |
What’s Good: They have some fiber from the oats, and they’re not loaded with protein, but they’re satisfying. The sugar is high, but it’s balanced by the fat from the butter and oats.
What to Know: These are definitely a dessert or snack. They’re not a health food, but they’re better than a box of cookies from the store because you control the ingredients.
Final Thoughts
So that’s my go-to no-bake chocolate oat fudge cookie! I’ve probably talked your ear off at this point, but when you make a recipe this often, you have a lot to say about it.
This has saved dinner plans more times than I can count. It’s my answer to “what’s for dessert” when I’m tired, don’t want to bake, and still want something that tastes really good. My kids are happy, my husband’s happy, and I’m happy because I’m not stressed about cooking.
Make it yours! Try different add-ins, swap in your favorite nuts, or adjust the cocoa. The best recipes are the ones you adapt to your family’s tastes. And if you’re looking for other easy, kid-friendly treats, check out these strawberry cream cheese roll-ups for a lighter option, or these cheesy broccoli and chicken fritters for a savory snack.
If you make this, drop a comment and let me know what you think! I love hearing how recipes turn out in your kitchen. And if something doesn’t work, tell me that too—I’m here to help troubleshoot.
Happy cooking! And I hope your kitchen smells half as good as mine does right now.
Frequently Asked Questions
Can I use instant oats instead of rolled oats?
You can, but the texture will be different. Instant oats are thinner and will make the cookies softer, almost like a bar. Rolled oats give that classic chewy texture. If you only have instant, it’s better than nothing, but rolled is preferred.
Why did my cookies not set?
This usually happens if you didn’t boil the mixture for a full minute. The boiling step is what dissolves the sugar and creates the binding agent. If you under-boil, the cookies will be soft and sticky. Next time, make sure you set a timer for exactly one minute once it starts boiling.
Can I double this recipe?
Yes, but you’ll need a larger pot. The mixture expands when it boils, so make sure you have plenty of room. Also, you’ll need more baking sheets. I usually make two batches if I’m feeding a crowd.
How long do these last?
They last up to 2 weeks in an airtight container at room temperature. In the fridge, they can last up to a month. In the freezer, up to 3 months.
Can I use brown sugar instead of white sugar?
You can, but it will change the flavor and color. Brown sugar adds a molasses taste and makes the cookies darker. It works, but the traditional recipe uses white sugar for that classic chocolate flavor.
Are these healthy?
They’re not a health food, but they’re not terrible. They have oats, which are good for you, and the sugar is balanced by the fat. They’re a better option than a candy bar, but still a treat.
Can I make these nut-free?
Yes, the base recipe is nut-free. Just make sure your oats and cocoa powder are processed in nut-free facilities if you have severe allergies. You can add seeds like pumpkin or sunflower instead of nuts for crunch.
Pin This Recipe!
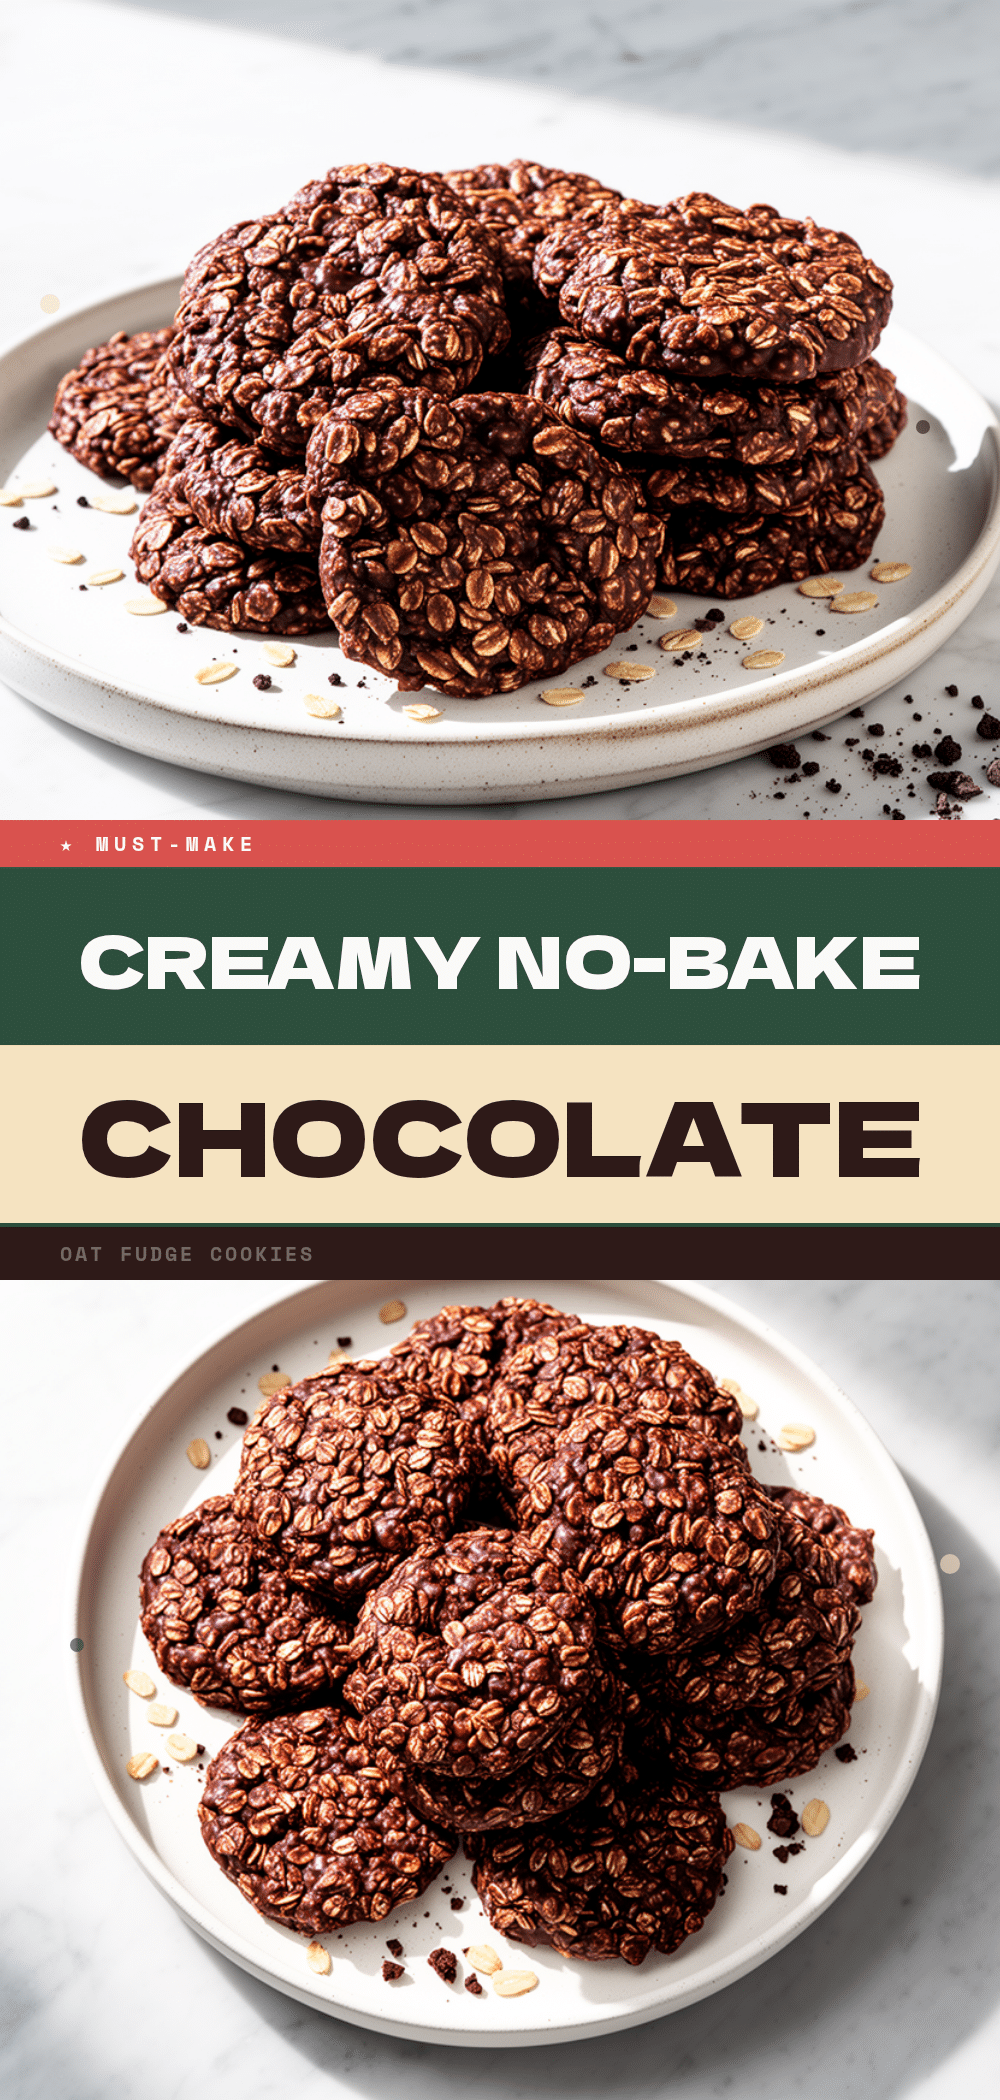
No-Bake Chocolate Oat Fudge Cookies
- Total Time: 30 minutes
- Yield: 20-25 cookies 1x
Description
A quick, 5-ingredient no-bake dessert that comes together in one pot. These chewy, fudgy cookies are perfect for late-night cravings and require minimal cleanup.
Ingredients
- 3 cups old-fashioned rolled oats
- 1/2 cup unsalted butter
- 2 cups granulated sugar
- 1/2 cup unsweetened cocoa powder
- 1/2 cup milk
- 1 teaspoon vanilla extract
- 1/4 teaspoon salt
- Optional: mini chocolate chips, chopped nuts (walnuts or pecans)
Instructions
- Line two baking sheets with parchment paper.
- In a medium saucepan, combine butter, sugar, cocoa powder, and milk.
- Stir over medium heat until butter melts and sugar dissolves (3-4 minutes).
- Bring to a rolling boil and boil hard for exactly one minute.
- Remove from heat immediately and stir in vanilla extract and salt.
- Add oats and stir vigorously until all oats are coated in the chocolate mixture.
- Drop mounds of the mixture onto prepared baking sheets, leaving space between cookies.
- Let cool at room temperature for 15-20 minutes until firm.
Notes
Do not use instant or steel-cut oats; old-fashioned rolled oats are required for the correct texture. Boiling for exactly one minute is crucial for the cookies to set properly. If the mixture becomes too thick to scoop, briefly reheat on low. Store in an airtight container at room temperature for up to a week, or freeze for up to three months.
- Prep Time: 5 minutes
- Cook Time: 10 minutes
- Category: Dessert
- Cuisine: American
Nutrition
- Serving Size: 1 cookie
- Calories: 180
- Sugar: 18
- Sodium: 50
- Fat: 7
- Saturated Fat: 4
- Carbohydrates: 28
- Fiber: 2
- Protein: 3
Keywords: no-bake cookies, chocolate oat cookies, easy dessert, 5-ingredient recipe, kid-friendly snacks, quick treats



