
I have a confession to make. Last Saturday, I stood in my kitchen at 10 AM, wearing pajamas, staring at a loaf pan that looked suspiciously like it had been used three years ago. I wasn’t trying to bake a fancy, multi-layered celebration cake with intricate piping. I just wanted something that tasted like sunshine but felt like a warm hug. I wanted the kind of cake that makes you close your eyes after the first bite and sigh. That’s when I pulled out the cream cheese and the lemons.
I’ve made this lemon cream cheese pound cake dozens of times over the years, but this specific version is different. It’s the one I call when I need to impress a neighbor without spending hours in the kitchen. It’s the one I pack in a Tupperware for church potlucks because it always disappears first. It’s the one I make when I’m sad, when I’m happy, or when I just need a reason to brew strong coffee and sit on the porch.
Most pound cakes are dry. I know this because I’ve eaten my fair share of sad, dense loaves that crumble to dust. This one isn’t like that. It’s moist, tangy, and incredibly tender. The cream cheese isn’t just a swirl on top; it’s folded right into the batter, creating this incredible marbled effect that tastes like lemon curd and buttery cake all at once. It’s rich, but the lemon cuts through the heaviness so you don’t feel like you need a nap after eating a slice.
I learned this recipe from a friend who swore by her grandmother’s trick of adding a splash of buttermilk. I’ve tested it with regular milk, yogurt, and even sour cream, but the buttermilk gives it that perfect, tender crumb. I’ve also tweaked the ratio of lemon zest to juice until it hit that sweet spot—bright enough to wake up your taste buds, but not so sour that it makes your face pucker. This is the lemon cream cheese pound cake you’ll make on repeat. I promise you, once you bake this, your pantry will always need to be stocked with lemons and cream cheese.
Why You’ll Love This Recipe
There are about ten reasons I keep making this cake, but here are the big ones that keep it in my regular rotation. It’s not just another dessert; it’s a reliable friend.
It’s Actually Moist — This is the biggest selling point. Most pound cakes are dry as the desert. Because of the cream cheese and the buttermilk, this cake stays moist for days. I’ve eaten leftovers on the fifth day, and it still tasted fresh. The fat from the cream cheese keeps the crumb tender and soft.
Zero Fancy Equipment Needed — You don’t need a stand mixer. A hand mixer or even a strong arm and a wooden spoon works perfectly. I’ve made this while holding a toddler on my hip, and it turned out fine. The batter is forgiving. If you overmix it slightly, it won’t ruin the cake. It’s incredibly beginner-friendly.
The Marbled Look is Easy — You don’t need to be a professional baker to make this look stunning. You just divide the batter in half and swirl it. It looks like you spent hours creating an artistic masterpiece, but it’s actually just two bowls and a knife. It’s the ultimate low-effort, high-reward bake.
Perfect for Any Occasion — I’ve served this at bridal showers, casual BBQs, and 3 AM snack attacks. It’s not too sweet, so it pairs well with strong coffee or tea. It’s also sturdy enough to travel. I’ve driven it in the backseat of my car (carefully!) without it falling apart. It’s a great gift for neighbors or teachers.
Make-Ahead Friendly — This cake actually gets better after it sits for a day. The flavors meld together, and the lemon zest infuses deeper into the batter. I usually bake it the night before an event. It stores beautifully at room temperature, so I don’t have to worry about it going bad before the party.
Real talk, this is my go-to when I need to bake something that feels special but doesn’t require a degree in pastry arts. It’s reliable, delicious, and always makes people ask for the recipe.
Ingredients You’ll Need
Here’s the best part: you probably have most of these ingredients already. This isn’t a recipe that requires a trip to three different specialty stores. It’s pantry-friendly with just a few key items that make all the difference.
Unsalted Butter (1 cup / 226g) — This is the base of your cake. I use high-quality European-style butter if I can find it, like Kerrygold or Plugra, because the higher fat content makes a richer flavor. Make sure it’s softened to room temperature. If you poke it and your finger leaves an indent, it’s ready. Cold butter will ruin your batter.
Cream Cheese (8 oz / 225g) — Full-fat brick cream cheese, not the spreadable kind in a tub. The tub stuff has more water and air, which can make the cake dense or greasy. Let it soften too, just like the butter. This is what gives the cake its tang and moisture.
Granulated Sugar (1 ½ cups / 300g) — Standard white sugar. Don’t try to substitute with brown sugar or honey here; the texture will be off. You need that granulated sugar to cream with the butter to create air pockets for lift.
Eggs (4 large) — Room temperature eggs are crucial. Cold eggs can cause the butter to seize up when you add them. I take them out of the fridge 30 minutes before I start. If you forget, you can warm them in a bowl of warm water for 5 minutes.
All-Purpose Flour (2 ½ cups / 315g) — I use Gold Medal or King Arthur. Sift the flour before measuring if it’s been sitting in the pantry for a while to remove clumps. This ensures a light, tender crumb rather than a heavy brick.
Buttermilk (1 cup / 240ml) — This is the secret weapon. The acidity in the buttermilk tenderizes the gluten in the flour, making the cake soft. If you don’t have buttermilk, make your own by adding 1 tablespoon of white vinegar or lemon juice to a measuring cup, then filling the rest with milk. Let it sit for 5 minutes until it curdles slightly.
Fresh Lemons (3 medium) — You need both zest and juice. The zest provides the aromatic oil that makes it taste like lemon, while the juice adds brightness. Never use bottled lemon juice for the zest part; it lacks flavor. And for the juice, fresh is non-negotiable for the best taste.
Vanilla Extract (1 teaspoon) — Just a touch to round out the flavors. Don’t skip it; it balances the sharpness of the lemon.
Baking Powder (1 teaspoon) — And ½ teaspoon of baking soda. These leavening agents help the cake rise. Make sure they’re not expired! Old leavening agents are the reason cakes turn out flat.
Salt (½ teaspoon) — Salt enhances flavor. It makes the lemon taste more like lemon. Don’t skip it.
Optional: Powdered Sugar Glaze (1 cup powdered sugar + 1-2 tablespoons lemon juice) — I usually skip the glaze because the cake is sweet enough, but if you want that extra shiny finish, whisk these together and drizzle over the cooled cake.
Equipment Needed
You don’t need fancy gadgets for this. Here’s what I actually use in my kitchen.
9×5 Inch Loaf Pan — This is the standard size. I use a metal pan because it conducts heat evenly. Dark non-stick pans can make the crust burn too quickly, so if you use one, lower the oven temperature by 25 degrees.
Mixing Bowls — Two large bowls. One for the wet ingredients and one for the dry. I like stainless steel because they’re easy to clean and don’t scratch.
Electric Mixer — A hand mixer is perfect for this. It’s lighter than a stand mixer and easy to maneuver in a deep bowl. If you’re mixing by hand, bring your arm muscles, because creaming butter and sugar takes about 5 minutes of effort.
Zester or Microplane — A microplane gives you the finest zest, which disperses evenly throughout the cake. If you use a regular grater, you’ll get bigger pieces of peel that might be too bitter.
Wire Cooling Rack — Essential. Never leave a cake in the pan to cool completely. It will steam and get soggy at the bottom. Transfer it to a rack after 10 minutes.
Parchment Paper — I always line my loaf pan with parchment. It makes removing the cake effortless and means less cleanup. Just grease the pan lightly before laying down the paper.
How to Make It: Step-by-Step
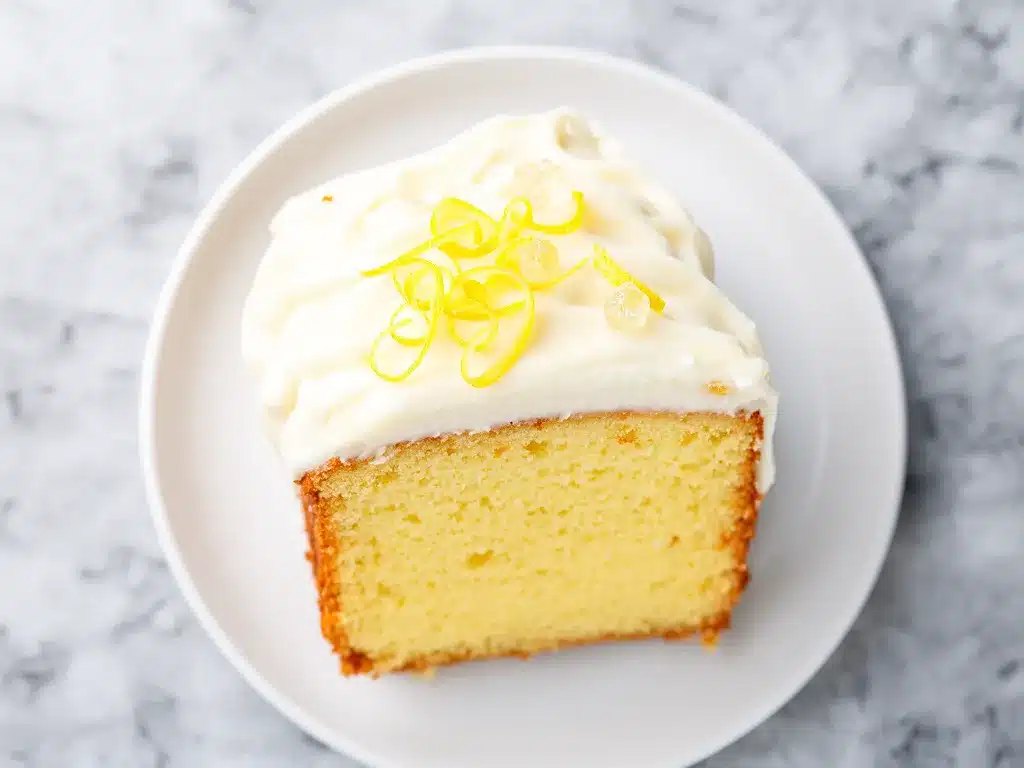
Alright, let’s make this! I’m walking you through exactly how I do it, including the little tricks I’ve picked up over the years.
Step 1: Prep Everything (10 minutes)
Preheat your oven to 325°F (165°C). This lower temperature is key for pound cake. It bakes slowly and evenly, preventing a domed top and cracked crust. Grease your 9×5 loaf pan and line it with parchment paper, leaving an overhang on the long sides so you can lift the cake out later. Soften your butter and cream cheese. Grate your lemon zest and juice your lemons. Have all ingredients at room temperature.
Step 2: Cream the Butter and Cream Cheese (3-4 minutes)
In a large bowl, beat the softened butter and cream cheese together on medium-high speed. This is the most important step. You’re looking for a smooth, fluffy mixture that’s almost white. Scrape down the sides of the bowl with a spatula to ensure everything is incorporated. If there are lumps of cream cheese, the cake will be dense.
Step 3: Add Sugar and Eggs (5 minutes)
Gradually add the granulated sugar while beating. Once the sugar is mixed in, add the eggs one at a time, beating well after each addition. This might seem like a lot of mixing, but it incorporates air. The mixture should look light and pale. Add the vanilla extract and lemon zest now. Mix until combined.
Step 4: Combine Dry Ingredients (2 minutes)
In a separate medium bowl, whisk together the flour, baking powder, baking soda, and salt. This ensures the leavening agents are evenly distributed so you don’t get bitter spots of baking soda in your cake.
Step 5: Mix Wet and Dry (3-4 minutes)
Reduce your mixer speed to low. Add the dry ingredients in three parts, alternating with the buttermilk in two parts. Start and end with the dry ingredients. Mix just until the flour disappears. Do not overmix! Overmixing develops gluten, which makes the cake tough. The batter should be thick and smooth. If it looks too thick, add a splash more buttermilk.
Step 6: Create the Marble Effect (2 minutes)
Divide the batter evenly between two bowls (or just divide it in half in one bowl). Leave one half plain. To the other half, add 2 tablespoons of lemon juice and mix gently. Now, spoon the plain batter and the lemon batter into the prepared loaf pan alternately. Use a knife or a skewer to gently swirl the batters together. Don’t over-swirl; you want distinct ribbons of white and yellow.
Step 7: Bake (50-60 minutes)
Place the loaf in the center of the oven. Bake for 50-60 minutes. At the 30-minute mark, check the top. If it’s browning too quickly, tent it loosely with aluminum foil. The cake is done when a toothpick inserted into the center comes out clean or with just a few moist crumbs. The top should be golden brown and spring back when lightly touched.
Step 8: Cool Completely (1 hour)
Let the cake cool in the pan for 10 minutes. Then, use the parchment overhang to lift it out onto a wire rack. Let it cool completely before slicing. This is the hardest part, but slicing a warm pound cake will make it gummy. Wait until it’s cool to the touch.
Expert Tips & Tricks
Here’s everything I’ve learned from making this dozens of times. These tips will save you from my mistakes.
Room Temperature is Non-Negotiable
I cannot stress this enough. Cold butter and cream cheese will not cream properly. Cold eggs will curdle the mixture. Take your ingredients out 30-60 minutes before you start. If you’re short on time, warm the butter and eggs in a bowl of warm water for 5-10 minutes.
Don’t Overmix the Batter
Once you add the flour, mix until just combined. Overmixing leads to a dense, tough cake. It’s better to have a few small lumps of flour than to mix it until it’s smooth. The heat of the oven will finish the job.
Use Fresh Lemons Only
Bottled lemon juice has a preservative taste that doesn’t work in baking. Use fresh lemons for both zest and juice. If your lemons are small, you might need a fourth one. Roll them on the counter before juicing to get more juice out.
Check Your Oven Temperature
Ovens are rarely accurate. I keep an oven thermometer inside to check. If your oven runs hot, your cake will burn on the outside and be raw inside. If it runs cold, it won’t rise properly.
The Toothpick Test
Don’t rely solely on the timer. Insert a toothpick into the center of the cake. If it comes out with wet batter, bake for 5 more minutes. If it comes out clean, it’s done. If it comes out with moist crumbs, it’s done.
Variations & Substitutions
Once you’ve nailed the basic version, here’s how you can mix it up. I’ve tried all of these.
Blueberry Lemon Pound Cake
Add 1 cup of fresh or frozen blueberries to the plain batter. Toss them in 1 tablespoon of flour first to prevent them from sinking. Fold them into the plain batter before baking. The berries burst with flavor and add a nice contrast.
Poppy Seed Lemon
Add 2 tablespoons of poppy seeds to the dry ingredients. This adds a nice crunch and visual appeal. It’s a classic combination that tastes like a lemon poppy seed muffin in cake form.
Gluten-Free Version
Use a 1:1 gluten-free flour blend that includes xanthan gum. The texture will be slightly more delicate, but it works well. Make sure your baking powder is certified gluten-free.
Dairy-Free Option
Replace butter with vegan butter sticks (not tub margarine). Use coconut cream or soy cream cheese. Use oat milk or soy milk with vinegar for the buttermilk substitute. It’s not exactly the same, but it’s still delicious.
Lemon Glaze
For a sweeter finish, mix 1 cup of powdered sugar with 2-3 tablespoons of fresh lemon juice. Drizzle over the completely cooled cake. Let it set for 15 minutes before slicing.
Other Citrus Variations
You can swap lemons for limes or oranges. Just adjust the zest and juice to taste. Lime works particularly well if you add some mint to the batter.
Serving & Storage
How to Serve:
I usually serve this cake plain, maybe with a dusting of powdered sugar. It pairs beautifully with strong black coffee or Earl Grey tea. For a summer afternoon, serve it with fresh berries and whipped cream. It’s also great for breakfast with a cup of tea.
Storage Instructions:
Room Temperature: Store in an airtight container or wrap tightly in plastic wrap. It will keep at room temperature for up to 3 days. This is the best way to enjoy it, as the texture is softest.
Refrigerator: If you live in a hot, humid climate, store it in the fridge. It will keep for up to 5 days. Let it come to room temperature before serving for the best flavor.
Freezer: Pound cake freezes beautifully. Wrap the whole loaf or individual slices tightly in plastic wrap, then in aluminum foil. It will keep for up to 3 months. Thaw overnight in the refrigerator.
Pro Tip: If the cake starts to dry out after a few days, wrap it in a damp paper towel and microwave it for 10 seconds. It will steam back to life.
Nutrition Information
I’m not a nutritionist, but here’s the breakdown if you’re tracking. This is a rich cake, so portion control is key.
Per Serving (based on 12 slices):
- Calories: 380
- Protein: 5g
- Carbs: 45g
- Fat: 20g
- Sugar: 28g
Look, this is a dessert. It’s meant to be enjoyed. But it’s also made with real ingredients, so it’s better than most store-bought cakes. When I make it, I slice it thin and pair it with tea, so it feels indulgent but not overwhelming.
Final Thoughts
So that’s my lemon cream cheese pound cake! It’s simple, reliable, and absolutely delicious. I’ve made this cake for birthdays, holidays, and random Tuesdays, and it never fails to make everyone happy. It’s the kind of recipe that becomes a staple in your kitchen because you know exactly what you’re getting.
If you make this, I’d love to hear how it turns out. Drop a comment below and let me know if you added any variations. Did you try the blueberry version? Did you skip the glaze? I love hearing about your bakes.
Happy baking! And I hope your kitchen smells like lemons and butter for days.
Frequently Asked Questions
Can I use frozen lemons for zest?
Yes, frozen lemons actually zest easier than fresh ones. Just thaw them slightly until they’re firm enough to hold but soft enough to grate. The flavor is just as good.
Why did my cake sink in the middle?
This usually happens if the oven door was opened too early, or if the cake wasn’t baked through. Make sure to check the cake with a toothpick before removing it from the oven. Also, ensure your leavening agents are fresh.
Can I double the recipe?
Yes, you can double the recipe, but you’ll need two loaf pans. Bake them at the same time, but you may need to rotate the pans halfway through for even baking. Keep an eye on the timing, as it might take a few minutes longer.
Can I use Greek yogurt instead of buttermilk?
Yes, Greek yogurt works well. Thin it out with a little milk to make it pourable, similar to buttermilk. It will add a similar tang and tenderness to the cake.
How do I know when the cake is done?
Use the toothpick test. Insert a toothpick into the center of the cake. If it comes out clean or with a few moist crumbs, it’s done. The top should also be golden brown and spring back when lightly pressed.
Can I make this ahead of time?
Absolutely. This cake tastes even better the next day. Bake it the night before, let it cool completely, and store it in an airtight container. It will stay moist and flavorful for up to three days.
Pin This Recipe!


Lemon Cream Cheese Pound Cake: Easy & Perfect
- Total Time: 1 hour 10 minutes
- Yield: 12 servings 1x
Description
A moist, tangy, and tender pound cake with a marbled cream cheese and lemon swirl. This beginner-friendly recipe requires no fancy equipment and stays fresh for days.
Ingredients
- 1 cup (226g) unsalted butter, softened to room temperature
- 8 oz (225g) full-fat brick cream cheese, softened to room temperature
- 1 ½ cups (300g) granulated sugar
- 4 large eggs, room temperature
- 2 ½ cups (315g) all-purpose flour, sifted
- 1 cup (240ml) buttermilk, room temperature
- 3 medium fresh lemons (zest and juice)
- 1 teaspoon vanilla extract
- 1 teaspoon baking powder
- ½ teaspoon baking soda
- ½ teaspoon salt
- Optional Glaze: 1 cup powdered sugar + 1-2 tablespoons lemon juice
Instructions
- Preheat oven to 325°F (165°C). Grease a 9×5 inch loaf pan and line with parchment paper, leaving an overhang on the long sides.
- In a large bowl, beat the softened butter and cream cheese together on medium-high speed until smooth and fluffy (3-4 minutes). Scrape down the sides.
- Gradually add the granulated sugar while beating. Add eggs one at a time, beating well after each addition. Mix in vanilla extract and lemon zest until combined.
- In a separate medium bowl, whisk together flour, baking powder, baking soda, and salt.
- Reduce mixer speed to low. Add dry ingredients in three parts, alternating with buttermilk in two parts, starting and ending with dry ingredients. Mix just until flour disappears; do not overmix.
- Divide batter evenly between two bowls. Add 2 tablespoons of lemon juice to one half and mix gently. Spoon plain and lemon batters into the prepared pan alternately. Swirl gently with a knife or skewer to create a marble effect.
- Bake for 50-60 minutes. If the top browns too quickly after 30 minutes, tent loosely with aluminum foil. The cake is done when a toothpick inserted into the center comes out clean or with moist crumbs.
- Let the cake cool in the pan for 10 minutes, then lift out using the parchment overhang and transfer to a wire rack to cool completely before slicing.
Notes
Ensure all ingredients are at room temperature for best results. Do not overmix the batter once flour is added to avoid a tough cake. For a gluten-free version, use a 1:1 gluten-free flour blend. For dairy-free, use vegan butter and coconut/soy cream cheese. The cake improves in flavor after sitting for a day.
- Prep Time: 10 minutes
- Cook Time: 50-60 minutes
- Category: Dessert
- Cuisine: American
Nutrition
- Serving Size: 1 slice
- Calories: 380
- Sugar: 28
- Sodium: 250
- Fat: 20
- Saturated Fat: 12
- Carbohydrates: 45
- Fiber: 1
- Protein: 5
Keywords: lemon pound cake, cream cheese pound cake, moist pound cake, easy baking, lemon dessert, marbled cake, make-ahead dessert



