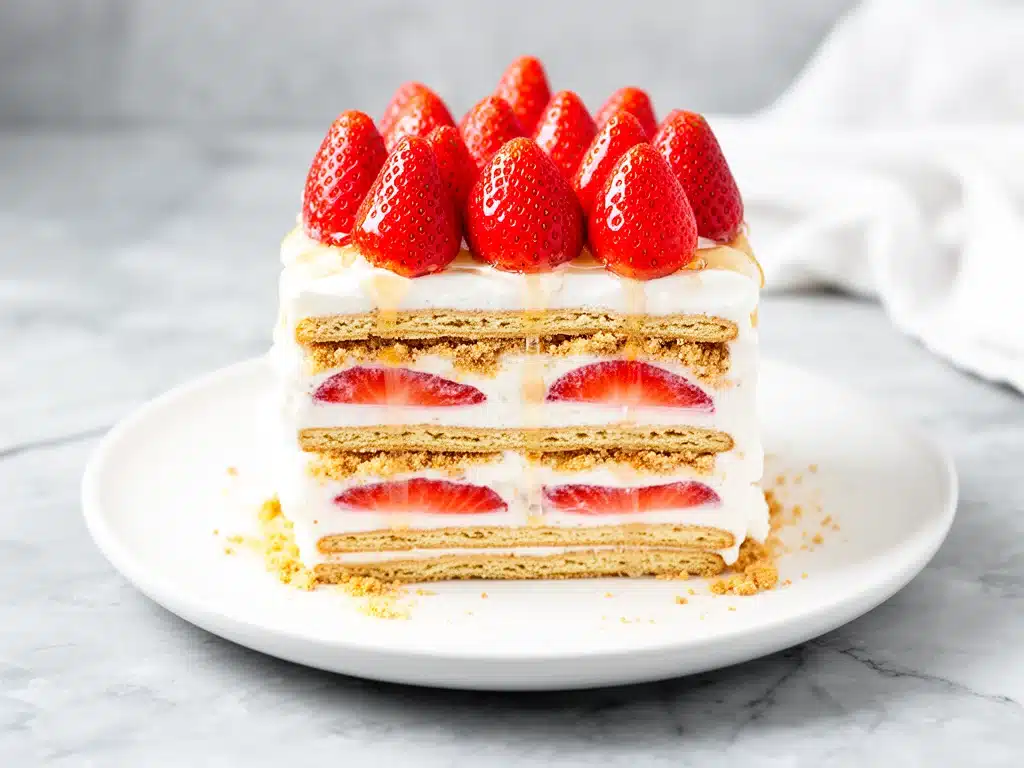
Last year, I was standing in my kitchen at 6 PM on Labor Day, staring at the clock with genuine panic. The grill was already smoking outside, my husband was unpacking the car, and I had absolutely nothing for dessert. I had bought a pie crust earlier that day, but it sat in the fridge mocking me because I was too exhausted to actually roll it out. Then I remembered a recipe my college roommate used to make—a “lazy lady cake” that required zero baking, zero fancy equipment, and zero stress. I threw together a version with strawberries, and it turned out to be the highlight of the entire holiday. That was five years ago. Now, it’s the only dessert I make for summer gatherings.
This Labor Day no-bake strawberry icebox cake isn’t just a dessert; it’s a survival strategy for busy hosts. It’s that rare dish that looks like you spent hours in the kitchen, but honestly? It takes less time than it takes to drive to a grocery store. The layers of soft cookies, sweet cream, and juicy strawberries create a texture that is unlike any other dessert you’ll eat all summer. It’s light enough for a hot day but rich enough to feel like a treat. I’ve served this to picky eaters, food snobs, and my own mom (who still thinks I bought it from a fancy bakery), and every single person asks for the recipe.
There’s something magical about how the cookies transform. When they sit in the refrigerator overnight, they absorb the moisture from the cream and the fruit, turning into something that tastes almost like a tiramisu but sweeter, brighter, and infinitely easier. You don’t need a mixer. You don’t need an oven. You just need patience and about five ingredients. If you’re looking for a way to end your long weekend on a high note without spending your evening standing over a stove, this is it. It’s my go-to when I want to impress guests but keep my sanity intact.
Why You’ll Love This No-Bake Strawberry Icebox Cake
I’ve made this cake for more summer parties than I can count, and it never fails to get compliments. Here’s why it has earned a permanent spot in my rotation, especially for holidays like Labor Day when you’re juggling grilling, socializing, and just trying to relax.
Zero Baking Required
This is the biggest selling point. Your oven stays cool, which keeps your house from turning into a sauna on a hot July or August day. I love that I can assemble this while the main course is cooking outside. It keeps me in the kitchen for ten minutes, then lets me go enjoy the party. No preheating, no watching, no burning.
It Actually Tastes Better the Next Day
Most desserts are best fresh out of the oven. Not this one. The magic happens during the chill time. The cookies soften, the flavors meld, and the cream sets into a luscious, mousse-like texture. I usually make this the night before a party so I can wake up, grab a slice, and feel like a genius. It’s the ultimate make-ahead dessert.
Only Five Ingredients
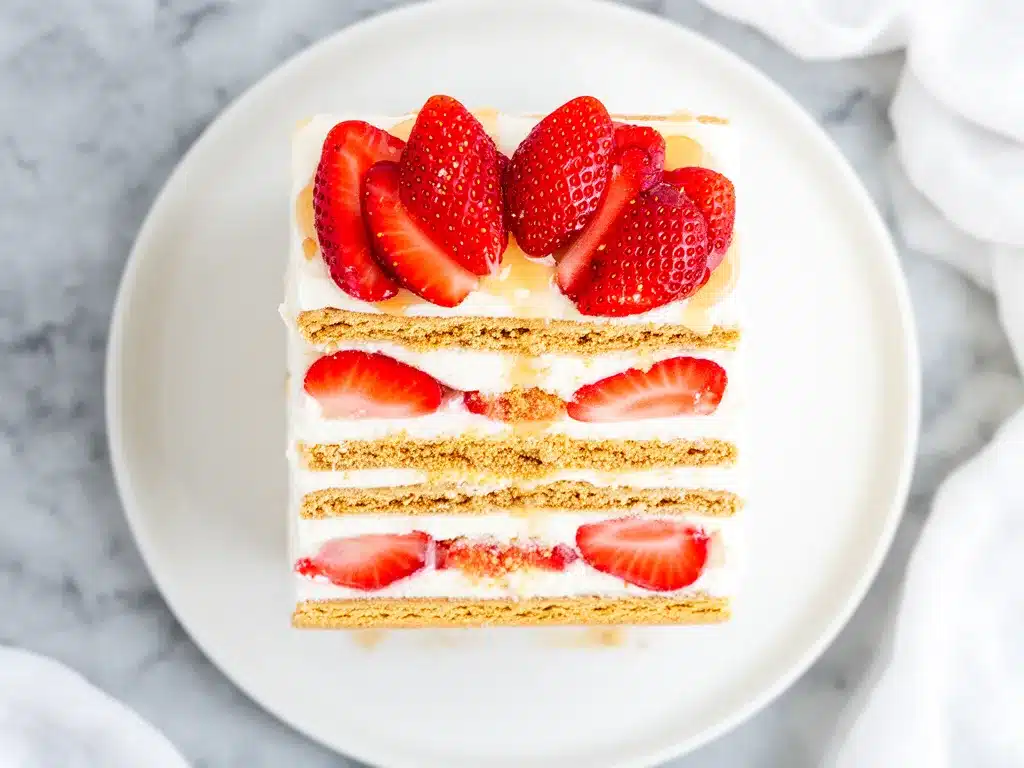
I’m not exaggerating. You need whipped cream, strawberries, vanilla pudding mix, vanilla wafers (or similar cookies), and maybe a little extra sugar if your berries are tart. That’s it. You don’t need fancy chocolate shavings or exotic fruits. This relies on simple, pantry-friendly ingredients that come together to taste incredibly sophisticated.
Gluten-Free Friendly Option
One of my friends has celiac disease, and I used to dread making desserts for her because I didn’t want her to get sick. With this recipe, I just swap the vanilla wafers for gluten-free vanilla wafers or gluten-free ladyfingers. The rest of the recipe stays the same. It’s inclusive without feeling like an afterthought. My friend actually prefers this version because the texture is so tender it melts in her mouth.
Visually Stunning
Because you build it in layers, it looks like something from a patisserie. The bright red strawberries peeking through the creamy white layers are gorgeous. It’s very photogenic, which is nice if you’re sharing it on social media or just want to feel proud of your spread. It pairs beautifully with a simple side like my Labor Day bacon cheddar ranch pasta salad for a complete, easy holiday meal.
Ingredients You’ll Need
The beauty of this cake is that you don’t need a specialty grocery store. Most of this is stuff you probably have in your fridge or pantry right now. Here’s what you need to make it, and a few tips on how to choose the best stuff.
The Cookie Base
Vanilla Wafers (about 50-60 cookies) — This is the classic choice. Nabisco brand is the standard, but any vanilla wafer or even vanilla sandwich cookies (cream filling removed) will work. If you want a slightly more buttery taste, you can use shortbread cookies, but they might be a bit too rich. Avoid chocolate chip cookies; the flavor clash is weird. You need that clean vanilla flavor to balance the strawberries.
The Creamy Layer
Heavy Whipping Cream (2 cups / 480ml) — This is non-negotiable. You need the fat content to whip it up properly. If you use half-and-half, it won’t hold its shape. Make sure your cream is cold—straight from the fridge. If your kitchen is hot, chill your mixing bowl in the freezer for 15 minutes first. I’ve tried room temp cream, and it’s a disaster. Don’t do it.
Instant Vanilla Pudding Mix (2 boxes / 5.1 oz each) — Yes, dry mix. This is the secret ingredient. The pudding mix thickens the cream and adds that classic vanilla ice cream flavor. You don’t cook it; you just whip it into the cream. It’s weird at first, but it works perfectly. Look for the “instant” variety, not the “cook and serve.”
Granulated Sugar (2-3 tablespoons) — Depending on how sweet your pudding mix and cookies are, you might want to add a little extra sugar. Taste your whipped cream before you assemble. If it’s not sweet enough, add a tablespoon and whip again. I usually go with 2 tablespoons, but I have a sweet tooth.
The Fruit
Fresh Strawberries (1.5 pounds / 680g) — Use the ripest strawberries you can find. If they’re in season, perfect. If not, buy the best you can find at the store and avoid the mushy ones. You’ll be slicing them, so appearance matters. I like to reserve the prettiest ones for the top layer decoration.
Optional: Powdered Sugar (1 tablespoon) — A light dusting on top adds a pretty, snowy look. It’s not necessary, but it makes the cake feel more finished.
Equipment Needed
You don’t need much for this, which is part of the appeal. Here’s what I use:
9×13 Inch Glass Baking Dish — I prefer glass because you can see the layers, and it chills evenly. Pyrex is great. You could use a ceramic dish, but glass is easier to clean. Make sure it’s deep enough to hold three layers of cookies and cream.
Hand Mixer or Stand Mixer — A hand mixer is totally fine for this. I use my hand mixer because it’s faster to pull out for a small batch. A stand mixer works too, but you have to wash the big bowl. Whisk by hand is possible but takes arm strength. I recommend a mixer.
Sharp Chef’s Knife — For slicing the strawberries evenly. A dull knife will crush the berries and make a mess. I learned this the hard way with a sad, bruised strawberry situation.
Measuring Cups and Spoons — Standard stuff. Just make sure you measure the pudding mix correctly.
Spatula — A rubber spatula is best for folding the cream and scraping the bowl clean. Don’t use a wooden spoon; it won’t get all the cream out.
How to Make It: Step-by-Step
Alright, let’s build this cake. It’s super simple, but there are a few tricks to make sure the layers stay distinct and the texture is perfect. I’m walking you through exactly how I do it.
Step 1: Prep Your Strawberries
Wash and hull your strawberries. Slice them thinly—about 1/4 inch thick. If you slice them too thick, the layers won’t stack well. If you slice them too thin, they’ll disappear into the cream. Aim for uniform slices so the cake looks neat. Set them aside on a plate.
Step 2: Whip the Cream
In a large mixing bowl, pour the cold heavy whipping cream. Add the instant vanilla pudding mix and the granulated sugar. Start mixing on low speed to incorporate the powder, then increase to medium-high speed. Whip for about 2-3 minutes until you have stiff peaks. This means when you lift the beater, the cream stands up straight. Do not over-whip, or it might turn into butter. Watch it closely.
Step 3: Build the First Layer
Take your 9×13 dish. Break the vanilla wafers in half if needed to make a single layer that fits the bottom of the dish. You want them slightly overlapping so there are no gaps. Pour about 1/3 of the whipped cream mixture over the cookies. Use a spatula to spread it evenly, getting into the corners. Then, arrange a layer of strawberry slices on top of the cream. Try to cover the cream completely for a pretty look.
Step 4: Build the Second Layer
Add another layer of vanilla wafers on top of the strawberries. Again, break them to fit. Spread another 1/3 of the cream over the cookies. Add another layer of strawberries. This middle layer is where the magic happens—the cookies soften and absorb the strawberry juices.
Step 5: Build the Top Layer
Add the final layer of cookies. Spread the remaining cream over the top. This is your canvas. Smooth it out as nicely as you can. Now, arrange the remaining strawberries on top. You can lay them flat or stand them up for height. I like to fan them out slightly. If you have extra cream, you can pipe little rosettes on top, but it’s not required.
Step 6: Chill
Cover the dish tightly with plastic wrap. Put it in the refrigerator for at least 4 hours, but overnight is best. This is the hard part—waiting. But trust me, the texture difference between 2 hours and 12 hours is huge. The cookies need time to turn soft and cake-like.
Step 7: Serve
Before serving, you can dust with powdered sugar if you want. Slice with a sharp knife. Clean the blade between cuts for neat slices. Serve cold. It’s best with a fork because it’s tender.
Expert Tips & Tricks
Here’s everything I’ve learned from making this dozens of times. These tips will save you from my mistakes.
Use the Right Cookies
Don’t use chocolate chip cookies or oatmeal raisin. The flavor needs to be neutral vanilla so it doesn’t clash with the strawberries. If you can’t find vanilla wafers, vanilla sandwich cookies (like Oreos but with white filling) work, but remove the filling. Ladyfingers are another option, but they absorb liquid faster, so your cake might get soggy quicker. Vanilla wafers are the sweet spot.
Don’t Skip the Pudding Mix
I know it seems weird to put dry pudding mix into whipped cream. But it acts as a stabilizer. It helps the cream hold its shape in the heat and adds that distinct vanilla pudding flavor that makes this cake taste like dessert, not just whipped cream. If you’re out of pudding mix, you can use instant vanilla custard powder, but the texture might be slightly different.
Strawberry Selection Matters
If your strawberries are bland, the whole cake will be bland. Taste a berry before you slice. If it’s not sweet, add a little sugar to the sliced berries and let them sit for 10 minutes to draw out the juices. Those juices are great for drizzling on top.
Keep it Cold
This cake is not a room-temperature dessert. Keep it in the fridge until the last minute. If you leave it out for more than an hour, the cream will start to soften and the structure might slump. If you’re serving it outside, bring a cooler or keep it in the shade.
Make it Ahead
This cake is better the next day. In fact, I recommend making it the night before. It gives the flavors time to meld and makes your life easier. You can make it up to 2 days ahead, but after that, the cookies might get too soft. I usually make it Saturday night for a Sunday party.
Variations & Substitutions
Once you’ve nailed the basic version, here’s how you can mix it up. I’ve tried all of these.
Chocolate Chip Cookie Version
Use chocolate chip cookies instead of vanilla wafers. Add a layer of chocolate chips between the cream layers. This is like a deconstructed chocolate chip cookie pie. It’s rich and decadent. My kids love this version.
Peanut Butter Cup Icebox Cake
Use chocolate wafers or Oreos. Mix peanut butter into the whipped cream. Add chopped peanut butter cups between layers. This is indulgent and great for fall or winter.
Raspberry Lemonade Cake
Swap strawberries for raspberries. Add lemon zest to the whipped cream. Use lemonade instead of water if you’re making the pudding (if the recipe calls for it). This is bright and tart, perfect for spring.
Gluten-Free
Use gluten-free vanilla wafers. Most major brands make them now. The rest of the recipe is naturally gluten-free (check your pudding mix label to be sure). This version is just as good.
Dairy-Free
Use coconut cream instead of heavy cream. Chill a can of full-fat coconut milk overnight, scoop out the solid part, and whip it. Use dairy-free cookies and dairy-free pudding mix. It’s different but still tasty. My lactose-intolerant friend loves this version.
Serving & Storage
How to Serve
I usually serve this straight from the dish. It looks rustic and homey. But here are other ways I’ve enjoyed it:
- With Fresh Berries — Add a few extra fresh berries on top of each slice for color.
- With Chocolate Sauce — Drizzle warm chocolate sauce over the top before serving.
- With Whipped Cream — Add a dollop of extra whipped cream on each plate.
Storage Instructions
Refrigerator: Store in the refrigerator for up to 3 days. Cover tightly with plastic wrap or foil. The cream will firm up in the fridge, so let it sit out for 10 minutes before serving if you want it softer.
Freezing: This doesn’t freeze well. The cookies will become mushy when thawed, and the cream might separate. I don’t recommend freezing this cake. Make it fresh or store in the fridge.
Leftovers: If you have leftovers, they’re best eaten within 2 days. The cookies continue to absorb moisture, so the texture changes. I usually eat it all within a day because it’s that good.
Nutrition Information
I’m not a nutritionist, but here’s the breakdown if you’re tracking. This is a rich dessert, so portion control is key.
Per Serving (based on 12 servings):
- Calories: 280
- Protein: 3g
- Carbs: 32g
- Fiber: 1g
- Sugar: 18g
- Fat: 16g
- Saturated Fat: 10g
- Cholesterol: 45mg
- Sodium: 120mg
What’s Good: It’s a relatively light dessert compared to heavy cakes or pies. The strawberries add some vitamin C and fiber. It’s not a health food, but it’s not overly heavy.
What to Know: Higher in sugar and fat from the cream and cookies. Contains dairy and gluten. Moderate sodium.
My Take: Look, this is a treat. Enjoy it. Don’t stress the calories. It’s better than store-bought cake, and you know exactly what’s in it. When I want to make it lighter, I use less sugar and more berries. But usually? I just eat a slice and enjoy it.
Final Thoughts
So that’s my go-to Labor Day no-bake strawberry icebox cake! I’ve probably talked your ear off at this point, but when you make a recipe this often, you have a lot to say about it. This has saved summer dinners more times than I can count. It’s my answer to “what’s for dessert” when I’m tired, don’t want takeout, and still want something that tastes really good. My kids are happy, my husband’s happy, and I’m happy because I’m not stressed about cooking.
Make it yours! Try different berries, swap the cookies, adjust the sweetness. The best recipes are the ones you adapt to your family’s tastes. If you make this, drop a comment and let me know what you think! I love hearing how recipes turn out in your kitchen. And if something doesn’t work, tell me that too—I’m here to help troubleshoot.
Happy cooking! And I hope your kitchen smells half as good as mine does right now. This cake is the perfect way to celebrate the end of summer with friends and family. It’s simple, it’s delicious, and it’s unforgettable.
Frequently Asked Questions
Can I use frozen strawberries?
You can, but thaw them first and drain the excess liquid. Frozen strawberries release a lot of water, which can make the cake soggy. If you use them fresh, pat them dry with a paper towel. I prefer fresh, but frozen works in a pinch.
Why did my cream not whip?
Usually, the cream wasn’t cold enough. Make sure your cream, bowl, and beaters are all very cold. If the kitchen is hot, chill everything first. Also, don’t over-whip. Once it forms stiff peaks, stop. If you keep whipping, it will turn into butter.
Can I make this in a different dish?
Yes! You can make it in a 9×9 square dish, but the layers will be thicker. You’ll need fewer cookies and less cream. Adjust the recipe accordingly. A trifle bowl is also cute for individual portions.
How long does this cake last?
It lasts up to 3 days in the fridge. After that, the cookies get too soft. I don’t recommend freezing it. Make it fresh or store in the fridge.
Can I use a different pudding flavor?
You can try chocolate or butterscotch pudding mix, but the flavor profile will change. Chocolate pudding with strawberries is okay, but vanilla is the classic combo. I stick with vanilla.
Do I need to chill the dish before assembling?
It helps, but it’s not required. Chilling the dish helps the cream set faster. If you’re in a hurry, chill the dish for 15 minutes before starting.
Can I add alcohol to this cake?
Yes! A splash of Kahlua or amaretto in the cream adds a nice adult touch. Just don’t add too much, or it will thin out the cream. I usually add 1 tablespoon per cup of cream.
Pin This Recipe!
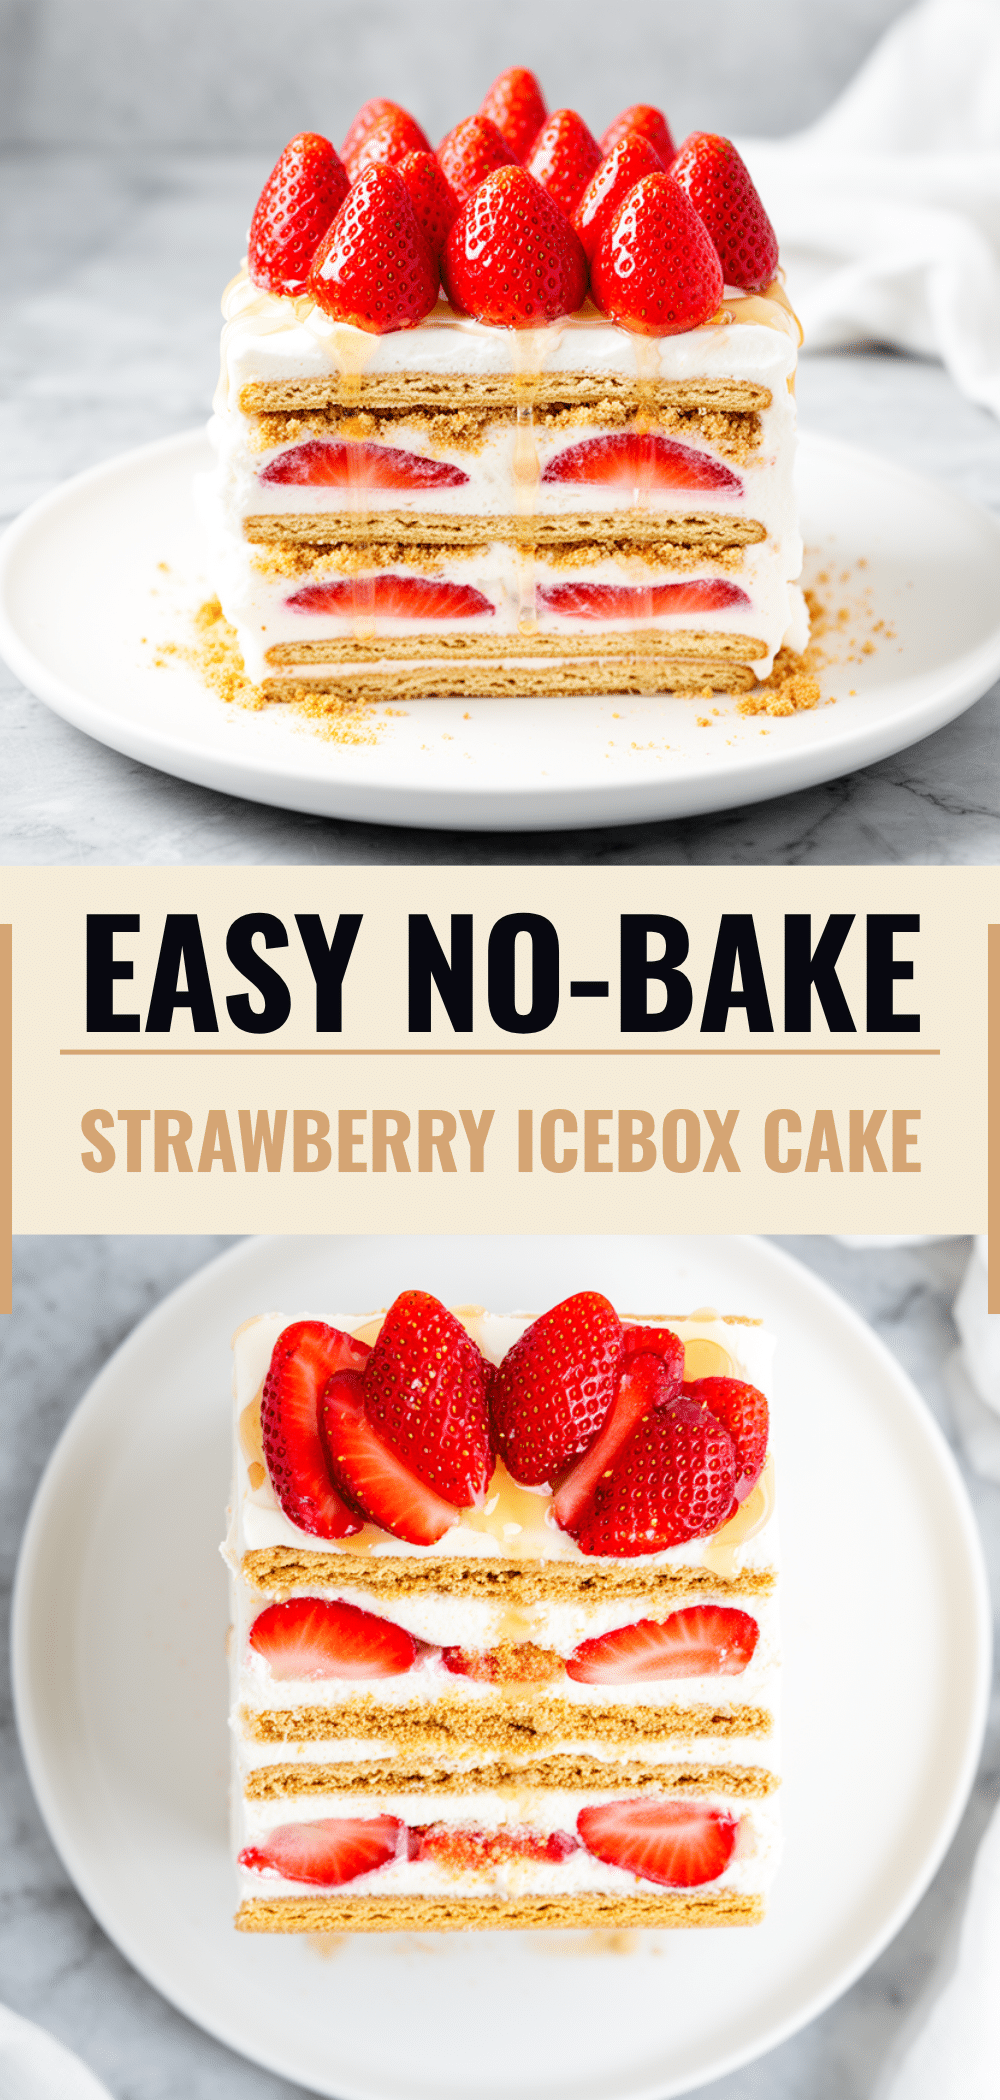
Labor Day No-Bake Strawberry Icebox Cake: 5-Ingredient Summer Dessert
- Total Time: 4 hours 15 minutes
- Yield: 12 servings 1x
Description
A stress-free, no-bake summer dessert featuring layers of vanilla wafers, whipped cream, instant vanilla pudding, and fresh strawberries. This make-ahead cake is perfect for holidays and requires only five ingredients.
Ingredients
- 50–60 vanilla wafers (or similar vanilla cookies)
- 2 cups (480ml) heavy whipping cream, cold
- 2 boxes (5.1 oz each) instant vanilla pudding mix
- 2–3 tablespoons granulated sugar (optional, to taste)
- 1.5 pounds (680g) fresh strawberries, sliced
- 1 tablespoon powdered sugar (optional, for dusting)
Instructions
- Wash, hull, and thinly slice the strawberries (about 1/4 inch thick). Set aside.
- In a large mixing bowl, combine the cold heavy whipping cream, instant vanilla pudding mix, and granulated sugar.
- Whip the mixture on low speed to incorporate the powder, then increase to medium-high speed for 2-3 minutes until stiff peaks form. Do not over-whip.
- Break vanilla wafers to fit the bottom of a 9×13 inch glass baking dish, creating a single layer with slight overlaps.
- Spread 1/3 of the whipped cream mixture over the cookies, then arrange a layer of sliced strawberries on top.
- Add a second layer of vanilla wafers, followed by another 1/3 of the cream and another layer of strawberries.
- Add the final layer of cookies and spread the remaining cream over the top.
- Arrange the remaining strawberries on top of the cream layer for decoration.
- Cover the dish tightly with plastic wrap and refrigerate for at least 4 hours, preferably overnight.
- Before serving, dust with powdered sugar if desired. Slice with a sharp knife and serve cold.
Notes
Ensure the cream is very cold for proper whipping. The cake tastes better the next day as the cookies soften and flavors meld. Do not freeze, as the texture will become mushy. For a gluten-free version, use gluten-free vanilla wafers.
- Prep Time: 15 minutes
- Cook Time: 0 minutes
- Category: Dessert
- Cuisine: American
Nutrition
- Serving Size: 1 slice
- Calories: 280
- Sugar: 18
- Sodium: 120
- Fat: 16
- Saturated Fat: 10
- Carbohydrates: 32
- Fiber: 1
- Protein: 3
Keywords: no-bake dessert, strawberry icebox cake, summer dessert, labor day recipe, easy dessert, make-ahead dessert, 5-ingredient dessert



