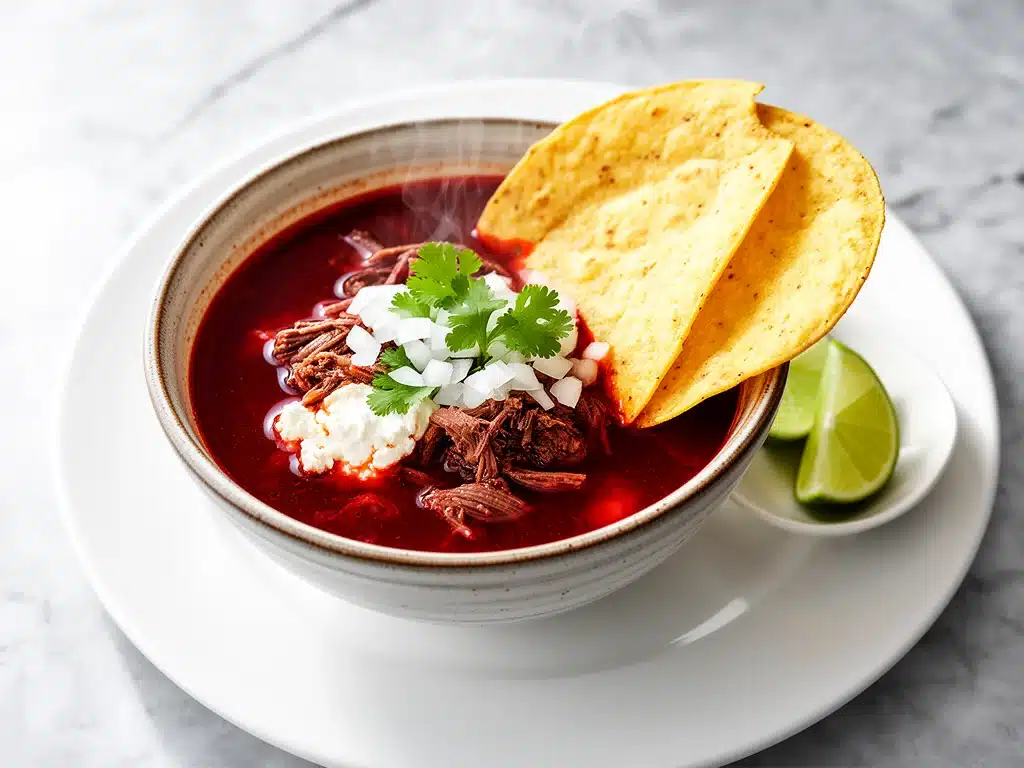
I’ll be honest with you. For years, I thought birria tacos were just a trendy Instagram trend. You know the ones—those hyper-saturated, cheese-pulled, red-dripping photos that made me roll my eyes every time they popped up in my feed. I’d scroll past, thinking, “It’s just a taco. How hard can it be?”
Then I went to a small family-run taqueria in East LA last summer. The line was out the door. The air smelled like charred onions, dried chiles, and slow-cooked beef. I was skeptical. I ordered three tacos and a cup of consomme. One bite, and I was done with my opinions. The meat was falling apart tender. The cheese was crispy and golden. The broth was smoky, complex, and deeply savory. It wasn’t just food; it was an experience.
That night, I came home and tried to recreate it. Let’s just say the first attempt was… a disaster. The meat was tough. The broth was bland. The cheese didn’t melt right. I spent the next three months testing, burning, and tweaking until I finally nailed it. And let me tell you, once you make this homemade beef birria tacos with consomme recipe, you’ll never order takeout again.
This isn’t just about dipping a taco in soup. It’s about the ritual. It’s about the hours of slow cooking that fill your kitchen with the most incredible aroma. It’s about the crispy, cheesy edges of the tortilla and the rich, red broth that you sip from a small cup like a fancy consommé. It’s comfort food at its absolute finest.
I’ve made this recipe dozens of times now. I’ve made it for Super Bowl parties where people ask for the recipe before they even finish their first taco. I’ve made it for lazy Sunday dinners when I want something that feels special but doesn’t require a chef’s degree. And every single time, it works. It’s reliable, it’s delicious, and it’s easier than you think.
If you’ve been waiting for a reason to cook something bold, flavorful, and deeply satisfying, this is it. Grab your slow cooker (or your Instant Pot), and let’s make the best birria tacos you’ve ever had.
Why You’ll Love This Beef Birria Recipe
There’s a reason this recipe has taken over the internet. It’s not just hype. There are actual, tangible reasons why this homemade beef birria tacos with consomme recipe is worth your time and effort.
1. It’s a Flavor Bomb
Most tacos are one-dimensional. You get the meat, maybe some salsa, maybe some cheese. Birria is different. You get the smoky heat of guajillo and ancho chiles. You get the sweetness of the dried fruits in the broth. You get the richness of the beef fat. And then, when you dip it in the consomme, you get an extra layer of intense, savory goodness. It’s complex in a way that makes you close your eyes and sigh.
2. The Meat is Incredibly Tender
We’re using chuck roast or beef brisket here. These are tough cuts of meat that need time to break down. When you slow cook them properly, they become fork-tender. They don’t just fall apart; they melt in your mouth. I’ve tried making this with leaner cuts, and it just doesn’t work. You need that fat content for flavor and texture.
3. It’s Perfect for Crowds
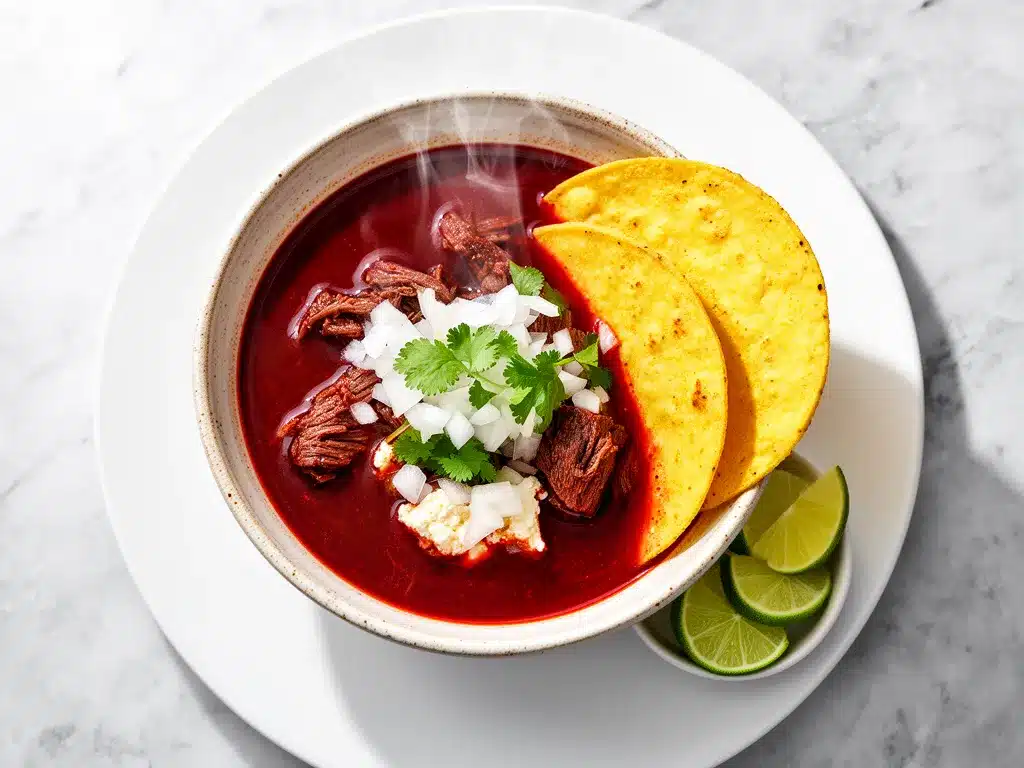
Hosting a dinner party? This is your secret weapon. You can prep the marinade the night before. The slow cooker does all the work while you’re out or relaxing. When guests arrive, you just assemble the tacos. It makes you look like a culinary genius, but really, you just let time do the heavy lifting. Plus, everyone loves a good dipping sauce, and the consomme serves double duty as both the cooking liquid and the dip.
4. It’s Customizable
Love spicy? Add more chipotle. Hate spice? Leave it out. Want more cheese? Go for it. Vegetarian? We’ll talk about that later. This recipe is a framework, not a rigid rulebook. It adapts to your taste buds.
5. Leftovers Are Better Than Fresh
Let’s be real. The meat gets even more flavorful the next day. The consomme thickens slightly and becomes richer. I deliberately make extra because I know I’ll be eating this for lunch the next few days. It reheats beautifully in the microwave or on the stove.
So basically, if you want dinner that impresses, satisfies, and tastes amazing, this is the one. It’s the kind of recipe that makes your family ask, “When are we making this again?”
Ingredients You’ll Need for Beef Birria Tacos
Here’s the thing about birria: the magic is in the sauce. The marinade, or adobo, is what gives the meat its signature red color and deep flavor. You don’t need fancy, hard-to-find ingredients, but you do need the right balance.
For the Meat and Broth
Beef Chuck Roast (4-5 lbs / 1.8-2.2 kg) — This is my go-to cut. It has enough marbling to stay juicy during the long cook. Beef brisket works too, but chuck is more forgiving if you’re a beginner. Look for good marbling—those white streaks of fat are flavor.
Beef Broth (4 cups / 960ml) — Use low-sodium broth so you can control the saltiness. Homemade is best, but a good quality store-bought carton works fine. Avoid the ones with added sugars or weird flavors.
Garlic (8 cloves / about 4 tablespoons) — Yes, eight cloves. Birria is garlicky, and that’s a good thing. Fresh cloves only. If you’re feeling lazy, you can buy pre-peeled cloves, but mincing fresh is better.
White Onion (1 large / about 300g) — Chopped roughly. We’re not eating this whole; we’re infusing the broth with its sweetness. Yellow onion works, but white is more traditional.
Bay Leaves (3-4 leaves) — These add a subtle herbal note that rounds out the broth. Don’t skip them. Remove them before serving, obviously.
Whole Allspice Berries (1 teaspoon) — This is the secret ingredient. It adds a warm, slightly sweet spice that’s quintessential to authentic birria. You can find it in the spice aisle. If you don’t have it, you can substitute with a mix of cloves and cinnamon, but allspice is ideal.
Black Peppercorns (1 teaspoon) — Adds a gentle heat and depth. Crush them slightly before adding.
For the Adobo (Chile Sauce)
Dried Guajillo Chiles (6-8 pieces / about 30g) — These are the backbone of the red color and mild sweetness. They have a fruity, slightly tart flavor. Remove the stems and seeds before rehydrating.
Dried Ancho Chiles (4-6 pieces / about 20g) — These are dried poblano peppers. They add depth, sweetness, and a mild heat. They’re darker and richer than guajillos. Together, they create the perfect balance.
Dried Chipotle Chiles (2-3 pieces) — These are smoked jalapeños. They add the heat and that smoky flavor that makes birria taste like it was cooked over an open fire. Adjust based on your spice tolerance.
Apple Cider Vinegar (1/4 cup / 60ml) — Adds brightness and cuts through the richness of the meat. It also helps tenderize the beef slightly.
Dried Oregano (2 teaspoons) — Mexican oregano is best if you can find it (it’s more citrusy and intense), but regular dried oregano works fine.
Cumin (1 teaspoon) — Adds earthiness. Don’t overdo it; you want the chiles to shine.
Cinnamon Stick (1 small stick) — Just like the allspice, this adds warmth. It’s subtle but important.
Black Tea Bags (2 bags) — This is a trick I learned from a professional chef. The tannins in the tea add a slight bitterness and complexity that mimics the depth of long-simmered bones. It sounds weird, but it works. Use Earl Grey or black tea.
For the Tacos
Flour Tortillas (12-16 small / 6-inch) — Flour tortillas are traditional for birria tacos because they crisp up beautifully in the butter. Corn tortillas can work, but they’re more likely to tear when you dip them. Look for fresh, soft flour tortillas.
Shredded Mexican Cheese Blend (2 cups / 200g) — Oaxaca cheese or Monterey Jack are best. They melt smoothly and have a mild flavor that doesn’t overpower the meat. Avoid pre-shredded cheese if possible; the anti-caking agents prevent proper melting.
Unsalted Butter (4 tablespoons / 60g) — For frying the tacos. Butter gives them that golden, crispy, rich finish. Olive oil works, but butter is superior here.
Fresh Cilantro (1/2 cup, chopped) — For garnish. Adds freshness and color.
White Onion (1/2 cup, finely diced) — For garnish. Adds crunch and sharpness.
Lime Wedges (4-6 limes) — Essential for squeezing over the tacos. The acid brightens up the heavy, rich flavors.
Equipment Needed
You don’t need a lot of fancy gear for this. Here’s what I actually use in my kitchen.
Slow Cooker (6-quart minimum) — This is the easiest method. I use a Crock-Pot, but any slow cooker works. If you’re using an Instant Pot, that’s fine too (we’ll adjust the time).
Blender — You need a high-powered blender to puree the rehydrated chiles into a smooth sauce. A regular blender works if you do it in batches. Don’t skip the blending step; lumpy sauce means uneven flavor.
Large Pot — For rehydrating the dried chiles. A simple saucepan works.
Skillet — A large cast-iron skillet or non-stick pan for frying the assembled tacos. I love cast iron because it gets super hot and creates the best crust.
Slotted Spoon — For removing the meat from the broth.
Tongs — For handling the tortillas and meat.
Strainer — Optional, but helpful for removing the bay leaves, allspice, and tea bags from the broth before serving.
How to Make It: Step-by-Step
Alright, let’s make this! I’m walking you through exactly how I do it, including the little tricks I’ve picked up along the way. This might seem like a lot of steps, but it’s mostly waiting time. The active work is minimal.
Step 1: Prepare the Dried Chiles (10 minutes)
Start by removing the stems and seeds from the guajillo, ancho, and chipotle chiles. Seeds add bitterness and heat, and we want flavor, not just spice. Place the chiles in a large pot and cover them with hot water. Let them soak for 15-20 minutes until they’re soft and pliable. This rehydrates them and makes them easy to blend. If they’re dry, they’ll stay dry in the blender, and you’ll get a gritty sauce.
Step 2: Make the Adobo Sauce (5 minutes)
Drain the chiles (reserve a little of the soaking liquid if your blender is struggling). Add the chiles to your blender along with the garlic, apple cider vinegar, oregano, cumin, cinnamon stick, black tea bags, and half of the chopped onion. Blend on high until completely smooth. You want a silky, uniform sauce. If it’s too thick, add a splash of the reserved chile water or some of the beef broth. Pour the sauce into a bowl and set aside.
Step 3: Prep the Beef (5 minutes)
Cut the beef chuck roast into 3-4 large chunks. You don’t need to dice it small; it will shred later. Season the meat generously with salt and pepper. If you have time, sear the meat in a hot skillet with a little oil for 2-3 minutes per side. This adds a nice browned flavor (the Maillard reaction), but it’s optional. I often skip this when I’m tired, and it still turns out great.
Step 4: Combine in the Slow Cooker (2 minutes)
Place the beef chunks in the slow cooker. Pour the adobo sauce over the meat. Add the remaining chopped onion, bay leaves, allspice, peppercorns, and beef broth. Make sure the meat is mostly submerged in the liquid. If it’s not, add a little more broth. The meat needs to simmer in the flavorful liquid, not just sit on top of it.
Step 5: Slow Cook (8-10 hours)
Cover the slow cooker and cook on LOW for 8-10 hours or HIGH for 4-5 hours. The meat is done when it’s fork-tender and pulls apart easily. If you poke it with a fork and it meets no resistance, you’re good. If it’s still tough, give it another hour. Don’t rush this step.
Step 6: Shred the Meat and Strain the Broth (15 minutes)
Once the meat is cooked, use tongs to transfer it to a large bowl. Discard the bay leaves, cinnamon stick, allspice, peppercorns, and tea bags from the pot. If you want a clear consomme, strain the broth through a fine-mesh sieve. Otherwise, you can leave it as is. Use two forks to shred the beef into bite-sized pieces. Discard any large pieces of fat if you prefer leaner meat, but I like leaving some for flavor.
Step 7: Assemble the Tacos (10 minutes)
Heat a skillet over medium heat with a tablespoon of butter. Take a flour tortilla, place a layer of shredded beef on one half, and sprinkle with shredded cheese. Fold the tortilla over the filling. Place it in the hot skillet. Cook for 2-3 minutes per side until the tortilla is golden brown and crispy, and the cheese is melted. You’re essentially making a grilled cheese taco. Repeat with the remaining tortillas, adding butter as needed.
Step 8: Serve with Consomme
Warm the consomme in a saucepan. Ladle it into small cups. Serve the crispy tacos on a platter with diced onion, cilantro, and lime wedges on the side. The traditional way to eat birria tacos is to take a bite of the taco, then dip it into the consomme. Or, pour some consomme over the taco. Do what feels right.
Total Time: About 1 hour active, 8-10 hours cooking (mostly hands-off)
Expert Tips & Tricks
Here’s everything I’ve learned from making this dozens of times. These tips will save you from my mistakes.
Don’t Skip the Searing (If You Have Time)
I mentioned searing the meat earlier. It’s not mandatory, but it adds a layer of flavor that slow cooking alone doesn’t achieve. The browned bits on the meat caramelize in the broth, adding depth. If you’re short on time, skip it, but if you have 10 minutes, do it.
Blend the Sauce Until It’s Silky
I can’t stress this enough. Lumpy chile sauce means uneven flavor. If your blender isn’t powerful enough, blend in batches. If the sauce is too thick, add broth. You want a smooth, pourable consistency.
Save the Consomme
This broth is liquid gold. Don’t throw it out. Use it as a base for soups, rice, or even as a dipping sauce for other foods. It’s packed with flavor. I freeze it in ice cube trays for quick flavor boosts later.
Use the Right Cheese
Oaxaca cheese is the traditional choice because it melts beautifully. If you can’t find it, Monterey Jack or a Mexican blend works. Avoid cheddar; it can be too sharp and greasy. You want mild, creamy melt.
Crispy Tortillas Are Key
Don’t be shy with the butter. The butter fries the tortilla, creating that crispy, golden crust that contrasts with the soft, tender meat. If you use too little butter, the tortilla will just get soggy. If you use too much, it’s greasy. Find the balance.
Adjust the Spice
Chipotle chiles vary in heat. If you’re sensitive to spice, use only 1 chipotle. If you love heat, use 3 or add a dash of cayenne. Taste the adobo sauce before adding it to the slow cooker. Adjust it to your liking.
Make-Ahead Strategy
You can make the adobo sauce up to 3 days ahead and store it in the fridge. You can also cook the meat and store it in the broth for up to 4 days. Reheat gently before assembling. This makes weeknight dinners so much easier.
Variations & Substitutions
Once you’ve nailed the basic version, here’s how you can mix it up. I’ve tried all of these.
Chicken Birria
Use boneless, skinless chicken thighs instead of beef. Cook on HIGH for 4-5 hours. Chicken cooks faster, so keep an eye on it. The flavor profile is the same, but the texture is lighter.
Pork Birria
Use pork shoulder (butt) instead of beef. It’s incredibly tender and fatty. Cook on LOW for 8-10 hours. Pork pairs beautifully with the chile sauce.
Vegetarian Birria
Use portobello mushrooms or jackfruit as the base. Portobellos have a meaty texture and absorb the sauce well. Jackfruit has a shreddable texture. Cook them in the adobo sauce for 30 minutes on the stove. It’s not the same as meat, but it’s delicious and satisfying.
Instant Pot Method
Follow the same steps, but cook on HIGH pressure for 45 minutes, then natural release for 15 minutes. Shred and serve. It’s faster, but the meat might not be as tender as slow-cooked.
Stovetop Method
Braise the meat in a large Dutch oven on low heat for 3-4 hours. Stir occasionally. This works if you don’t have a slow cooker, but you need to watch it closely.
Gluten-Free Option
Use corn tortillas instead of flour. They’re naturally gluten-free. Just be careful when dipping; corn tortillas are more fragile. Double-layer them if needed.
Dairy-Free Option
Use dairy-free cheese alternatives. They don’t melt as well, but they work. Or skip the cheese and add avocado slices instead.
Serving & Storage
How to Serve:
I usually serve this straight from the skillet at the dinner table—it looks rustic and stays warm. But here are other ways I’ve enjoyed it:
Side Dishes:
– Mexican rice (the consomme makes great rice cooking liquid)
– Refried beans
– Simple green salad with lime vinaigrette
– Elote (Mexican street corn) for a fun contrast
Toppings Bar:
When I have guests, I put out: extra consomme, diced onion, cilantro, lime wedges, sliced radishes, and hot sauce. Everyone customizes their bowl.
Storage Instructions:
Refrigerator:
Store the shredded meat and consomme separately in airtight containers for up to 4 days. The tortillas should be stored separately to stay fresh.
Reheating:
Best method: Reheat the meat and consomme in a saucepan over low heat until warmed through. Fry the tacos fresh. Reheating pre-assembled tacos makes the tortilla soggy.
Freezing:
Yes, you can freeze the shredded meat and consomme for up to 3 months. Thaw in the fridge overnight and reheat. Do not freeze the assembled tacos.
Pro tip: If you’re meal-prepping, cook the meat on Sunday, shred it, and store it in the broth. On weeknights, just heat it up and assemble the tacos in 10 minutes.
Nutrition Information
I’m not a nutritionist, but here’s the breakdown if you’re tracking. Keep in mind that this is a rich, hearty dish, so portions matter.
Per Serving (based on 6 servings, 2 tacos each):
– Calories: 450
– Protein: 25g
– Carbs: 35g
– Fiber: 3g
– Sugar: 2g
– Fat: 22g
– Saturated Fat: 10g
– Cholesterol: 85mg
– Sodium: 650mg
What’s Good:
– High protein from the beef
– Rich in flavor without excessive sugar
– Can add vegetables to boost nutrition
What to Know:
– Higher in calories and fat from the cheese and butter
– Contains gluten and dairy
– Moderate sodium (use low-sodium broth to reduce)
My Take:
Look, this is indulgent food. It’s not a diet recipe. But it’s way better than takeout, and you control the ingredients. When I want to make it lighter, I use less butter, less cheese, and add extra veggies. But usually? I just enjoy a reasonable portion and savor it.
Final Thoughts
So that’s my go-to homemade beef birria tacos with consomme recipe! I’ve probably talked your ear off at this point, but when you make a recipe this often, you have a lot to say about it.
This has saved weeknight dinners more times than I can count. It’s my answer to “what’s for dinner” when I want something special but don’t want to stress. My kids are happy, my husband’s happy, and I’m happy because I’m not stressed about cooking.
Make it yours! Try different add-ins, swap in your favorite vegetables, adjust the spice level. The best recipes are the ones you adapt to your family’s tastes.
If you make this, drop a comment and let me know what you think! I love hearing how recipes turn out in your kitchen. And if something doesn’t work, tell me that too—I’m here to help troubleshoot.
Happy cooking! And I hope your kitchen smells half as good as mine does right now.
Frequently Asked Questions
Q: Can I use a different cut of meat?
A: You can, but chuck roast or brisket are best because they have enough fat to stay tender during the long cook. Leaner cuts like sirloin will dry out. If you must use leaner meat, reduce the cook time and keep an eye on it.
Q: Why is my consomme cloudy?
A: If you didn’t strain it, that’s normal. The particles from the chiles and spices can make it cloudy. If you want a clear broth, strain it through a fine-mesh sieve lined with cheesecloth. It’s still flavorful, just less clear.
Q: Can I make this in an Instant Pot?
A: Yes! Add all ingredients to the Instant Pot. Cook on HIGH pressure for 45 minutes, then natural release for 15 minutes. Shred and serve. It’s faster, but the texture might be slightly less tender than slow-cooked.
Q: How spicy is this recipe?
A: It’s medium heat. The chipotle chiles add a smoky spice, but it’s not overwhelming. If you want it hotter, add more chipotle or a dash of cayenne. If you want it milder, use only 1 chipotle and remove the seeds from the other chiles.
Q: Can I freeze the consomme?
A: Absolutely. Freeze it in ice cube trays or quart-sized bags. It’s great for adding flavor to soups, rice, or stews later. It keeps for up to 3 months.
Q: Why did my tortillas tear when I dipped them?
A: Flour tortillas are more pliable than corn, but they can still tear if they’re old or thin. Use fresh, soft tortillas. If they’re too delicate, double-layer them before adding the cheese and meat.
Q: Can I use canned chiles instead of dried?
A: You can, but the flavor is different. Canned chipotles in adobo sauce are convenient, but they lack the depth of dried guajillo and ancho chiles. If you use canned, adjust the liquid in the recipe accordingly.
Pin This Recipe!
Homemade Beef Birria Tacos: Best Easy Consomme Recipe
- Total Time: 8 hours 30 minutes
- Yield: 6 servings 1x
Description
Experience the ritual of slow-cooked, fork-tender beef birria tacos with a rich, smoky consomme. This recipe uses chuck roast, dried guajillo and ancho chiles, and a secret tea bag trick for deep flavor, resulting in crispy, cheesy tacos that are perfect for crowds.
Ingredients
- 4–5 lbs Beef Chuck Roast (cut into 3–4 large chunks)
- 4 cups Beef Broth (low-sodium)
- 8 cloves Garlic (fresh)
- 1 large White Onion (chopped roughly)
- 3–4 Bay Leaves
- 1 teaspoon Whole Allspice Berries
- 1 teaspoon Black Peppercorns (crushed)
- 6–8 Dried Guajillo Chiles (stems and seeds removed)
- 4–6 Dried Ancho Chiles (stems and seeds removed)
- 2–3 Dried Chipotle Chiles
- 1/4 cup Apple Cider Vinegar
- 2 teaspoons Dried Oregano
- 1 teaspoon Cumin
- 1 small Cinnamon Stick
- 2 Black Tea Bags (Earl Grey or black)
- 12–16 Flour Tortillas (6-inch)
- 2 cups Shredded Mexican Cheese Blend (Oaxaca or Monterey Jack)
- 4 tablespoons Unsalted Butter
- 1/2 cup Fresh Cilantro (chopped)
- 1/2 cup White Onion (finely diced)
- 4–6 Limes (cut into wedges)
Instructions
- Prepare the dried chiles by removing stems and seeds. Place them in a large pot, cover with hot water, and soak for 15-20 minutes until soft.
- Drain the chiles (reserve some soaking liquid). Add chiles, garlic, apple cider vinegar, oregano, cumin, cinnamon stick, tea bags, and half the chopped onion to a blender. Blend until smooth. Pour sauce into a bowl.
- Season beef chunks with salt and pepper. Optionally sear in a hot skillet for 2-3 minutes per side for added flavor.
- Place beef in a slow cooker. Pour adobo sauce over meat. Add remaining onion, bay leaves, allspice, peppercorns, and beef broth. Ensure meat is mostly submerged.
- Cover and cook on LOW for 8-10 hours or HIGH for 4-5 hours until meat is fork-tender.
- Remove meat to a bowl. Discard bay leaves, cinnamon, allspice, peppercorns, and tea bags. Strain broth if desired for clear consomme. Shred beef with two forks.
- Heat a skillet with butter. Place tortilla in skillet, add beef and cheese to one half, fold over. Cook 2-3 minutes per side until golden and crispy.
- Warm consomme in a saucepan. Serve tacos with diced onion, cilantro, lime wedges, and cups of consomme for dipping.
Notes
The tea bags add tannins for complexity. Searing the meat is optional but recommended for depth. Flour tortillas are traditional for dipping; corn tortillas are more fragile. The consomme can be frozen for later use. Leftovers taste even better the next day.
- Prep Time: 30 minutes
- Cook Time: 8-10 hours
- Category: Main Course
- Cuisine: Mexican
Nutrition
- Serving Size: 2 tacos per serving
- Calories: 450
- Sugar: 2
- Sodium: 650
- Fat: 22
- Saturated Fat: 10
- Carbohydrates: 35
- Fiber: 3
- Protein: 25
Keywords: beef birria, birria tacos, consomme recipe, slow cooker birria, mexican food, cheesy tacos, guajillo chiles, ancho chiles, easy dinner, party food



