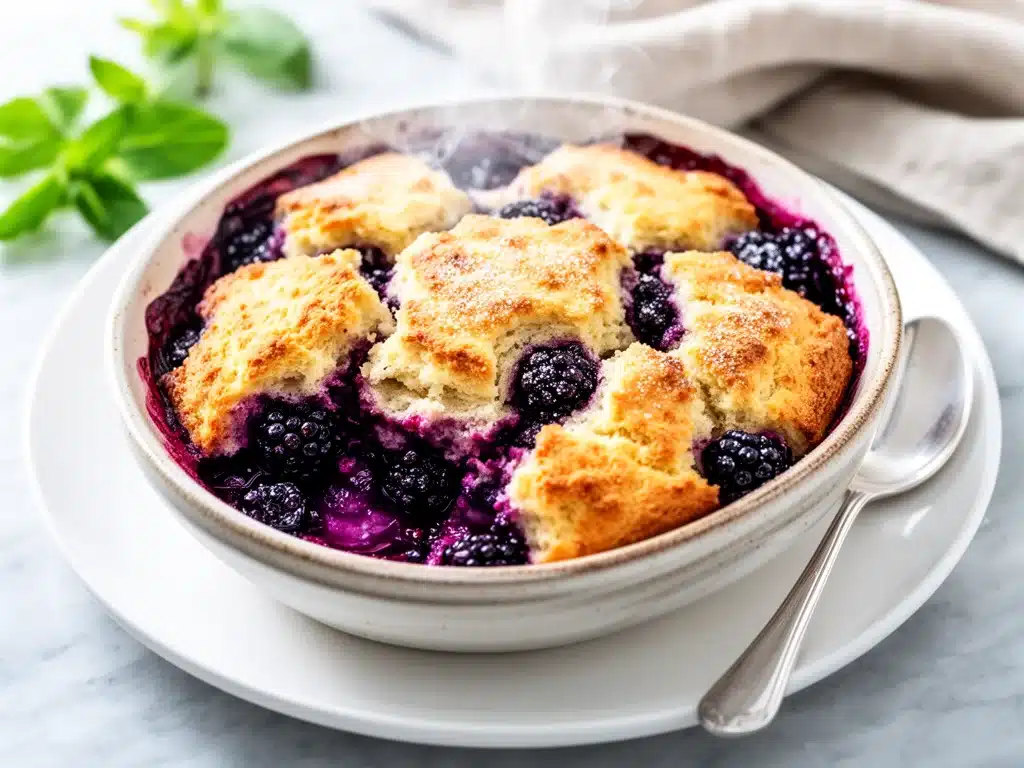
There is a specific kind of magic that happens in late July when the blackberry bushes in my neighbor’s yard finally give up their fruit. It’s not just about the berries themselves, though they are incredible. It’s about the moment you walk in the door, your hands stained purple, your pockets heavy with fruit, and you realize you have to turn that abundance into something edible before it spoils. That’s exactly how I fell in love with this fresh blackberry cobbler with sweet biscuit topping.
I remember the first time I made it. I was twenty-four, living in a drafty apartment with a kitchen that smelled like old coffee, trying to impress a date who claimed to have “refined” taste. I didn’t have time for a pie crust. I didn’t have the patience for flaky layers. So I threw together what I thought was a desperate last resort: a bubbling, jammy blackberry filling topped with a thick, buttery, sweet biscuit dough. I served it warm with a scoop of vanilla ice cream, expecting him to politely take a bite and change the subject.
Instead, he ate three helpings. Then he asked for the recipe. Then he came over the next week to help me pick more berries. (We didn’t end up together, but that doesn’t matter. What matters is that I discovered a dessert that could turn a simple fruit haul into a memory.)
Now, years later, this fresh blackberry cobbler with sweet biscuit topping is the star of my summer table. It’s not fancy. It doesn’t require a rolling pin or a food processor. It doesn’t demand perfection. It just demands good berries and a little bit of butter. And honestly? That’s all you need. Whether you’re picking berries from your own backyard, grabbing them at the farmers market, or buying the slightly mushy container from the grocery store because it’s on sale, this recipe turns them into something nostalgic, comforting, and utterly irresistible.
Why You’ll Love This Blackberry Cobbler Recipe
Look, there are plenty of desserts out there. You could make a blackberry pie, which is beautiful but tricky. You could make a blackberry crisp, which is easy but sometimes feels a bit… sad? Like a sad, crunchy blanket over fruit. This fresh blackberry cobbler with sweet biscuit topping hits that sweet spot between rustic and indulgent. Here’s why it has earned a permanent spot in my rotation:
It’s Forgiving — Seriously, if you can dump berries into a dish and drop spoonfuls of dough on top, you can make this. I’ve made this while holding a toddler. I’ve made it at 10pm the night before a dinner party when I forgot to prep dessert. It never fails me. The biscuits rise up around the berries like little pillows, and even if they’re slightly uneven, it just looks more homemade. Which it is.
The Texture is Unbeatable — This is the big one. The bottom layer is juicy, tart, and syrupy. The top layer is tender, sweet, and slightly crisp on the edges. You get that contrast in every single bite. It’s not just soft dough on soft fruit. There’s structure. There’s chew. There’s crunch. It’s a mouthfeel experience.
It’s Better Than Store-Bought — I’ve tried frozen blackberry pie fillings. I’ve tried canned cobbler mixes. They taste like sugar and artificial flavor. Fresh blackberries have a complexity—floral, tart, earthy—that no processed mix can replicate. When you use real fruit, you don’t need to hide it under a mountain of sugar. The fruit shines.
It’s a Crowd-Pleaser — I’ve served this to my vegan friends (with a swap), my gluten-sensitive cousin (with a gluten-free blend), and my dad who thinks “healthy” means “no dessert.” Everyone comes back for seconds. The aroma alone pulls people into the kitchen. It’s the kind of dessert that starts conversations.
Makes Amazing Leftovers — Actually, it tastes even better the next day. The flavors meld together overnight. The biscuits soften slightly and absorb some of that berry syrup, becoming almost like a bread pudding in spots. I deliberately make a double batch when the berries are cheap.
This is my go-to when I need a dessert that feels special but doesn’t stress me out. No complicated techniques, no weird ingredients, just reliable, delicious food that makes everyone happy.
Ingredients You’ll Need
Here’s the best part: you probably have most of this already in your pantry and fridge. This isn’t a recipe that requires a trip to three different specialty stores. It’s simple, honest ingredients that work together beautifully.
For the Blackberry Filling
Fresh Blackberries (4-5 cups / 600-750g) — This is the star. Use fresh, ripe berries. If they’re a little underripe, add a touch more sugar. If they’re super sweet, you can reduce the sugar slightly. Wash them gently and pick out any stems or leaves. If you’re using frozen blackberries, do not thaw them first, or you’ll get a watery mess. But fresh is always best for this fresh blackberry cobbler with sweet biscuit topping.
Granulated Sugar (½ cup / 100g) — This helps draw out the juices from the berries and creates that syrupy base. I use white sugar for its clean sweetness, but you can substitute half with brown sugar for a deeper, molasses-like flavor if you prefer.
Lemon Juice (1 tablespoon / 15ml) — This is non-negotiable. The acid cuts through the sweetness and brightens the berry flavor. It also helps prevent the berries from turning brown. Freshly squeezed is best, but bottled works in a pinch.
Cornstarch (2 tablespoons / 15g) — This thickens the juices as the cobbler bakes. Without it, you’ll end up with a soupy bottom layer. If you don’t have cornstarch, arrowroot powder or tapioca starch works too.
Vanilla Extract (1 teaspoon / 5ml) — Just a little bit to add warmth and depth. Don’t skip it; it makes the berries taste more like “dessert” and less like “snack.”
For the Sweet Biscuit Topping
All-Purpose Flour (1 ½ cups / 190g) — Standard flour works perfectly. Cake flour makes it too tender, bread flour makes it too chewy. Stick to AP.
Baking Powder (2 teaspoons / 10g) — This is what makes the biscuits rise. Make sure yours isn’t old! If it’s been in your cabinet for more than six months, toss it and get fresh. I learned this the hard way with a flat, dense cobbler.
Salt (½ teaspoon / 3g) — Essential for balancing the sweetness. It also enhances the flavor of the berries.
Unsalted Butter (½ cup / 115g, cold and cubed) — Cold butter is the secret to tender biscuits. When the cold butter hits the hot oven, it creates steam pockets, which lift the dough. If your butter is soft, your biscuits will be dense. Cube it straight from the fridge.
Heavy Cream (½ cup / 120ml) — Or buttermilk. Cream makes it richer; buttermilk makes it tangier. I prefer cream for this sweet version, but buttermilk is great if you want a more traditional biscuit flavor.
Extra Granulated Sugar (1 tablespoon / 15g) — Sprinkled on top before baking. This creates that crunchy, caramelized crust that you’ll be scraping off the pan.
Optional Add-ins: Lemon Zest (1 teaspoon) — Adds a floral note that pairs amazingly with blackberries. Cinnamon (¼ teaspoon) — If you like a hint of spice, this works well. I usually keep it simple, but it’s a nice variation.
Equipment Needed
You don’t need fancy equipment for this. Here’s what I actually use, and what you can skip if you’re low on space.
9×9 Inch Baking Dish — Or an 8-inch square dish. I prefer the 9×9 because it gives the biscuits room to spread. If you use a smaller dish, the cobbler will be taller and might overflow. A deep-dish pie plate works too, but you might need to adjust baking time.
Mixing Bowls — Two medium bowls. One for the fruit, one for the dough. I use glass bowls because I can see through them.
Fork or Pastry Cutter — To cut the butter into the flour. I use a fork because it’s easier to clean, but a pastry cutter is faster if you have one.
Spatula — For stirring the fruit mixture. Silicone is best because it scrapes the bowl clean.
Cooling Rack — Letting the cobbler cool slightly before serving helps the filling set. Otherwise, you’ll get a runny mess on your plate.
Parchment Paper — Optional, but I line my baking dish with it for easier cleanup. Berry juice can stick and burn if you don’t.
How to Make It: Step-by-Step
Alright, let’s make this! I’m walking you through exactly how I do it, including the little tricks I’ve picked up over the years.
Step 1: Prep Your Oven and Dish (5 minutes)
Preheat your oven to 375°F (190°C). This is the perfect temperature—not too hot to burn the sugar, not too low to make the biscuits doughy. Grease your 9×9 baking dish with butter or cooking spray. If you’re using parchment paper, line it now. This step is crucial because blackberry juice can be sticky and hard to scrub off later.
Step 2: Make the Filling (10 minutes)
In your large mixing bowl, combine the fresh blackberries, sugar, lemon juice, cornstarch, and vanilla. Toss gently until the berries are evenly coated. The cornstarch will turn white at first, but that’s normal. Pour this mixture into your prepared baking dish. Spread it out evenly. It will look like a lot, but it will settle down as it bakes.
Step 3: Make the Biscuit Dough (10 minutes)
In a separate bowl, whisk together the flour, baking powder, and salt. Add the cold, cubed butter. Use a fork or pastry cutter to cut the butter into the flour until the mixture resembles coarse crumbs with some pea-sized pieces of butter remaining. Those pea-sized pieces are important—they create flakiness. Pour in the heavy cream and stir gently with a spatula until the dough just comes together. Do not overmix! Overmixing makes tough biscuits. It should look shaggy and messy. That’s good.
Step 4: Assemble the Cobbler (5 minutes)
Drop spoonfuls of the biscuit dough over the blackberry mixture. Don’t try to make perfect circles. Just drop them wherever. You want them somewhat evenly distributed, but leave some gaps so the berries can bubble up through. Sprinkle the extra tablespoon of sugar over the top of the biscuits. This will caramelize and get crunchy.
Step 5: Bake Until Golden (45-50 minutes)
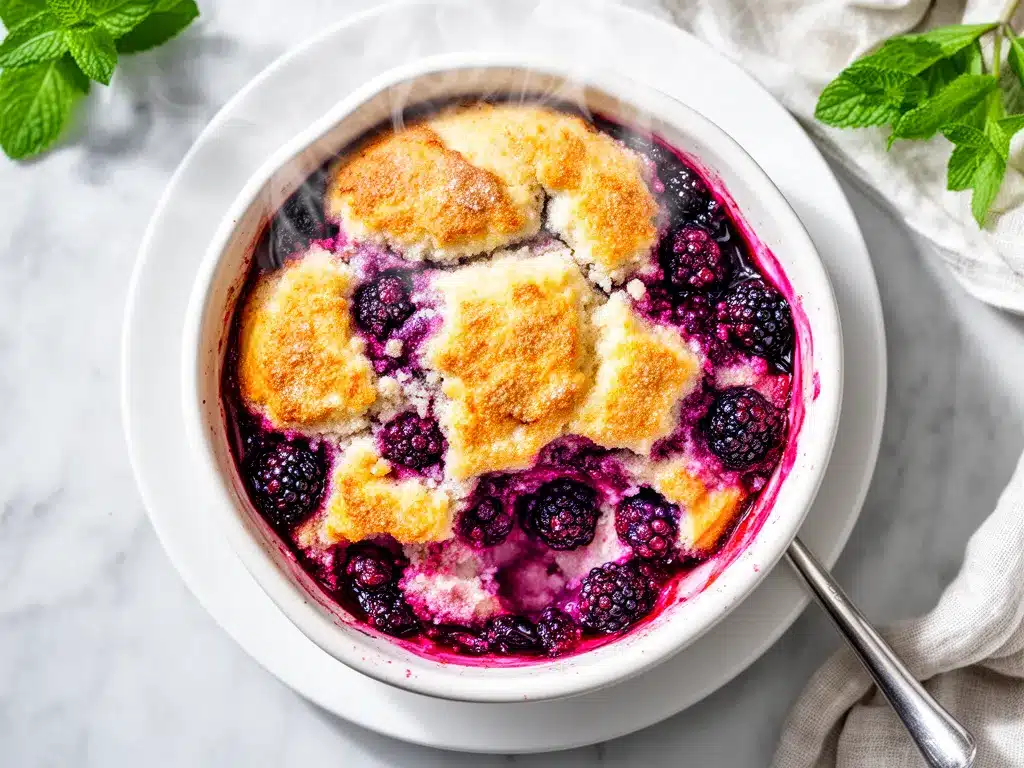
Place the dish in the preheated oven. Bake for 45-50 minutes. You’ll know it’s done when the biscuits are golden brown on top and the filling is bubbling vigorously around the edges. If the biscuits are browning too quickly, cover them loosely with aluminum foil for the last 10 minutes. Let the cobbler cool for at least 15 minutes before serving. This allows the filling to thicken slightly.
Step 6: Serve and Enjoy
Serve warm, ideally with a scoop of vanilla ice cream or a dollop of whipped cream. The contrast of hot, juicy berries and cold cream is pure heaven. Dig in!
Total Time: About 75 minutes (20 minutes prep, 50 minutes bake, 15 minutes cool)
Expert Tips & Tricks
Here’s everything I’ve learned from making this dozens of times. These tips will save you from my mistakes.
Keep the Butter Cold — I cannot stress this enough. If your butter melts before it hits the oven, your biscuits will be dense. Cube the butter and put it back in the fridge for 10 minutes before adding it to the flour if your kitchen is warm.
Don’t Skip the Resting Time — I know it’s hard to wait, but cutting into a hot cobbler means the filling will be runny. Let it rest. The cornstarch needs time to set. Fifteen minutes is the minimum.
Use a Dark Dish for Crispier Biscuits — If you use a glass dish, the biscuits might be softer. A dark metal or cast iron dish will give you a crispier bottom and edges. I prefer the crispiness.
Adjust Sweetness to Taste — Not all blackberries are the same. If your berries are very tart, add an extra tablespoon of sugar to the filling. If they’re super sweet, reduce it. Taste a berry before you start.
For Extra Flavor — Add a teaspoon of lemon zest to the biscuit dough. It brightens up the whole dish and makes it taste more sophisticated.
Variations & Substitutions
Once you’ve nailed the basic version, here’s how you can mix it up. I’ve tried all of these.
Raspberry Cobbler — Swap blackberries for raspberries. Raspberries are more delicate, so they might break down more, creating a thicker sauce. Use the same amounts.
Mixed Berry Cobbler — Use a mix of blackberries, blueberries, and raspberries. This is great when you have a little bit of everything. The flavors complement each other beautifully.
Gluten-Free Version — Use a 1:1 gluten-free flour blend. The texture will be slightly more crumbly, but it still works. Add an extra teaspoon of baking powder to help with rise.
Dairy-Free Version — Use vegan butter (cold!) and coconut cream or oat milk. The flavor will be slightly different, but still delicious. I’ve made this for my lactose-intolerant friend, and she loved it.
Spiced Version — Add ½ teaspoon cinnamon and ¼ teaspoon nutmeg to the biscuit dough. This gives it a fall-like vibe, even in summer.
With Alcohol — Add a tablespoon of bourbon or rum to the filling. It adds a warm, complex depth. Great for adult gatherings.
Serving & Storage
How to Serve:
I usually serve this straight from the baking dish at the dinner table—it looks rustic and stays warm. But here are other ways I’ve enjoyed it:
Side Dishes:
– Vanilla bean ice cream (classic)
– Whipped cream with a hint of vanilla
– A simple green salad (yes, really! The contrast is nice)
– Toasted almond slices for crunch
Toppings Bar:
When I have guests, I put out: extra berries, honey, crushed nuts, and different types of ice cream. Everyone customizes their bowl.
Storage Instructions:
Refrigerator:
Store in an airtight container for up to 3 days. The biscuits will soften, which is fine. Actually, many people prefer them soft.
Reheating:
Best method: Oven at 350°F for 10-15 minutes. This restores the crispness.
Microwave method: 30-60 seconds. The biscuits will be soft, but it’s fast.
Freezing:
You can freeze unbaked cobbler! Assemble it, wrap it tightly in plastic and foil, and freeze for up to 3 months. Bake from frozen, adding 10-15 minutes to the baking time. Do not freeze baked cobbler; the texture suffers.
Pro tip: If leftovers are drying out, sprinkle a little water on the biscuits before reheating. It steams them slightly and keeps them moist.
Nutrition Information
I’m not a nutritionist, but here’s the breakdown if you’re tracking. This is a treat, so enjoy it guilt-free!
Per Serving (based on 9 servings):
– Calories: 320
– Protein: 4g
– Carbs: 52g
– Fiber: 4g
– Sugar: 32g
– Fat: 12g
– Saturated Fat: 7g
– Cholesterol: 30mg
– Sodium: 220mg
What’s Good:
– Real fruit means vitamins and antioxidants
– Fiber from the berries and flour
– Portion-controlled if you serve reasonable slices
What to Know:
– High in sugar from the berries and biscuits
– Contains dairy and gluten
– Moderate sodium
My Take:
Look, this is a dessert. It’s sweet, rich, and comforting. It’s not a health food. But it’s made with real ingredients, and it’s way better than anything from a box. When I want to make it lighter, I reduce the sugar in the filling and use less butter in the biscuits. But usually? I just eat a reasonable portion and enjoy it. Life’s too short for diet desserts.
Final Thoughts
So that’s my fresh blackberry cobbler with sweet biscuit topping! I’ve probably talked your ear off at this point, but when you make a recipe this often, you have a lot to say about it. This has saved summer evenings more times than I can count. It’s my answer to “what’s for dessert” when I want something homemade but don’t want to spend hours in the kitchen.
Make it yours! Try different berries, add spices, swap the cream for buttermilk. The best recipes are the ones you adapt to your family’s tastes. If you make this, drop a comment and let me know what you think! I love hearing how recipes turn out in your kitchen. And if something doesn’t work, tell me that too—I’m here to help troubleshoot.
Happy cooking! And I hope your kitchen smells half as good as mine does right now.
Frequently Asked Questions
Q: Can I use frozen blackberries?
A: You can, but the texture will be different. Frozen berries release more water, so your filling might be runnier. If you use frozen, do not thaw them first. Add an extra tablespoon of cornstarch to the filling to help thicken it. Fresh is always best for this fresh blackberry cobbler with sweet biscuit topping, but frozen works in a pinch.
Q: Why did my biscuits turn out flat?
A: This usually happens if the baking powder is old or if the butter was too warm. Make sure your baking powder is fresh (test it by mixing a teaspoon with hot water—it should fizz). Also, keep the butter cold until it hits the oven.
Q: Can I make this ahead of time?
A: Yes! You can assemble the cobbler the night before, cover it, and refrigerate. Let it sit at room temperature for 20 minutes before baking. You might need to add 5-10 minutes to the baking time since the dish will be cold.
Q: How do I know when the cobbler is done?
A: The biscuits should be golden brown, and the filling should be bubbling vigorously around the edges. If you’re unsure, insert a knife into the center—it should come out clean (mostly, some berry juice is fine).
Q: Can I substitute the heavy cream?
A: Yes. Buttermilk works great and adds a tangy flavor. Whole milk works too, but the biscuits will be less rich. Avoid skim milk; it won’t give you the right texture.
Q: Why is my filling watery?
A: This can happen if the berries were very juicy or if you didn’t use enough cornstarch. Next time, add an extra tablespoon of cornstarch. Also, make sure you’re letting the cobbler cool for at least 15 minutes before serving. The filling thickens as it cools.
Q: Can I double this recipe?
A: Absolutely! Double everything and use a 9×13 inch baking dish. The baking time will increase by about 10-15 minutes. Keep an eye on it to make sure the top doesn’t burn.
Pin This Recipe!
Fresh Blackberry Cobbler: Easy Homemade Dessert
- Total Time: 75 minutes
- Yield: 9 servings 1x
Description
A rustic and indulgent dessert featuring a bubbling, jammy blackberry filling topped with a thick, buttery, sweet biscuit dough. This forgiving recipe requires no rolling pin and delivers unbeatable texture with tender biscuits and tart fruit.
Ingredients
- 4–5 cups fresh blackberries
- 1/2 cup granulated sugar (for filling)
- 1 tablespoon lemon juice
- 2 tablespoons cornstarch
- 1 teaspoon vanilla extract
- 1 1/2 cups all-purpose flour
- 2 teaspoons baking powder
- 1/2 teaspoon salt
- 1/2 cup unsalted butter, cold and cubed
- 1/2 cup heavy cream
- 1 tablespoon granulated sugar (for topping)
- Optional: 1 teaspoon lemon zest
- Optional: 1/4 teaspoon cinnamon
Instructions
- Preheat oven to 375°F (190°C). Grease a 9×9 inch baking dish with butter or cooking spray, or line with parchment paper.
- In a large mixing bowl, combine fresh blackberries, 1/2 cup sugar, lemon juice, cornstarch, and vanilla. Toss gently until berries are evenly coated.
- Pour the berry mixture into the prepared baking dish and spread evenly.
- In a separate bowl, whisk together flour, baking powder, and salt.
- Add cold, cubed butter to the flour mixture. Use a fork or pastry cutter to cut the butter in until the mixture resembles coarse crumbs with pea-sized pieces of butter remaining.
- Pour in heavy cream and stir gently with a spatula until the dough just comes together. Do not overmix.
- Drop spoonfuls of the biscuit dough over the blackberry mixture, leaving some gaps for berries to bubble up.
- Sprinkle the remaining 1 tablespoon of sugar over the top of the biscuits.
- Bake for 45-50 minutes, or until biscuits are golden brown and filling is bubbling vigorously around the edges. If browning too quickly, cover loosely with foil for the last 10 minutes.
- Let the cobbler cool for at least 15 minutes before serving to allow the filling to thicken.
- Serve warm with vanilla ice cream or whipped cream.
Notes
Keep butter cold for flaky biscuits. Do not skip the resting time as the filling needs to set. Use a dark metal dish for crispier biscuits. If using frozen blackberries, do not thaw them and add an extra tablespoon of cornstarch.
- Prep Time: 20 minutes
- Cook Time: 50 minutes
- Category: Dessert
- Cuisine: American
Nutrition
- Serving Size: 1 slice
- Calories: 320
- Sugar: 32
- Sodium: 220
- Fat: 12
- Saturated Fat: 7
- Carbohydrates: 52
- Fiber: 4
- Protein: 4
Keywords: blackberry cobbler, homemade dessert, biscuit topping, summer dessert, easy baking, fresh berries, rustic dessert



