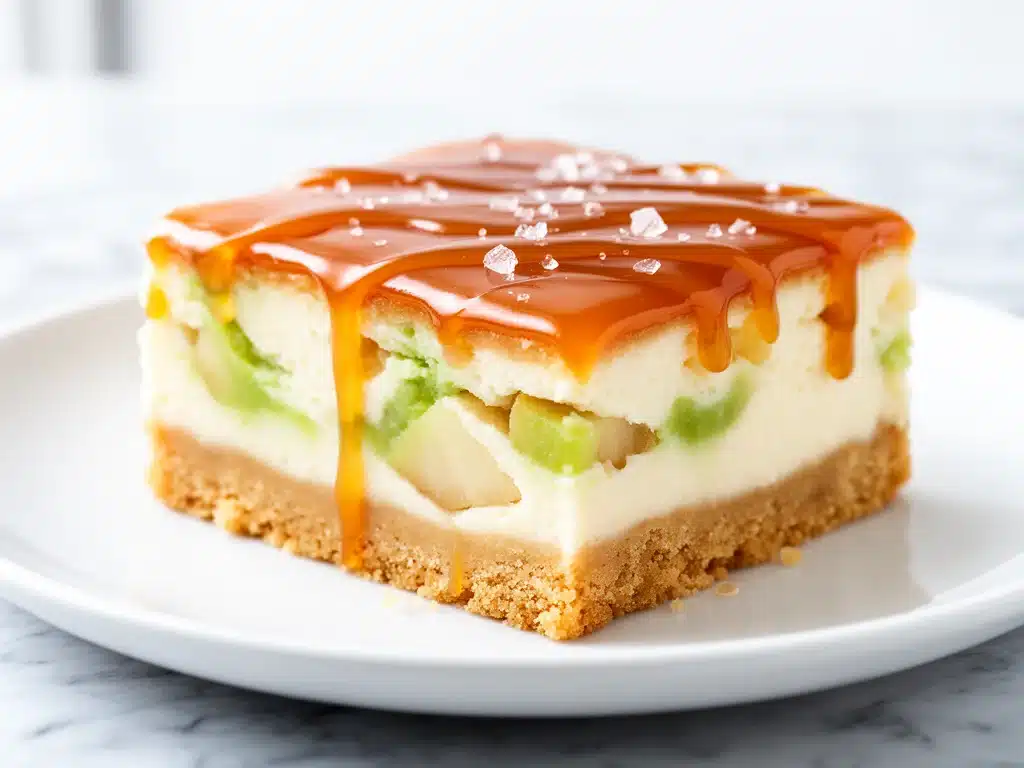
There is a specific kind of panic that hits around October. You’ve spent all summer ignoring your oven because it turns your kitchen into a sauna, but now the air gets crisp, the leaves turn, and suddenly you’re standing in front of your pantry wondering, “What do I bake?” It’s not just about hunger. It’s a seasonal craving for something warm, comforting, and undeniably indulgent. Last year, I tried to make a traditional whole cheesecake for a family gathering. It took six hours, required a water bath, and ended up cracking down the middle. My aunt looked at it, smiled politely, and then ate the brownies I’d made as backup. I was devastated. I wanted a dessert that tasted like fall in a bowl but didn’t require a degree in structural engineering.
So, I stopped trying to replicate the fancy restaurant cheesecake and started thinking about what I actually loved: the combination of tart apples, sweet caramel, and that rich, tangy cream cheese filling. I wanted something portable. Something I could cut into squares, hand out at a party, or just eat with a spoon while watching the rain hit the window. That experimentation led me to these creamy caramel apple cheesecake bars. They are the ultimate fall dessert, combining the best elements of a crumble with the luxury of a cheesecake, all packed into a single pan.
Here’s the thing about these bars: they are easier than you think. You don’t need to whip egg whites to stiff peaks. You don’t need to worry about cracks. You just mix, press, bake, and chill. The result is a dense, creamy bar that tastes like it came from the best bakery in town, but you made it in your own kitchen for a fraction of the price. I’ve made these for book clubs, potlucks, and quiet Tuesday nights when I need a little comfort. They are reliable, delicious, and honestly, better than takeout because you control the sweetness and the quality of the apples. If you’re looking for a fall dessert that actually works, this is it.
Why You’ll Love These Creamy Caramel Apple Cheesecake Bars
I’ve tested this recipe about ten times over the last two months, tweaking the apple-to-caramel ratio and testing different crusts. The version below is the winner. It balances the tartness of the apples with the richness of the cream cheese perfectly. Here is why these bars have taken over my fall baking rotation:
Stupid Simple Assembly — Seriously, if you can mix batter and chop apples, you can make this. There is no water bath. There is no complicated layering technique that requires patience I don’t have. You just press the crust, pour the filling, top it with apples and caramel, and bake. It’s foolproof.
Make-Ahead Friendly — This is the #1 reason I make them. They actually taste better the next day. The flavors meld together overnight, making the caramel soak into the crust and the apples soften just right. I love making these on Sunday and having them ready for the week. They keep well in the fridge for up to four days.
Perfect Portion Control — A whole cheesecake can be intimidating to serve. These bars are self-portioned. Cut them into squares, hand them out, and everyone gets a perfect slice. No jagged edges or crumbling mess. They look professional and elegant, which makes you feel like a baking pro.
Seasonal Flavors Without the Fuss — You get all the cozy apple pie vibes without the need to make a double crust or deal with a soggy bottom. The caramel adds that sticky, sweet element that ties everything together, and the cream cheese cuts through the sugar so it’s not cloying.
Great for Any Occasion — I’ve served these at work, to neighbors, and for Thanksgiving dessert. They are versatile enough to be fancy but casual enough for a casual snack. Plus, they travel well if you keep them in the pan.
This is my go-to dessert when I want to impress people without spending hours in the kitchen. It’s reliable, delicious, and makes your house smell like a bakery.
Ingredients You’ll Need
Don’t let the list scare you. Most of these are pantry staples or easy-to-find grocery items. I’m particular about a few things here, and I’ll tell you why.
For the Crust
Graham Cracker Crumbs (1 ½ cups / 150g) — I use the standard graham cracker crumbs. You can crush whole graham crackers in a food processor if you want, but the pre-made stuff works perfectly fine. It provides that classic sweet, crunchy base.
Unsalted Butter (½ cup / 115g, melted) — Use real butter, not margarine. It binds the crumbs and adds the rich flavor. If you melt it in the microwave, just let it cool for a minute so it doesn’t cook the crumbs.
Granulated Sugar (2 tablespoons / 25g) — Just a little bit to sweeten the crust. You don’t want it too sweet, as the filling is rich.
Cinnamon (½ teaspoon) — A pinch of cinnamon in the crust adds depth. It hints at the apple flavor to come.
For the Cream Cheese Filling
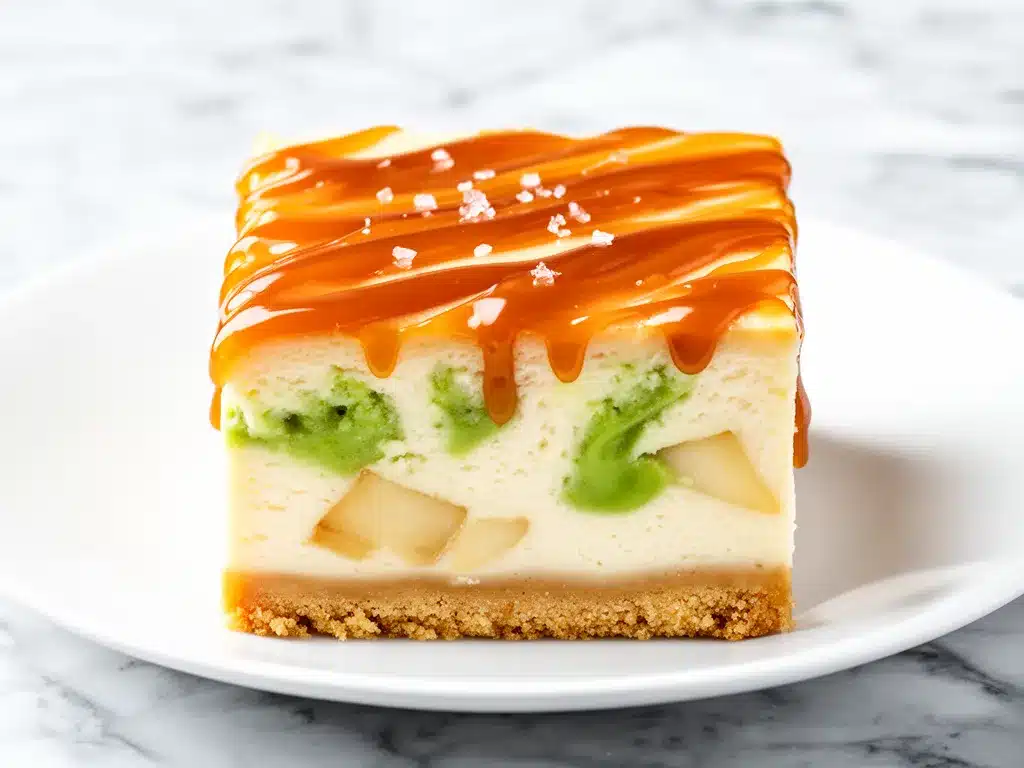
Full-Fat Cream Cheese (24 oz / 680g, softened) — This is crucial. Do not use low-fat or whipped cream cheese. It won’t set properly and will be runny. Let it sit on the counter for 30 minutes before you start. Softened cream cheese blends smoothly. Lumps are the enemy of a creamy bar.
Granulated Sugar (1 cup / 200g) — This balances the tartness of the cream cheese. If you prefer less sweet, you can reduce to ¾ cup, but I recommend sticking with the full cup.
Eggs (3 large) — Room temperature eggs are best. They emulsify better into the batter. If your eggs are cold, run them under warm water for a few minutes.
Vanilla Extract (2 teaspoons) — Use real vanilla, not imitation. It makes a huge difference in flavor.
Sour Cream (½ cup / 120g) — This adds tang and creaminess. It also helps keep the texture soft and fudgy rather than cakey. Don’t skip it.
For the Topping
Apples (3 medium, about 2 cups diced) — I recommend Honeycrisp or Gala. They hold their shape well and have a nice sweet-tart balance. Granny Smith is too tart for this specific recipe unless you like very sour apples. Peeled and diced into ½-inch cubes.
Butter (2 tablespoons / 30g) — For sautéing the apples.
Brown Sugar (¼ cup / 50g) — Adds molasses flavor and helps caramelize the apples.
Cinnamon (1 teaspoon) — For the apple mix.
Store-Bought Caramel Sauce (1 cup / 240ml) — I’m being honest here: using high-quality store-bought caramel saves time and guarantees consistency. Look for a brand like Smucker’s or a local bakery brand. If you want to make your own, you can, but it adds a lot of extra work. The bars are great either way.
Sea Salt Flakes (optional) — A sprinkle on top before serving cuts the sweetness and adds a gourmet touch.
Equipment Needed
You don’t need fancy tools for this. Here is what I actually use.
9×9 Inch Baking Pan — I use a metal pan. Glass pans can cause the bottom to burn slightly, so if you use glass, lower the oven temperature by 25 degrees. Line the pan with parchment paper for easy lifting.
Mixer — A hand mixer or stand mixer is helpful for the cream cheese filling. You need to beat it until smooth. Doing this by hand is possible but requires serious arm strength.
Medium Skillet — For sautéing the apples. A non-stick skillet works best so the sugar doesn’t stick.
Spatula — For spreading the filling and mixing the apples.
Whisk — For mixing the eggs and sugar.
How to Make Creamy Caramel Apple Cheesecake Bars
Alright, let’s make this! I’m walking you through exactly how I do it, including the little tricks I’ve picked up.
Step 1: Prep Your Pan and Oven (5 minutes)
Preheat your oven to 350°F (175°C). Line a 9×9 inch baking pan with parchment paper, leaving an overhang on the sides. This is essential for lifting the bars out later. Grease the parchment lightly with butter or cooking spray.
Step 2: Make the Crust (5 minutes)
In a medium bowl, mix the graham cracker crumbs, melted butter, 2 tablespoons sugar, and ½ teaspoon cinnamon. It should look like wet sand. Press this mixture firmly and evenly into the bottom of your prepared pan. Use the bottom of a measuring cup to pack it down tightly. If the crust is loose, the bars will fall apart. Bake for 8-10 minutes until lightly golden. Remove and let it cool while you make the filling.
Step 3: Beat the Cream Cheese (5 minutes)
In a large bowl, beat the softened cream cheese and 1 cup sugar until completely smooth and creamy. This is the most important step. Scrape down the sides of the bowl and beat for another 2 minutes. You want zero lumps. Add the sour cream and vanilla extract, and mix until combined.
Step 4: Add the Eggs (2 minutes)
Add the eggs one at a time, mixing on low speed just until incorporated. Do not overmix once the eggs are in, or you’ll incorporate too much air, which can cause cracks. The batter should be smooth and glossy.
Step 5: Sauté the Apples (5 minutes)
While the crust bakes, melt 2 tablespoons of butter in a skillet over medium heat. Add the diced apples, ¼ cup brown sugar, and 1 teaspoon cinnamon. Cook for 5-7 minutes, stirring occasionally, until the apples are tender and coated in a light caramel sauce. Remove from heat and let cool slightly.
Step 6: Assemble the Bars (5 minutes)
Pour the cream cheese filling over the warm crust. Spread it evenly. Spoon the sautéed apples over the top of the filling. Drizzle the caramel sauce over the apples in a zigzag pattern. You can swirl it gently with a knife for a marbled effect, or just leave it in stripes.
Step 7: Bake and Cool (45 minutes)
Bake for 35-40 minutes. The edges should be set and slightly puffed, but the center should still have a slight jiggle. It will firm up as it cools. Do not overbake, or they will become dry.
Step 8: Chill and Serve (1 hour +)
Let the bars cool in the pan on a wire rack for at least 30 minutes. Then, refrigerate for at least 4 hours, preferably overnight. This chilling time is non-negotiable for clean cuts. Once chilled, lift the bars out using the parchment paper, slice into squares, and drizzle with a little extra caramel if you want to be fancy. Sprinkle with sea salt flakes if you’re feeling gourmet.
Expert Tips & Tricks
Here’s everything I’ve learned from making these dozens of times. These tips will save you from my mistakes.
Softened Cream Cheese is Key
I cannot stress this enough. If your cream cheese is cold, you will get lumps. If you forget to take it out, cut it into cubes and microwave it for 15-second bursts, stirring in between, until it’s soft. It should yield to gentle pressure.
Don’t Skip the Sauté
You could just dump raw apples on top, but they won’t cook evenly in the oven. Sautéing them first ensures they are tender and flavorful. It also concentrates their sweetness.
Chill, Chill, Chill
I know it’s tempting to cut into them warm. Don’t. They will be messy and soft. The texture transforms in the fridge. The cream cheese sets, and the flavors meld. Patience pays off.
Clean Cuts
Use a sharp knife and wipe it clean between each cut. Dip the knife in hot water and dry it for super clean slices. This makes the presentation look professional.
Storage
Keep these in an airtight container in the fridge for up to 4 days. They can also be frozen for up to 3 months. Wrap individual bars in plastic wrap and foil. Thaw in the fridge overnight.
Variations & Substitutions
Once you’ve nailed the basic version, here’s how you can mix it up. I’ve tried all of these.
Pumpkin Spice Version
Swap the apples for 1 cup of pumpkin puree. Add 1 teaspoon pumpkin pie spice to the filling. Top with caramel and pecans. It’s like pumpkin pie meets cheesecake.
Apple Pie Spice
Add a pinch of nutmeg and allspice to the apple topping for a more complex spice flavor.
Nutty Twist
Add ½ cup of chopped pecans or walnuts to the crust. Toast them first for extra flavor. It adds a nice crunch.
Maple Caramel
Use maple-flavored caramel sauce instead of regular caramel. It pairs beautifully with the apples.
Gluten-Free
Use gluten-free graham cracker crumbs. The rest of the ingredients are naturally gluten-free. Just check your caramel sauce label.
Serving & Storage
How to Serve:
I usually serve these straight from the fridge. They are best cold. I like to garnish with a sprig of fresh thyme or a few crushed pecans for a fancy touch. They pair well with a cup of hot coffee or tea.
Side Dishes:
These are rich, so they don’t need much else. Maybe a simple green salad if you’re having a dinner party. Or just enjoy them as is.
Storage Instructions:
Refrigerator: Store in an airtight container for up to 4 days. They might get a bit firm in the fridge, so let them sit out for 10 minutes before eating.
Freezer: Wrap tightly in plastic wrap and foil. Freeze for up to 3 months. Thaw in the fridge overnight.
Pro Tip: If you’re meal-prepping desserts, these are perfect. Make a batch on Sunday, and you have dessert ready for the week. No guilt, no stress.
Nutrition Information
I’m not a nutritionist, but here’s the breakdown if you’re tracking. This is a rich dessert, so portions matter.
Per Serving (based on 16 bars):
- Calories: 280
- Protein: 5g
- Carbs: 32g
- Fiber: 1g
- Sugar: 24g
- Fat: 15g
- Saturated Fat: 9g
- Cholesterol: 45mg
- Sodium: 180mg
What’s Good: It has some protein from the cream cheese and eggs. The apples add a tiny bit of fiber.
What to Know: It’s high in sugar and saturated fat because of the cream cheese, butter, and caramel. It’s a treat, not a health food. Enjoy in moderation.
Final Thoughts
So that’s my take on creamy caramel apple cheesecake bars! I’ve probably talked your ear off at this point, but when you make a recipe this often, you have a lot to say about it. These bars have saved my fall dessert game. They are my answer to “what do I bring to the party” or “what do I bake when I want comfort.” My family loves them, my friends ask for the recipe, and I love making them because they are so forgiving.
Make it yours! Try different apples, add nuts, or swap the caramel for chocolate sauce. The best recipes are the ones you adapt to your tastes. If you make this, drop a comment and let me know what you think! I love hearing how recipes turn out in your kitchen. And if something doesn’t work, tell me that too—I’m here to help troubleshoot.
Happy baking! I hope your kitchen smells as good as mine does right now.
Frequently Asked Questions
Can I use frozen apples?
You can, but they will release more water. Thaw them completely and drain off any excess liquid before sautéing. Fresh apples are better for texture, but frozen works in a pinch.
Why did my bars crack?
Cracking usually happens from overmixing (incorporating too much air) or overbaking. Make sure you mix the eggs on low speed and don’t bake them until they are dry. A slight jiggle in the center is perfect.
Can I make this in a 9×13 pan?
Yes, but the bars will be thinner. Reduce the baking time to 25-30 minutes. Keep an eye on them so they don’t dry out.
Can I use apple pie filling?
You can, but it’s very sweet and watery. If you use it, drain it well and reduce the brown sugar in the topping. Sautéing fresh apples gives better flavor and texture.
How do I store leftovers?
Store in an airtight container in the fridge for up to 4 days. They taste best chilled. Do not freeze unless you wrap them tightly, as the texture can change slightly.
Can I make these ahead for a party?
Absolutely. They are better made a day ahead. Make them 24 hours before your event. They will hold up well in the fridge.
Is there a substitute for caramel sauce?
You can use dulce de leche, chocolate sauce, or even a simple apple butter. But caramel is the classic choice for a reason.
Pin This Recipe!
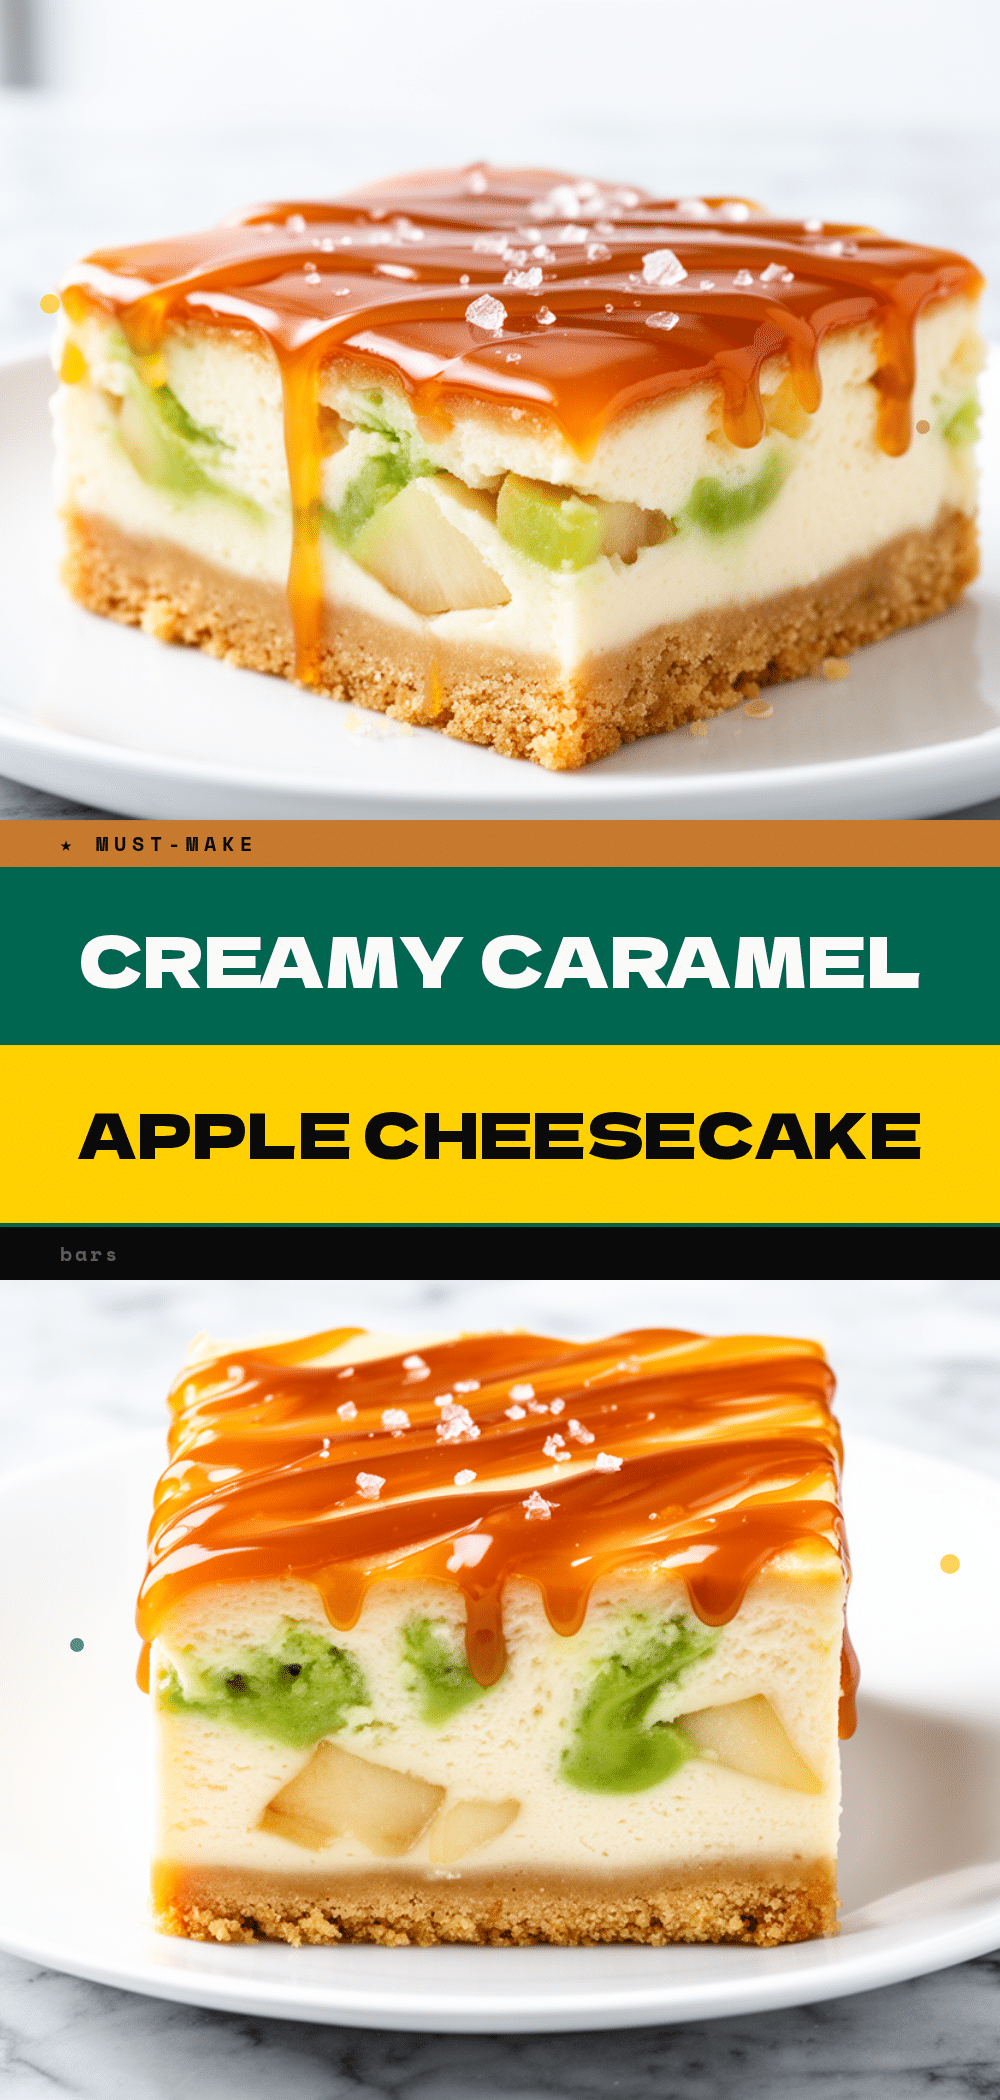
Creamy Caramel Apple Cheesecake Bars
- Total Time: 1 hour 15 minutes
- Yield: 16 servings 1x
Description
An easy, no-water-bath fall dessert combining a graham cracker crust, rich cream cheese filling, sautéed apples, and caramel sauce in a single pan.
Ingredients
- 1 ½ cups graham cracker crumbs
- ½ cup unsalted butter, melted
- 2 tablespoons granulated sugar
- ½ teaspoon cinnamon
- 24 oz full-fat cream cheese, softened
- 1 cup granulated sugar
- 3 large eggs, room temperature
- 2 teaspoons vanilla extract
- ½ cup sour cream
- 3 medium apples (Honeycrisp or Gala), peeled and diced
- 2 tablespoons butter
- ¼ cup brown sugar
- 1 teaspoon cinnamon
- 1 cup store-bought caramel sauce
- Sea salt flakes, optional
Instructions
- Preheat oven to 350°F (175°C). Line a 9×9 inch baking pan with parchment paper and grease lightly.
- In a medium bowl, mix graham cracker crumbs, melted butter, 2 tablespoons sugar, and ½ teaspoon cinnamon. Press firmly into the bottom of the prepared pan.
- Bake crust for 8-10 minutes until lightly golden. Remove and let cool.
- In a large bowl, beat softened cream cheese and 1 cup sugar until smooth. Scrape down sides and beat for another 2 minutes.
- Add sour cream and vanilla extract; mix until combined.
- Add eggs one at a time, mixing on low speed just until incorporated. Do not overmix.
- In a medium skillet, melt 2 tablespoons butter over medium heat. Add diced apples, ¼ cup brown sugar, and 1 teaspoon cinnamon. Cook for 5-7 minutes until tender and coated in caramel. Remove from heat.
- Pour cream cheese filling over the warm crust and spread evenly.
- Spoon sautéed apples over the filling. Drizzle caramel sauce over the top.
- Bake for 35-40 minutes until edges are set and center has a slight jiggle.
- Cool in the pan on a wire rack for 30 minutes, then refrigerate for at least 4 hours or overnight.
- Lift bars out using parchment paper, slice into squares, and serve chilled.
Notes
Ensure cream cheese is fully softened to avoid lumps. Do not overmix after adding eggs to prevent cracking. Sautéing apples first ensures they are tender and flavorful. Bars must be chilled for at least 4 hours for clean cuts. Store in an airtight container in the fridge for up to 4 days or freeze for up to 3 months.
- Prep Time: 20 minutes
- Cook Time: 55 minutes
- Category: Dessert
- Cuisine: American
Nutrition
- Serving Size: 1 bar
- Calories: 280
- Sugar: 24
- Sodium: 180
- Fat: 15
- Saturated Fat: 9
- Carbohydrates: 32
- Fiber: 1
- Protein: 5
Keywords: fall dessert, cheesecake bars, caramel apple, easy baking, make-ahead dessert, graham cracker crust



