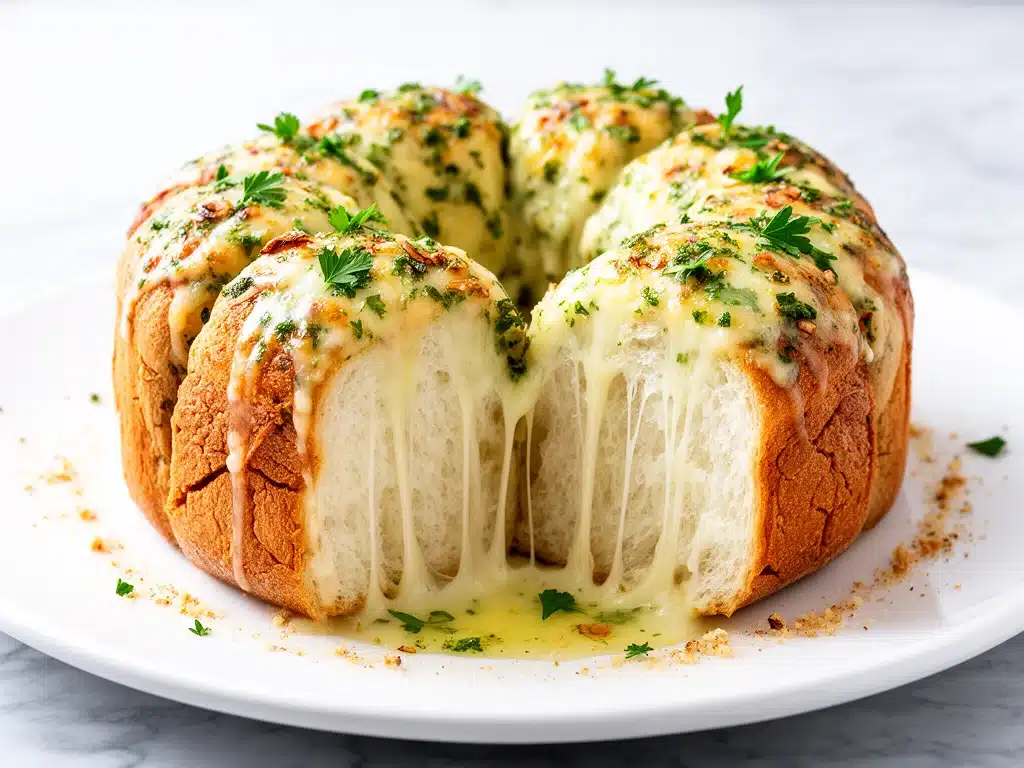
Last Thanksgiving, I made the mistake of leaving the bread basket on the table. I turned my back for exactly three seconds to grab more gravy, and when I looked back, my uncle was holding an empty plate, looking at me with those wide, accusing eyes. “Where did it go?” he asked, genuinely baffled. It wasn’t just gone; it had been annihilated. That’s when I knew I had created something dangerous. Not because it was hard to make, but because it was too good to be real.
That is the magic of Cheesy Garlic Pull-Apart Bread Rolls. They are the culinary equivalent of a magic trick. You start with a loaf of bread, some butter, some garlic, and a mountain of cheese. You twist it, bake it, and suddenly you have a communal, gooey, golden masterpiece that disappears faster than you can say “pass the butter.” I’ve made these for dinner parties, for potlucks, for midnight snacks (don’t judge me), and even as a side dish for Labor Day bacon cheddar ranch pasta salad. Every single time, the reaction is the same: gasps, reaching hands, and immediate requests for the recipe.
People assume these are complicated. They think you need fancy dough or hours of proofing time. But here’s the secret: I use store-bought bread. Yes, really. And it tastes better than most artisanal loaves I’ve bought from high-end bakeries. Why? Because the garlic butter soak and the cheese pull transform ordinary bread into something extraordinary. I’ve tested this recipe with everything from French bread to baguettes to dinner rolls, and while French bread gives the best structure, I’ll show you how to make it work with whatever you have in your pantry.
This isn’t just a side dish. It’s an experience. It’s the dish that makes you look like a host who has their life together, even if you’re wearing sweatpants and making it at 6 PM on a Tuesday. It’s crispy on the outside, soft on the inside, and loaded with enough garlic and cheese to make anyone question their life choices. Let’s get into it.
Why You’ll Love This Recipe
I’ve been making these cheesy garlic pull-apart rolls for years, and they remain my secret weapon for impressing guests without spending hours in the kitchen. Here’s why they’ve earned a permanent spot in my rotation:
- Zero Stress, Maximum Impact — Seriously, if you can spread butter, you can make this. I’ve made this while on speakerphone with my mom, and it turned out perfect. The prep is literally just slicing and twisting. No kneading, no rising, no waiting.
- Insanely Addictive Flavor — It’s the holy trinity: butter, garlic, and cheese. But it’s not just one-dimensional. The herbs add a fresh note, and the garlic gets slightly caramelized in the butter, creating this deep, savory richness that hits you every time. It’s like a garlic knot had a baby with a cheese pull.
- Perfect for Crowds — Need to feed 10 people? This feeds 10 people. Need to feed 2? It feeds 2 people with enough leftovers for breakfast. It scales up beautifully. I’ve made three loaves at once for a party of 30, and they vanished in minutes.
- Texture Nirvana — There’s nothing worse than dry bread. These rolls stay moist because of the butter soak, but the tops get this incredible crispy, golden crust. The contrast between the soft, cheesy interior and the crisp exterior is what keeps people coming back.
- Make-Ahead Friendly — You can assemble these the night before, cover them, and bake them straight from the fridge. This is a lifesaver when you’re hosting a big dinner and want to spend time with your guests, not your oven. I often prep these while getting the main course ready.
Real talk: These rolls have saved me more times than I can count. They’re my go-to when I need to bring something to a neighbor’s house, when I’m hosting a game night, or when I just need to treat myself to something warm and cheesy. They’re comforting, they’re indulgent, and they’re ridiculously easy.
Ingredients You’ll Need
Here’s the best part: you probably have most of this already. It’s pantry staples and fridge basics. I’m particular about the garlic and cheese, though. Don’t cut corners there.
For the Bread Base
French bread or baguette (1 large loaf, about 16-20 inches) — This is the standard. I like a slightly stale loaf because it absorbs the butter better without falling apart. Fresh bread works too, but it might get a bit mushy. If you can’t find a long loaf, two smaller baguettes work fine.
For the Garlic Butter Sauce
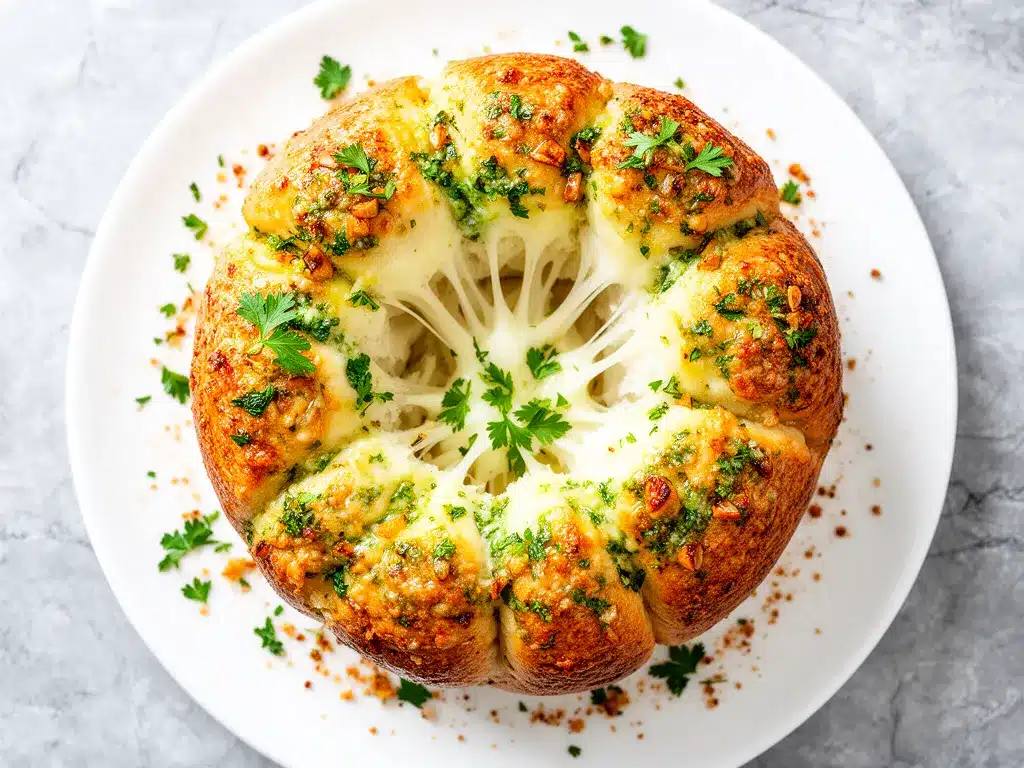
Unsalted butter (½ cup / 115g) — Room temperature is best for mixing. I use unsalted so I can control the sodium. If you only have salted, reduce the added salt in the recipe.
Garlic (6-8 cloves, minced) — Yes, that many. Fresh garlic is non-negotiable here. Jarred garlic has a weird metallic aftertaste that ruins the delicate butter flavor. Minced fine so it distributes evenly. If you’re worried about it burning, don’t be—the butter protects it.
Italian seasoning (2 tablespoons) — Or a mix of dried parsley, oregano, and basil. Dried herbs work better here because they toast in the butter. Fresh herbs will wilt and turn brown, which looks unappetizing.
Parsley (2 tablespoons, dried) — Adds color and a fresh, grassy note. Don’t skip this. It brightens up the rich butter.
Garlic powder (1 teaspoon) — For that extra punch of garlic flavor that lingers. Fresh garlic plus garlic powder is the combo that makes people ask for seconds.
Granulated sugar (1 teaspoon) — This is the secret weapon. It helps the tops get that golden, slightly caramelized crust. It also balances the saltiness of the cheese.
Salt (½ teaspoon) — Adjust based on your butter and cheese saltiness.
For the Cheese
Shredded mozzarella (2 cups / 200g) — Low-moisture mozzarella is key. The kind in the bag works perfectly. Fresh mozzarella has too much water and will make the bread soggy. Trust me.
Shredded Parmesan (½ cup / 50g) — Grate your own if you can. It melts better and has a sharper flavor. Pre-grated Parmesan has anti-caking agents that prevent good melting.
Optional Add-Ins
Cooked bacon bits (½ cup) — If you’re a bacon lover, sprinkle this in between the layers. It adds a smoky crunch that pairs perfectly with the garlic.
Chopped green onions (2-3) — For a fresh, sharp bite. Add these after baking so they stay bright green.
Red pepper flakes (½ teaspoon) — For a little heat. Not everyone likes it, but it’s a great option for spicy food fans.
Equipment Needed
You don’t need fancy equipment for this. Here’s what I actually use:
Baking sheet — I use a standard half-sheet pan. Line it with parchment paper for easy cleanup. The cheese will drip and stick, so parchment is your friend.
Small saucepan or microwave-safe bowl — For melting the butter. I prefer the microwave for speed, but a saucepan gives you more control. Either works.
Small bowl — For mixing the garlic butter sauce.
Sharp knife — A serrated bread knife is ideal for slicing the loaf. A regular chef’s knife works if you’re careful.
Pastry brush — Optional, but helpful for brushing the tops with extra butter after baking for extra shine.
Aluminum foil — To cover the rolls if they start browning too quickly in the oven.
Grater — If you’re grating your own Parmesan. Box grater works fine.
How to Make It: Step-by-Step
Alright, let’s make this! I’m walking you through exactly how I do it, including the little tricks I’ve picked up over the years.
Step 1: Prep Your Oven and Pan (5 minutes)
Preheat your oven to 375°F (190°C). Line a baking sheet with parchment paper. This is crucial because the cheese will bubble over and stick to the pan. Parchment paper saves you from scrubbing later. I learned this the hard way with a burnt cheese disaster.
Step 2: Make the Garlic Butter Sauce (5 minutes)
Melt the butter in a microwave-safe bowl or small saucepan. Once melted, whisk in the minced garlic, Italian seasoning, dried parsley, garlic powder, sugar, and salt. Stir until well combined. The mixture should look like a fragrant, yellow paste. Taste it (carefully, it’s hot) and adjust salt if needed. It should smell amazing. If it doesn’t smell good now, it won’t taste good later.
Step 3: Slice the Bread (5 minutes)
Take your French bread loaf. Do not cut all the way through! Slice it horizontally, leaving about an inch of the bottom intact so the loaf stays connected. Then, slice vertically every 1-1.5 inches, again not cutting all the way through. You should end up with a grid-like pattern, but the loaf is still one piece. Think of it like a tic-tac-toe board on top of a connected loaf. This creates the “pull-apart” sections.
Step 4: Soak the Bread (5 minutes)
Place the sliced loaf on the prepared baking sheet. Using a pastry brush or your fingers, generously brush the garlic butter mixture into all the cuts and over the top. Get into every nook and cranny. You want every piece of bread to be coated. Don’t be shy with the butter. If you have leftover butter, brush the very top of the loaf. This is what creates that crispy, flavorful crust.
Step 5: Add the Cheese (2 minutes)
Open up the slices slightly and sprinkle a generous amount of mozzarella and Parmesan cheese into each cut. Then, sprinkle the remaining cheese over the top of the loaf. Use about 2/3 of the mozzarella now, and save the rest for later if you want a double-cheese layer. The cheese should be visible in every gap.
Step 6: Bake (15-20 minutes)
Place the baking sheet in the preheated oven. Bake for 15-20 minutes, or until the cheese is melted, bubbly, and starting to brown in spots. The bread should be golden and crispy on the outside. If the tops are browning too fast but the cheese isn’t melted yet, cover loosely with aluminum foil.
Step 7: Finish and Serve
Remove from the oven. If you have extra butter, brush the tops again for extra shine. Sprinkle with fresh parsley if using. Let it cool for 5 minutes so the cheese sets slightly (otherwise it’s just molten lava). Then, pull it apart and serve immediately. The steam rising from the cheese is part of the experience.
Expert Tips & Tricks
Here’s everything I’ve learned from making this dozens of times. These tips will save you from my mistakes.
Use Stale Bread — Fresh bread is too soft and will get soggy. Stale bread (or bread left out overnight) absorbs the butter better and stays crispier. If your bread is fresh, toast it in the oven for 5 minutes before assembling to dry it out slightly.
Don’t Skimp on Garlic — This is garlic bread, after all. Six cloves is the minimum. If you love garlic, go to 8 or 10. The butter mellows it out, so you won’t get garlic breath, but you’ll get that rich flavor.
Grate Your Own Cheese — Pre-shredded cheese has cellulose to prevent clumping, which stops it from melting smoothly. Buy blocks and grate them yourself. It takes 2 minutes and makes a huge difference in texture.
Low-Moisture Mozzarella — Again, this is important. Fresh mozzarella has high water content and will make your bread soggy. Low-moisture mozzarella melts beautifully without adding extra liquid.
Brush the Top — Many people forget to brush the very top of the loaf with butter. This is what gives you that golden, crispy crust. Without it, the top stays pale and soft.
Cover if Browning Too Fast — Ovens vary. If your cheese is browning before the bread is heated through, cover with foil. You can always put it back in uncovered for a minute to crisp up.
Make-Ahead Strategy — Assemble everything up to 24 hours in advance. Cover tightly with plastic wrap and refrigerate. Bake straight from the fridge, adding 5-10 minutes to the cook time. This is perfect for dinner parties.
Variations & Substitutions
Once you’ve nailed the basic version, here’s how you can mix it up. I’ve tried all of these.
Jalapeño Popper Version — Add diced jalapeños and cream cheese to the filling. Top with cheddar. This is spicy, creamy, and incredible. Great for game day.
Bacon Ranch — Add cooked bacon bits and dried ranch seasoning to the butter mix. Top with cheddar and mozzarella. This is a crowd-pleaser for kids and adults alike.
Spinach and Artichoke — Add chopped spinach and marinated artichoke hearts to the filling. Top with mozzarella and Parmesan. Tastes like the dip, but as a bread.
Herb Butter Only — Skip the cheese for a lighter option. Use extra herbs in the butter. Serve with marinara sauce for dipping.
Gluten-Free — Use a gluten-free French bread loaf. The technique is the same. Note that GF bread can be more delicate, so handle gently.
Dairy-Free — Use dairy-free butter and dairy-free cheese shreds. Many brands have melted well in my tests. Top with nutritional yeast for a cheesy flavor.
Serving & Storage
How to Serve: Serve warm, pulled apart. It’s great as a side for pasta, grilled meats, or salads. I also serve it with cheesy broccoli and chicken fritters for a full meal. It’s also amazing with soup or chili.
Storage: Store leftovers in an airtight container at room temperature for up to 2 days. The bread will soften, so reheat in the oven at 350°F for 10 minutes to crisp it up. Avoid the microwave, as it makes the bread chewy.
Freezing: You can freeze unbaked assembled rolls. Wrap tightly in plastic and foil, then freeze. Bake from frozen, adding 10-15 minutes to the cook time. Do not freeze baked rolls, as the texture suffers.
Nutrition Information
I’m not a nutritionist, but here’s the breakdown if you’re tracking. Note that this is per roll, assuming 12 rolls from one loaf.
- Calories: 280
- Protein: 10g
- Carbs: 30g
- Fiber: 1g
- Sugar: 2g
- Fat: 14g
- Saturated Fat: 7g
- Cholesterol: 30mg
- Sodium: 450mg
Look, this is comfort food with butter and cheese. It’s not a diet recipe. But it’s way better than takeout, costs less, and I know exactly what’s in it. When I want to make it lighter, I use less butter and less cheese, but usually? I just eat one or two and enjoy it.
Final Thoughts
So that’s my go-to cheesy garlic pull-apart bread rolls! I’ve probably talked your ear off at this point, but when you make a recipe this often, you have a lot to say about it. These rolls have saved weeknight dinners more times than I can count. They’re my answer to “what’s for dinner” when I’m tired, don’t want takeout, and still want something that tastes really good. My kids are happy, my husband’s happy, and I’m happy because I’m not stressed about cooking.
Make it yours! Try different add-ins, swap in your favorite vegetables, adjust the garlic (though more is always better in my opinion). The best recipes are the ones you adapt to your family’s tastes.
If you make this, drop a comment and let me know what you think! I love hearing how recipes turn out in your kitchen. And if something doesn’t work, tell me that too—I’m here to help troubleshoot.
Happy cooking! And I hope your kitchen smells half as good as mine does right now.
Frequently Asked Questions
Can I use baguettes instead of French bread?
Absolutely. Baguettes work great. You might need two smaller loaves instead of one large one. The slicing technique is the same. Just be careful, as baguettes can be crustier and harder to slice.
Why did my bread get soggy?
This usually happens if you use fresh, soft bread that absorbs too much butter, or if you use fresh mozzarella with high water content. Use stale bread and low-moisture mozzarella. Also, make sure you’re not drowning the bread in butter—just enough to coat it.
Can I make this ahead of time?
Yes! Assemble everything up to 24 hours in advance. Cover tightly and refrigerate. Bake straight from the fridge, adding 5-10 minutes to the cook time. This is perfect for dinner parties.
Why did my cheese separate or look oily?
This happens if the oven temperature is too high, causing the cheese to melt too fast and release its fats. Bake at 375°F, not higher. Also, avoid using pre-shredded cheese with anti-caking agents, as they can interfere with melting.
Can I freeze these?
You can freeze unbaked assembled rolls. Wrap tightly in plastic and foil, then freeze. Bake from frozen, adding 10-15 minutes to the cook time. Do not freeze baked rolls, as the texture suffers.
How do I reheat leftovers?
Reheat in the oven at 350°F for 10 minutes to crisp it up. Avoid the microwave, as it makes the bread chewy. If you must use the microwave, do it in short bursts and cover with a damp paper towel.
Can I use fresh herbs instead of dried?
You can, but dried herbs work better in the butter mixture because they toast and release flavor. If you use fresh herbs, chop them finely and add them after baking to keep them bright green. Dried parsley is best for the butter mix.
Pin This Recipe!
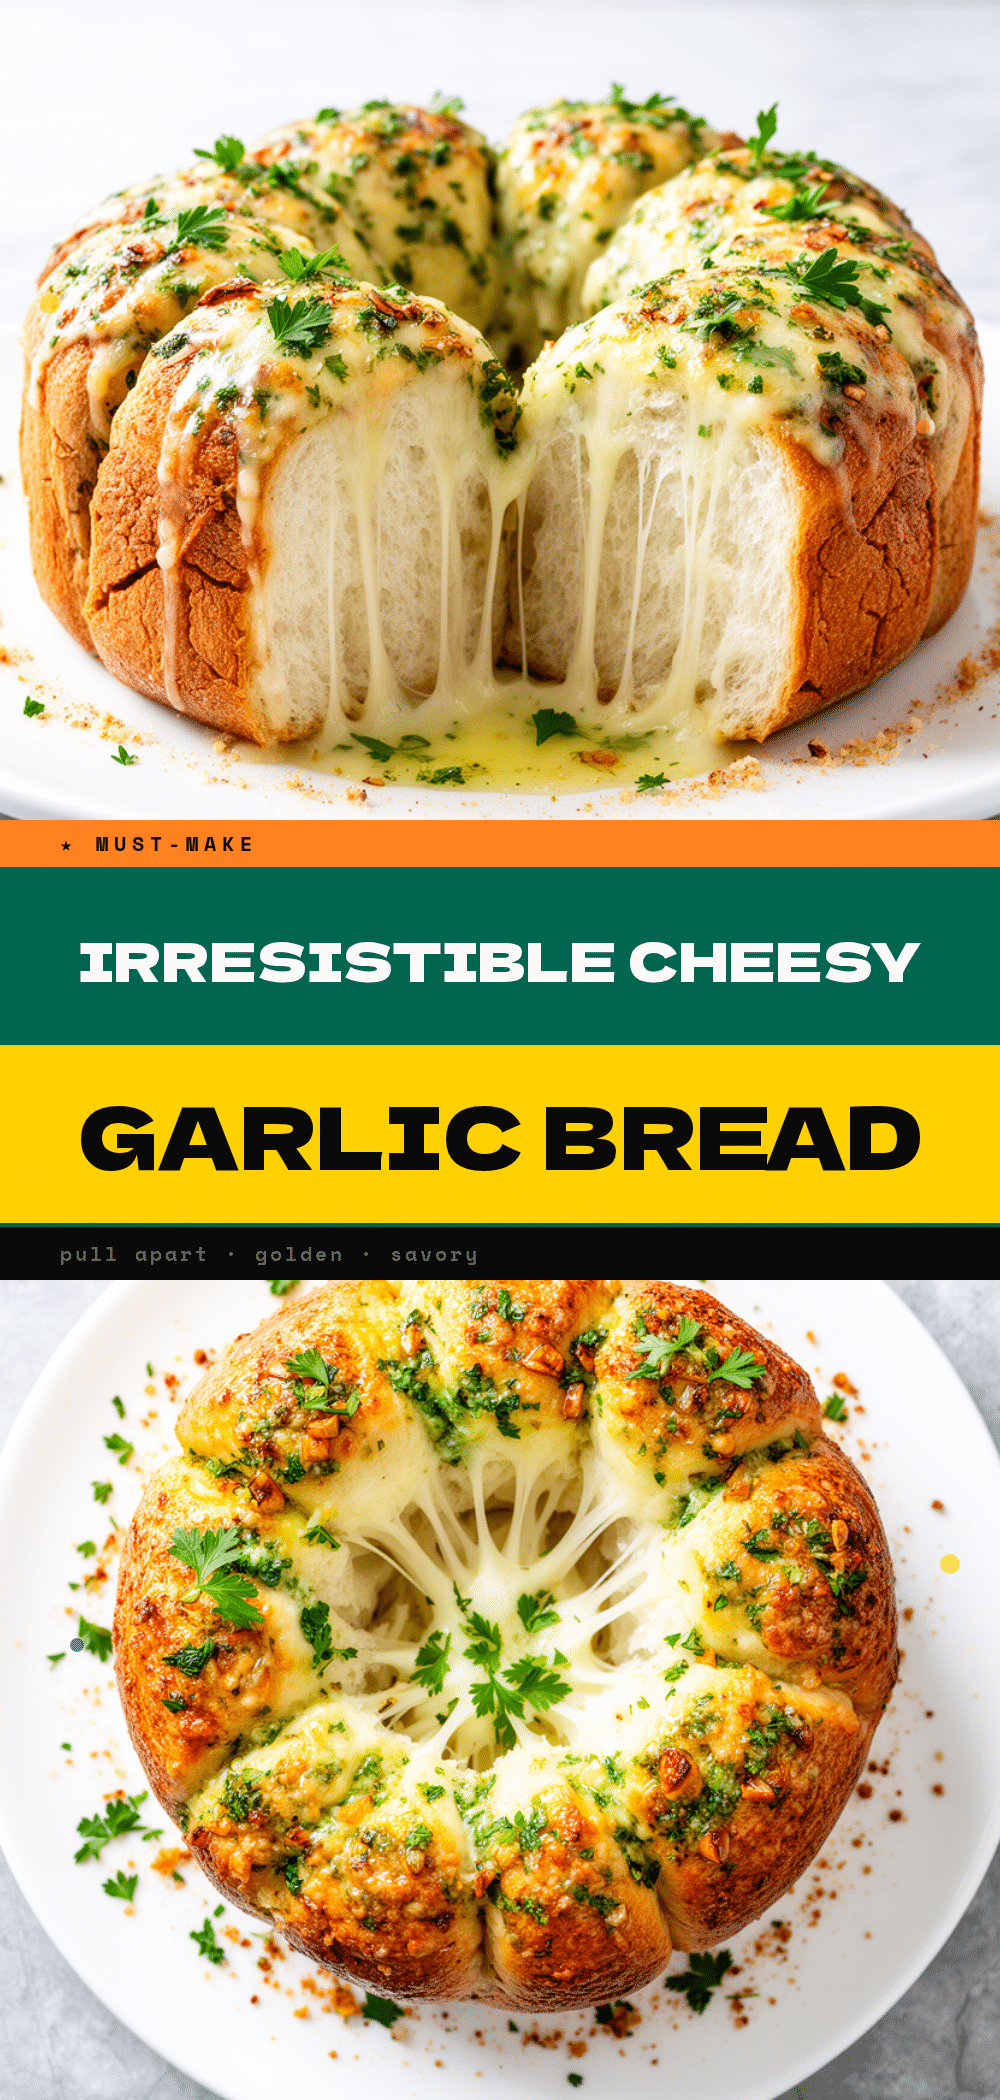
Cheesy Garlic Pull-Apart Bread Rolls
- Total Time: 35 minutes
- Yield: 12 servings 1x
Description
These easy, store-bought bread rolls are soaked in a rich garlic butter sauce and loaded with melted mozzarella and Parmesan cheese. Crispy on the outside, soft on the inside, and perfect for sharing.
Ingredients
- 1 large loaf French bread or baguette (16–20 inches, slightly stale)
- 1/2 cup unsalted butter (room temperature)
- 6–8 cloves garlic (minced)
- 2 tablespoons Italian seasoning
- 2 tablespoons dried parsley
- 1 teaspoon garlic powder
- 1 teaspoon granulated sugar
- 1/2 teaspoon salt
- 2 cups shredded low-moisture mozzarella cheese
- 1/2 cup shredded Parmesan cheese
- Optional: 1/2 cup cooked bacon bits
- Optional: 2-3 chopped green onions
- Optional: 1/2 teaspoon red pepper flakes
Instructions
- Preheat oven to 375°F (190°C). Line a baking sheet with parchment paper.
- Melt butter in a microwave-safe bowl or small saucepan. Whisk in minced garlic, Italian seasoning, dried parsley, garlic powder, sugar, and salt until combined.
- Slice the French bread loaf horizontally, leaving about an inch of the bottom intact. Then slice vertically every 1-1.5 inches, not cutting all the way through, to create a grid pattern.
- Place the sliced loaf on the prepared baking sheet. Generously brush the garlic butter mixture into all cuts and over the top of the loaf.
- Open slices slightly and sprinkle mozzarella and Parmesan cheese into each cut. Sprinkle remaining cheese over the top.
- Bake for 15-20 minutes until cheese is melted, bubbly, and bread is golden and crispy. Cover with foil if browning too quickly.
- Remove from oven and brush with extra butter if desired. Let cool for 5 minutes before pulling apart and serving.
Notes
Use stale bread for better texture as it absorbs butter without getting soggy. Use low-moisture mozzarella to prevent sogginess. Grate your own Parmesan for better melting. Can be assembled up to 24 hours in advance and refrigerated before baking. Do not freeze baked rolls.
- Prep Time: 15 minutes
- Cook Time: 20 minutes
- Category: Side Dish
- Cuisine: American
Nutrition
- Serving Size: 1 roll
- Calories: 280
- Sugar: 2
- Sodium: 450
- Fat: 14
- Saturated Fat: 7
- Carbohydrates: 30
- Fiber: 1
- Protein: 10
Keywords: garlic bread, pull-apart bread, cheesy bread, side dish, easy recipe, party food, garlic butter, mozzarella, baguette



