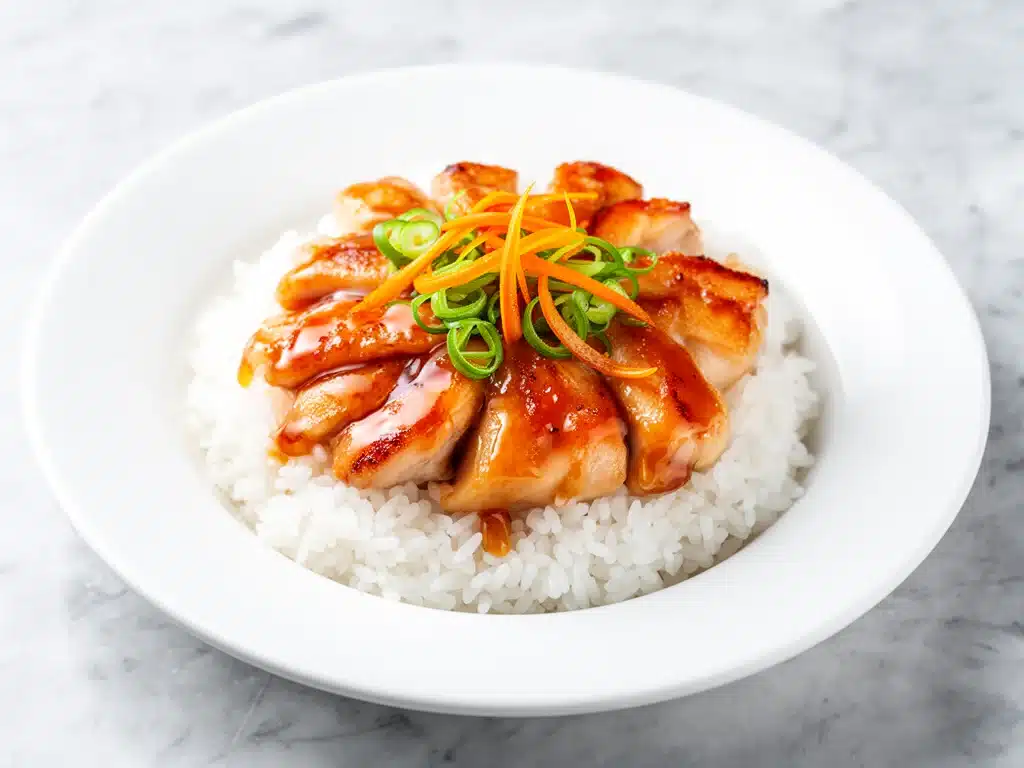
There was a Tuesday evening last autumn when I was so exhausted I considered eating cereal for dinner. Again. I had just come home from a work trip, my suitcase was still half-unpacked in the hallway, and the thought of chopping vegetables or standing over a hot stove felt like climbing Mount Everest. My stomach was growling, but my brain was screaming “easy.”
Then I remembered the leftover chicken in the fridge and a bottle of teriyaki sauce I’d bought on impulse at the Asian market three weeks ago and forgotten about until now. I didn’t have time to order Uber Eats, and I definitely didn’t have the energy for a complex recipe. So I threw together what I thought would be a mediocre, sad-looking dinner. I pan-seared some chicken, poured on the sauce, and dumped it over rice.
Twenty minutes later, I was sitting on my couch, fork in hand, with a bowl that was honestly better than most takeout I’ve paid $20 for. It was sweet, savory, glossy, and incredibly comforting. That night, I realized I didn’t need to be a professional chef to have restaurant-quality meals at home. I just needed the right combination of simple ingredients and a little bit of technique.
That accidental dinner turned into a habit. Within a month, Japanese Chicken Teriyaki Donburi Bowls became my go-to rescue plan for those “I can’t even” nights. It’s my answer to the endless “what’s for dinner?” loop. And honestly? It’s saved my weeknight sanity more times than I can count. My family loves it, my neighbors ask for the recipe, and I love that I can make it from scratch in under 30 minutes.
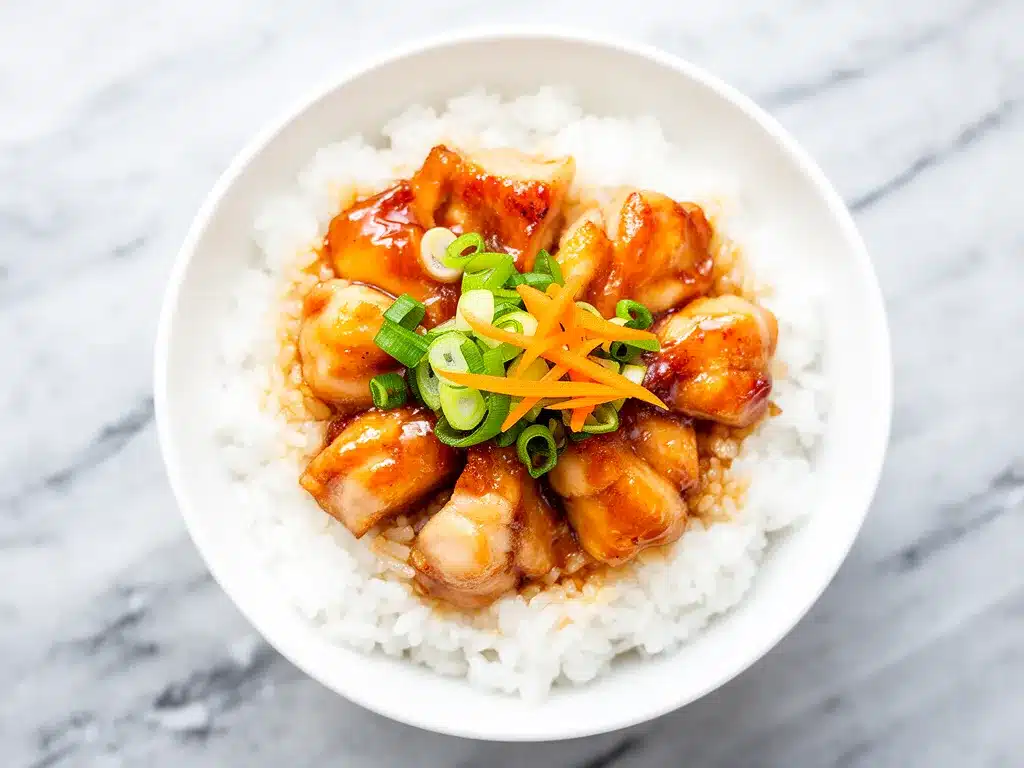
Here’s the thing about donburi bowls: they’re not just food; they’re a hug in a bowl. The glossy sauce clinging to tender chicken, the fluffy rice, the bright pop of green onions—it’s visual comfort food. And the best part? You don’t need to go to a Japanese restaurant to get it. You can make it in your own kitchen, using ingredients you probably already have or can grab on the way home.
Why You’ll Love This Chicken Teriyaki Donburi Recipe
Once you try making teriyaki from scratch, you’ll never look at the bottled stuff the same way. This recipe has completely changed our weeknight dinner routine, and here’s exactly why it works so well for busy people.
- Lightning Fast — Seriously, this is a 30-minute meal from start to finish. I’ve timed it. The chicken cooks in 10 minutes, the sauce takes 5, and the rice? Well, you can use a rice cooker or instant pot, but even stovetop rice is manageable. I make this on nights when I walk through the door at 6:30 pm and need dinner on the table by 7:15.
- Pantry-Friendly Sauces — You don’t need a trip to a specialty store. The classic teriyaki sauce is just soy sauce, sugar, mirin, and ginger. If you don’t have mirin, I’ll show you a hack. Most of these ingredients are staples for anyone who cooks regularly. I keep soy sauce and sesame oil stocked at all times.
- Customizable Proteins — While chicken thighs are my absolute favorite for this, you can use breast meat, shrimp, or even tofu. I’ve made this with leftover rotisserie chicken when I’m being extra lazy, and it still tastes incredible. It’s flexible enough to work with whatever you have.
- Better Than Takeout — I’m not being dramatic. The sauce is fresher, less sugary, and you control the sodium. Plus, you can add fresh veggies like steamed broccoli or edamame right into the bowl. It feels healthier because it actually is, but it tastes just as indulgent.
- Makes Amazing Leftovers — This is one of those meals that’s great for meal prep. The chicken stays moist in the fridge for up to 4 days, and the sauce keeps the rice from drying out. I deliberately make a double batch on Sundays so I have lunch sorted for the week.
- Family-Approved — My kids, who usually pick at their food, devour this. The sweet-savory flavor profile is a hit with picky eaters, and the rice bowl format lets them customize their own toppings. It’s a win-win for parents and kids.
This is my go-to when I need dinner to just work. No complicated techniques, no weird ingredients, just reliable, delicious food that makes everyone happy. It’s the kind of meal that leaves you feeling satisfied without being heavy, and that’s rare on a busy weeknight.
Ingredients You’ll Need for Perfect Donburi
Here’s the best part: you probably have most of this already. The beauty of Japanese home cooking is its simplicity. I’m particular about a few ingredients here, and I’ll tell you exactly why they matter.
For the Chicken
Chicken thighs (1.5 lbs / 680g, boneless, skinless) — I always use thighs. They stay juicy and don’t dry out like breast meat does when you cook them quickly. If you must use breast, cut it into smaller, even pieces so it cooks fast. Look for plump thighs without too much visible fat.
Salt and black pepper — Just a pinch of each to season the chicken before searing. Don’t skip this; it builds the base flavor.
Neutral oil (1 tablespoon) — I use avocado or vegetable oil. Olive oil has too strong a flavor for this, and butter burns too easily at high heat.
For the Homemade Teriyaki Sauce
Soy sauce (½ cup / 120ml) — Use low-sodium if you can. It gives you control over the saltiness. I love Kikkoman, but any good quality soy sauce works. Avoid the “seasoned” soy sauces that have added sugar; we’re adding our own.
Mirin (¼ cup / 60ml) — This is sweet rice wine. It adds that authentic glossy shine and subtle sweetness. If you can’t find it, mix 2 tablespoons of white wine or dry sherry with 2 tablespoons of water and a teaspoon of sugar. It’s not perfect, but it’s a decent substitute.
Sake (¼ cup / 60ml) — Japanese rice wine. It removes any gaminess from the chicken and adds depth. If you don’t have sake, use dry sherry or just extra mirin. I keep a small bottle in my fridge for cooking.
Sugar (2 tablespoons / 25g) — White sugar is traditional. Brown sugar works too but will make the sauce darker and slightly more molasses-forward. I stick to white for that clean, sweet balance.
Fresh ginger (1 tablespoon, grated) — Yes, fresh. Grated ginger adds a bright, zesty kick that powdered just can’t match. Peel it and grate it on the fine side of your box grater. If you’re in a huge rush, you can use 1 teaspoon of paste, but fresh is better.
Garlic (1 clove, minced) — Just one. Don’t overdo it. We want the ginger and soy to shine.
For the Bowl Assembly
Short-grain Japanese rice (2 cups dry / 400g) — This is crucial. Short-grain rice is sticky and slightly sweet, perfect for bowls. Long-grain rice like Basmati or Jasmine is too fluffy and won’t hold the sauce the same way. I use Koshihikari or similar brands.
Green onions (2-3 stalks, thinly sliced) — For garnish. They add color, crunch, and a fresh onion bite that cuts through the richness.
Sesame seeds (1 tablespoon, toasted) — Adds nuttiness and visual appeal. Toast them in a dry pan for 2 minutes until golden. It’s a small step that makes a big difference.
Optional Veggies — Steamed broccoli, edamame, or pickled ginger (gari) are classic additions. I love adding a soft-boiled egg on top for extra protein and richness.
Equipment Needed
You don’t need fancy equipment for this. Here’s what I actually use.
- Large skillet or wok — 12-inch is ideal. I prefer a stainless steel skillet because it gives a good sear on the chicken. Cast iron works too, but non-stick is easier for cleanup.
- Rice cooker or medium pot — For cooking the rice. A rice cooker is hands-off and consistent, but a pot with a tight lid works fine.
- Sharp knife and cutting board — For slicing the chicken and green onions. A dull knife makes chicken slicing difficult and unsafe.
- Small saucepan — For simmering the teriyaki sauce. A small one prevents boiling over.
- Box grater — For the fresh ginger. Microplane works great too.
- Spatula and wooden spoon — For stirring the sauce and flipping the chicken.
Don’t have a rice cooker? No problem. Any pot with a tight-fitting lid will do. I’m obsessed with my garlic press, but for this recipe, mincing one clove by hand is quick and easy.
How to Make It: Step-by-Step
Alright, let’s make this! I’m walking you through exactly how I do it, including the little tricks I’ve picked up over years of making this.
Step 1: Cook the Rice (Start First!)
Start your rice before you touch the chicken. Rinse 2 cups of short-grain Japanese rice under cold water until the water runs clear. This removes excess starch and prevents gummy rice. Add it to your rice cooker or pot with 2¼ cups of water. Cook according to your appliance’s instructions. Once done, let it sit covered for 10 minutes to steam. Fluff it with a fork or rice paddle before serving.
Step 2: Make the Teriyaki Sauce
In a small saucepan, combine ½ cup soy sauce, ¼ cup mirin, ¼ cup sake, 2 tablespoons sugar, 1 tablespoon grated ginger, and 1 minced garlic clove. Whisk it all together over medium heat. Bring it to a gentle simmer, then reduce the heat to low. Let it cook for about 5-7 minutes, stirring occasionally, until it thickens slightly and becomes glossy. It should coat the back of a spoon. Remove from heat and set aside. You’ll have about ¾ cup of sauce.
Step 3: Prep the Chicken
Pat the chicken thighs dry with paper towels. Moisture is the enemy of a good sear. Season both sides with salt and black pepper. If the thighs are very thick, pound them slightly to an even ½-inch thickness so they cook uniformly. Slice them into bite-sized strips or keep them whole, depending on your preference.
Step 4: Sear the Chicken
Heat 1 tablespoon of neutral oil in your large skillet over medium-high heat. Once the oil shimmers, add the chicken in a single layer. Don’t crowd the pan; cook in batches if necessary. Sear for 3-4 minutes per side until golden brown and cooked through (internal temp of 165°F / 74°C). You want a nice crust on the outside. Remove chicken from the pan and set aside on a plate.
Step 5: Glaze the Chicken
Reduce the heat to medium-low. Pour the prepared teriyaki sauce into the same skillet (don’t clean it; those browned bits are flavor gold). Let it bubble for 30 seconds. Return the chicken to the pan, tossing to coat it evenly in the sauce. Let it cook for another 1-2 minutes, spooning the sauce over the chicken repeatedly. The sauce will cling to the meat and become sticky and glossy. This is the magic moment.
Step 6: Assemble the Bowl
Place a generous scoop of steaming rice in a wide bowl. Top with the glazed chicken. Drizzle any remaining sauce from the pan over the top. Garnish with thinly sliced green onions and toasted sesame seeds. Add steamed broccoli or a soft-boiled egg if you like. Serve immediately while hot.
Total Time: About 30 minutes (10 minutes active for chicken, 20 minutes mostly hands-off for rice and sauce).
Expert Tips & Tricks for Success
Here’s everything I’ve learned from making this dozens of times. These tips will save you from my mistakes.
Don’t Skip the Rice Rinse
I know it’s an extra step, but rinsing the rice until the water is clear is non-negotiable for that perfect, fluffy texture. Unrinsed rice is sticky and gummy, which ruins the bowl experience. I keep a mesh strainer over my sink specifically for this.
High Heat for the Sear
Get your pan good and hot before adding the chicken. If the pan isn’t hot enough, the chicken will steam instead of sear, and you won’t get that delicious brown crust. I wait until I see slight wisps of smoke before adding the oil.
Reduce the Sauce Properly
Don’t rush the sauce reduction. If it’s too thin, it won’t cling to the chicken. If it’s too thick, it’ll be syrupy. Aim for a consistency similar to maple syrup. If it gets too thick, add a splash of water. If it’s too thin, let it simmer longer.
Toast Your Sesame Seeds
This is such a small thing, but it elevates the dish. Raw sesame seeds are bland. Toasting them in a dry pan for 2-3 minutes releases their oils and adds a nutty aroma. It’s the difference between “good” and “restaurant-quality.”
Use Leftover Rice?
Leftover rice is actually better for fried rice, but for donburi, fresh is best. If you must use leftover rice, sprinkle it with a little water and microwave it for 1-2 minutes to rehydrate it before serving. Cold rice is hard and unpleasant in a warm bowl.
Variations & Substitutions
Once you’ve nailed the basic version, here’s how you can mix it up. I’ve tried all of these.
Chicken Breast Version
Use boneless, skinless chicken breasts instead of thighs. They’re leaner but drier. Cut them into smaller, uniform pieces and cook them quickly. Don’t overcook! Remove them from the pan as soon as they’re done to keep them moist.
Shrimp Teriyaki
Swap the chicken for 1 lb of large shrimp, peeled and deveined. Shrimp cooks in 2-3 minutes. Toss them in the sauce at the very end just to coat. It’s lighter and faster.
Vegetarian Tofu Bowl
Use extra-firm tofu, pressed and cubed. Pan-fry the tofu until crispy on all sides, then toss in the sauce. Add steamed broccoli and edamame for a hearty veggie bowl. It’s surprisingly satisfying.
Spicy Teriyaki
Add 1 teaspoon of sriracha or chili flakes to the sauce while it simmers. It adds a nice kick that balances the sweetness. Great if you like some heat with your comfort food.
Gluten-Free Option
Use tamari instead of soy sauce. Everything else is naturally gluten-free. Just check your mirin and sake labels to ensure they’re gluten-free (some contain wheat).
Serving & Storage
How to Serve
I usually serve this straight from the skillet at the dinner table—it looks rustic and stays warm. But here are other ways I’ve enjoyed it:
- Side Dishes — Steamed broccoli with a squeeze of lemon, edamame with sea salt, or a simple cucumber salad with rice vinegar. I also love adding a side of cheesy broccoli and chicken fritters for a fun twist on the veggie component.
- Toppings Bar — When I have guests, I put out: extra green onions, sesame seeds, pickled ginger, sriracha, and soft-boiled eggs. Everyone customizes their bowl.
- Drink Pairing — Iced green tea or a light lager beer works great with this. It’s refreshing and cuts through the richness.
Storage Instructions
Refrigerator: Store the cooked chicken and sauce in an airtight container for up to 3 days. Keep the rice separate if possible, as it absorbs the sauce and can get soggy. The chicken stays moist in the sauce.
Reheating: Best method: Add the chicken and sauce to a skillet with a splash of water over low heat. Stir until heated through. For rice, microwave it with a damp paper towel over it for 1 minute to rehydrate. Never microwave the chicken and sauce together in a bowl without liquid—it will dry out.
Freezing: This doesn’t freeze well. The rice becomes grainy and hard upon thawing, and the sauce can separate. Make it fresh or store in the fridge for up to 3 days.
Pro tip: If you’re meal prepping, cook the rice in bulk and store it in portions. Reheat individual bowls with the chicken and sauce on top. It’s a lifesaver for busy mornings.
Nutrition Information
I’m not a nutritionist, but here’s the breakdown if you’re tracking.
Per Serving (based on 4 servings):
- Calories: 450
- Protein: 35g
- Carbs: 50g
- Fiber: 1g
- Sugar: 12g
- Fat: 12g
- Saturated Fat: 3g
- Cholesterol: 85mg
- Sodium: 900mg
What’s Good: High in protein from the chicken. Good source of energy from the rice. You can boost nutrition by adding veggies like broccoli or edamame.
What to Know: Higher in sodium from the soy sauce. Use low-sodium soy sauce to reduce this. Contains gluten (unless using tamari). The sauce has added sugar, so keep portions in mind if you’re watching sugar intake.
My Take: Look, this is comfort food. It’s not a diet recipe. But it’s way better than takeout, costs less, and I know exactly what’s in it. When I want to make it lighter, I use less sauce and add extra vegetables. But usually? I just eat a reasonable portion and enjoy it.
Final Thoughts
So that’s my go-to Japanese Chicken Teriyaki Donburi Bowl! I’ve probably talked your ear off at this point, but when you make a recipe this often, you have a lot to say about it.
This has saved weeknight dinners more times than I can count. It’s my answer to “what’s for dinner” when I’m tired, don’t want takeout, and still want something that tastes really good. My kids are happy, my husband’s happy, and I’m happy because I’m not stressed about cooking.
Make it yours! Try different add-ins, swap in your favorite vegetables, adjust the spice level. The best recipes are the ones you adapt to your family’s tastes. And if you’re looking for other quick weeknight ideas, check out these 10-minute breakfast roll-ups for a sweet start to your day, or this easy bacon ranch pasta salad for a no-cook side dish.
If you make this, drop a comment and let me know what you think! I love hearing how recipes turn out in your kitchen. And if something doesn’t work, tell me that too—I’m here to help troubleshoot.
Happy cooking! And I hope your kitchen smells half as good as mine does right now.
Frequently Asked Questions
Can I use long-grain rice instead of short-grain?
You can, but the texture will be different. Long-grain rice is fluffier and less sticky, so it won’t hold the sauce as well. Short-grain Japanese rice is traditional for donburi because it’s slightly sweet and sticky, creating that perfect bowl experience. If you must use long-grain, consider adding a tiny bit more sauce to compensate.
Why did my sauce turn out too thin?
Usually means you didn’t simmer it long enough. The sauce needs to reduce to coat the back of a spoon. If it’s too thin, return it to the heat and let it bubble for another 2-3 minutes. If it’s too thick, add a splash of water or broth.
Can I make the sauce ahead of time?
Yes! The sauce keeps in the fridge for up to a week. In fact, it tastes better the next day as the flavors meld. Just reheat it gently before using. This is a great time-saver for busy weeknights.
What’s the difference between mirin and sake?
Mirin is sweet rice wine, adding sweetness and gloss. Sake is dry rice wine, adding depth and removing gaminess. They serve different purposes. If you don’t have one, you can substitute with dry sherry (for sake) or a mix of water and sugar (for mirin), but the authentic flavor is best with both.
How do I prevent the chicken from drying out?
Use chicken thighs, which have more fat and stay juicy. Also, don’t overcook them. Cook until just done (165°F / 74°C), and let them rest for a minute before slicing. Overcooking is the #1 cause of dry chicken.
Can I use pre-made teriyaki sauce?
You can, but homemade is so much better. Pre-made sauces are often very sugary and contain preservatives. If you’re in a huge rush, you can use a good quality bottled sauce, but dilute it with a little water if it’s too thick or salty. I recommend making the sauce from scratch whenever possible.
What sides go well with donburi?
Simple sides work best. Steamed broccoli, edamame, cucumber salad, or miso soup are classic pairings. I also love adding a side of cheesy broccoli and chicken fritters for a fun, crispy contrast to the soft rice and tender chicken.
Pin This Recipe!
Japanese Chicken Teriyaki Donburi: Easy 30-Min Weeknight Dinner
- Total Time: 30 minutes
- Yield: 4 servings 1x
Description
A quick and comforting weeknight dinner featuring tender chicken thighs glazed in a homemade sweet and savory teriyaki sauce, served over fluffy short-grain Japanese rice.
Ingredients
- 1.5 lbs boneless, skinless chicken thighs
- Salt and black pepper
- 1 tablespoon neutral oil (avocado or vegetable)
- ½ cup soy sauce (low-sodium recommended)
- ¼ cup mirin
- ¼ cup sake
- 2 tablespoons white sugar
- 1 tablespoon fresh ginger, grated
- 1 clove garlic, minced
- 2 cups short-grain Japanese rice
- 2–3 stalks green onions, thinly sliced
- 1 tablespoon sesame seeds, toasted
- Optional: Steamed broccoli, edamame, or soft-boiled egg
Instructions
- Rinse 2 cups of short-grain Japanese rice under cold water until clear. Cook with 2¼ cups water in a rice cooker or pot. Let sit covered for 10 minutes after cooking, then fluff.
- In a small saucepan, combine soy sauce, mirin, sake, sugar, grated ginger, and minced garlic. Whisk and bring to a gentle simmer over medium heat.
- Reduce heat to low and simmer for 5-7 minutes until the sauce thickens slightly and becomes glossy. Remove from heat.
- Pat chicken thighs dry and season with salt and pepper. If thick, pound to even ½-inch thickness.
- Heat neutral oil in a large skillet over medium-high heat. Sear chicken in a single layer for 3-4 minutes per side until golden brown and cooked through (165°F). Remove chicken and set aside.
- Reduce skillet heat to medium-low. Pour teriyaki sauce into the same skillet. Let bubble for 30 seconds.
- Return chicken to the pan, tossing to coat evenly. Cook for 1-2 minutes, spooning sauce over the chicken until sticky and glossy.
- Assemble bowls by placing a generous scoop of rice in a wide bowl. Top with glazed chicken, drizzle with remaining sauce, and garnish with green onions and toasted sesame seeds.
Notes
Rinsing the rice is crucial for preventing gummy texture. Use chicken thighs for juiciness; if using breast, cut into smaller pieces. Toast sesame seeds for better flavor. The sauce can be made ahead and stored in the fridge for up to a week. Do not freeze this dish as the rice texture suffers upon thawing.
- Prep Time: 10 minutes
- Cook Time: 20 minutes
- Category: Main Course
- Cuisine: Japanese
Nutrition
- Serving Size: 1 bowl per serving
- Calories: 450
- Sugar: 12
- Sodium: 900
- Fat: 12
- Saturated Fat: 3
- Carbohydrates: 50
- Fiber: 1
- Protein: 35
Keywords: Japanese Chicken Teriyaki, Donburi, Weeknight Dinner, Easy Recipe, 30 Minute Meal, Rice Bowl, Chicken Thighs, Homemade Teriyaki Sauce



