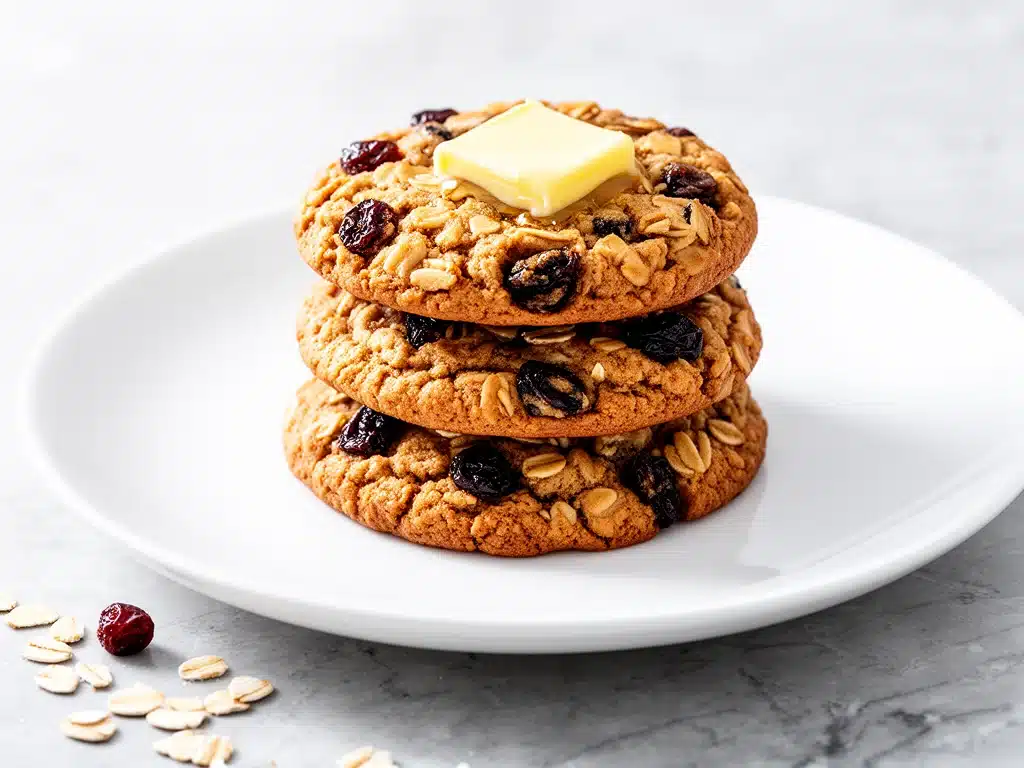
I’ve always had a complicated relationship with oatmeal raisin cookies. For years, they were the cookie I politely ate at church potlucks while hiding the raisins under the napkin, convinced that oatmeal cookies were basically just dessert versions of breakfast cereal. They were usually dry, cakey, and lacking any real soul. Then, about three years ago, I tried a batch at a friend’s house that completely changed my mind. These weren’t the dry, cardboard-like discs I remembered. They were chewy, deeply caramelized, and smelled like a bakery that actually knows what it’s doing. The secret? Brown butter. Once I realized how much flavor you can unlock by just browning the butter, I stopped buying oatmeal raisin cookies altogether. I started making them at home, tweaking the ratio of oats to flour until I hit that perfect sweet spot between cakey and crisp.
This Chewy Brown Butter Oatmeal Raisin Cookies recipe has become my absolute go-to for when I need to impress guests or just want to fill my kitchen with the most comforting smell in the world. It uses simple ingredients you probably already have in your pantry—no fancy flours or weird extracts required. The process is straightforward, but the result is anything but ordinary. I’ve tested this recipe at least fifteen times, adjusting the amount of brown sugar, the type of oats, and the baking time to get that ideal chewy texture that holds together but melts in your mouth. If you’re skeptical about oatmeal raisin, I challenge you to make this batch. I bet you’ll end up hiding them from your family so you can have them all to yourself (which, honestly, happened to me).
What makes these cookies special isn’t just the technique; it’s the simplicity. You don’t need an electric mixer if you don’t want one, and you don’t need to chill the dough for twelve hours (though I do recommend at least thirty minutes for easier handling). It’s a weeknight dessert that feels fancy because of that nutty, toasted butter flavor, but it’s humble enough to be made with basic staples. I’ve served these to my pickiest eaters, including a teenager who claims to hate “healthy” cookies, and they were gone in minutes. That’s the power of good brown butter. It transforms a simple cookie into something worth writing home about.
Why You’ll Love This Recipe
There are a million cookie recipes out there, and I’m not saying this is the only one you’ll ever need. But here’s the thing: this Chewy Brown Butter Oatmeal Raisin Cookies recipe hits a specific note that most others miss. It’s not just sweet; it’s complex. It’s not just chewy; it’s tender. Here’s why I keep coming back to this batch:
- The Brown Butter Factor — This is the game-changer. Browning the butter toasts the milk solids, giving the cookies a deep, nutty, almost butterscotch flavor that regular melted butter just can’t match. It adds a level of sophistication that makes you look like a pro baker, even though it’s super easy. I remember the first time I made this, I tasted the raw brown butter and nearly stopped the recipe right there because it smelled too good to bake.
- Perfectly Chewy Texture — I’ve tried recipes that turn out crisp all the way through, and others that are too cakey. This one lands right in the middle. The edges get slightly crisp, but the center stays soft and chewy. I achieved this by using a higher ratio of brown sugar to white sugar and adding an extra egg yolk, which adds richness and moisture.
- Simple Ingredients — You don’t need to go to a specialty store for this. All-purpose flour, brown butter, rolled oats, raisins (or chocolate chips, if you’re brave), eggs, and sugar. That’s it. It’s pantry-friendly, which means I can throw these together on a random Tuesday night when I’m craving something sweet but don’t want to order takeout.
- Fast Prep Time — Unlike some cookie doughs that need days in the fridge to develop flavor, this one is ready in about 30 minutes if you’re in a rush. The brown butter happens fast, and the dough comes together in a bowl. I’ve made these on a whim after dinner, and they were ready to eat before the dishes were even done.
- Family Approved — My kids love them, my husband loves them, and even my non-baking friends ask for the recipe. I’ve brought these to book clubs, office parties, and casual hangouts, and they’re always the first cookie to disappear. They’re versatile enough to be dressed up with nuts or kept classic, but they’re always delicious.
This recipe has saved me more times than I can count. It’s my answer to “what can I bring to the potluck?” or “what should I bake when I’m stressed?” It’s reliable, it’s delicious, and it makes your kitchen smell like heaven. Once you make these, you’ll never go back to dry, flavorless oatmeal raisin cookies again.
Ingredients You’ll Need
One of the best things about this Chewy Brown Butter Oatmeal Raisin Cookies recipe is how few ingredients you need. I’m not kidding—most of this is stuff you already have. I’m particular about a few things here, mostly because I’ve learned the hard way what makes the difference between a good cookie and a great one. Here’s what you’ll need and why it matters.
For the Brown Butter Base
Unsalted butter (1 cup / 226g) — I always use unsalted so I can control the saltiness. You need a full cup. Don’t try to cut this down, or the texture will suffer. Use high-quality butter if you can find it; the flavor of the browned butter will be front and center.
Light brown sugar (1 cup / 200g) — This is key for chewiness. Dark brown sugar works too and adds a deeper molasses flavor, but light brown sugar gives that classic oatmeal cookie taste. Make sure it’s packed when you measure it.
Granulated white sugar (½ cup / 100g) — This helps with the slight crispness on the edges. It balances the moisture from the brown sugar. I use regular white sugar; no need for anything fancy here.
Large eggs (2 large) — Room temperature eggs incorporate better into the butter mixture. If you’re rushing, just drop them in a bowl of warm water for five minutes. Don’t use small or medium eggs; the recipe is balanced for large ones.
Vanilla extract (2 teaspoons) — Use real vanilla extract, not imitation. It makes a huge difference in the flavor profile. I keep a bottle of Nielsen-Massey on hand because it’s pure and flavorful.
For the Dry Mix
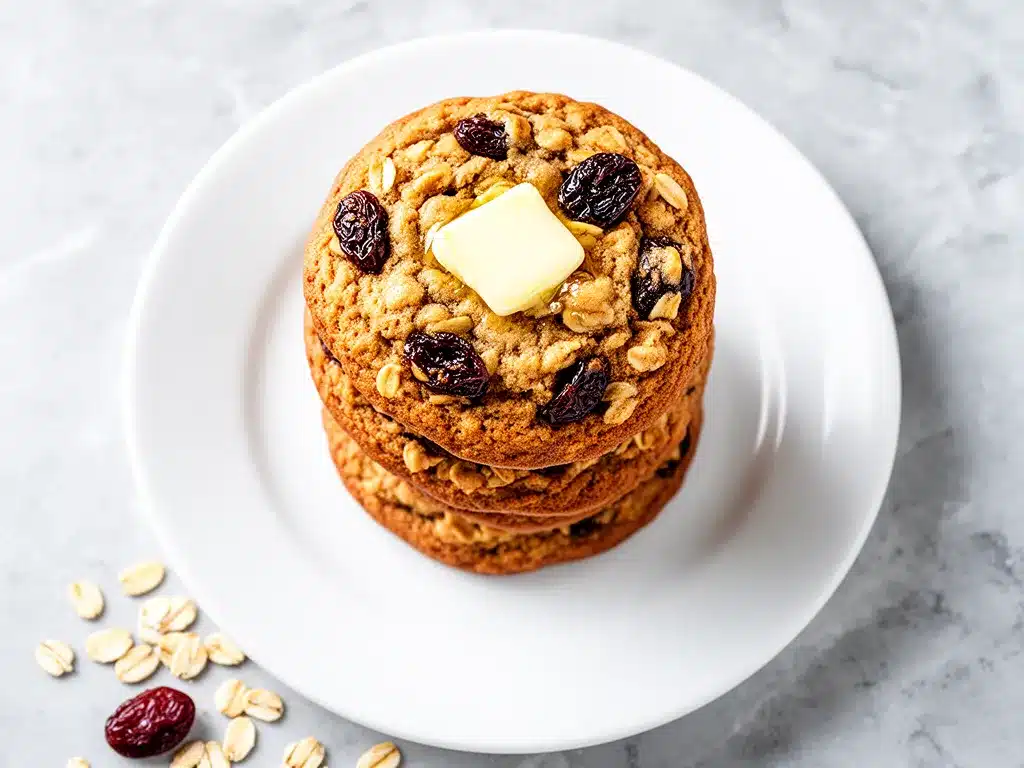
All-purpose flour (2 cups / 250g) — Don’t use cake flour or bread flour. All-purpose gives the right structure. Spoon it into the measuring cup and level it off; don’t scoop it directly from the bag, or you’ll end up with too much flour and dry cookies.
Baking soda (1 teaspoon) — This helps the cookies spread and brown. Make sure it’s fresh; if it’s old, your cookies won’t rise properly. I replace my baking soda every few months.
Baking powder (½ teaspoon) — Just a little bit to give them a bit of lift and tenderness.
Kosher salt (1 teaspoon) — Salt is crucial for flavor. It enhances the sweetness and the nutty butter. Use kosher salt or sea salt; table salt is too fine and can be too salty if you measure it wrong.
Cinnamon (1 teaspoon) — Ground cinnamon adds warmth. I use regular ground cinnamon; it’s classic and works perfectly here.
The Stars of the Show
Rolled oats (3 cups / 270g) — Use old-fashioned rolled oats, not instant or quick oats. Instant oats will turn mushy. Rolled oats give that nice chewy texture and substantial bite. I buy the store brand; there’s no need to spend extra on organic unless you prefer it.
Raisins (1 cup / 140g) — Classic raisins are great, but I sometimes mix in golden raisins for a bit of sweetness. If you’re not a fan of raisins, you can swap them for chocolate chips, but honestly, the tartness of raisins balances the sweet brown sugar perfectly. Soak them in hot water for 10 minutes if you want them plump and juicy.
Optional: Chopped walnuts or pecans (½ cup) — If you like a bit of crunch, add nuts. I usually skip them, but my dad loves them in his cookies. Toast them in a dry pan for 2 minutes before adding for extra flavor.
Equipment Needed
You don’t need fancy gadgets to make these cookies. Here’s what I actually use, and what you can get away with skipping.
Medium saucepan — I use a stainless steel saucepan with a light-colored interior. This helps you see the butter browning without burning it. A non-stick pan works too, but you won’t see the color change as easily.
Whisk — For beating the eggs and sugars. A simple balloon whisk is fine. I use mine for most mixing tasks.
Large mixing bowl — I prefer a glass or ceramic bowl because it’s heavy and doesn’t slide around. A large capacity is important because you’ll be adding a lot of oats.
Wooden spoon or spatula — For mixing the dough. A sturdy spatula works well to scrape the sides. I use a wooden spoon because it doesn’t scratch my bowls.
Baking sheets — I use two large baking sheets. Dark sheets bake faster, so you might need to lower the temperature by 25 degrees if you use them. Light-colored sheets are more forgiving for beginners.
Parchment paper — Line your baking sheets with parchment. It prevents sticking and makes cleanup a breeze. I don’t use silicone mats for these because I like the slight browning on the bottom that parchment allows.
Cooling rack — Essential for cooling the cookies so they don’t continue to cook in the heat of the pan. I have a couple of wire racks that nest together.
Measuring cups and spoons — For dry ingredients, use dry measuring cups. For wet ingredients, use liquid measuring cups. It sounds basic, but it matters for consistency.
How to Make It: Step-by-Step
Alright, let’s make these Chewy Brown Butter Oatmeal Raisin Cookies! I’m walking you through exactly how I do it, including the little tricks I’ve picked up over the years. This process is straightforward, but attention to detail is what makes the difference.
Step 1: Brown the Butter (10 minutes)
Start by melting the butter in your saucepan over medium heat. As it melts, stir it occasionally. Once it’s fully melted, it will start to foam and crackle. Keep stirring! You’re looking for the milk solids at the bottom to turn golden brown. You’ll also notice a nutty aroma, like toasted hazelnuts. This usually takes 5-7 minutes. Don’t walk away! Once it’s brown, immediately pour it into a heatproof bowl to stop the cooking. Let it cool for about 10-15 minutes until it’s still liquid but not hot. If it’s too hot, it will cook the eggs when you add them.
Step 2: Mix the Wet Ingredients (2 minutes)
In your large mixing bowl, combine the cooled brown butter, brown sugar, and white sugar. Whisk vigorously for about 1-2 minutes. You want the mixture to look glossy and slightly emulsified. This step helps dissolve the sugar a bit, which contributes to the chewy texture. Add the eggs one at a time, whisking well after each addition. Stir in the vanilla extract. The mixture should look smooth and creamy.
Step 3: Combine Dry Ingredients (1 minute)
In a separate medium bowl, whisk together the flour, baking soda, baking powder, salt, and cinnamon. This ensures that the leavening agents are evenly distributed, so you don’t get any bitter spots of baking soda in your cookies. Sifting isn’t strictly necessary, but if your flour is lumpy, give it a quick whisk.
Step 4: Bring It All Together (2 minutes)
Gradually add the dry ingredients to the wet ingredients. Mix with a wooden spoon or spatula until just combined. Do not overmix! Once the flour disappears, stop. Overmixing develops gluten, which leads to tough cookies. The dough will look shaggy at first. Add the rolled oats and raisins. Fold them in gently until they are evenly distributed. The dough will be thick and sticky. This is normal.
Step 5: Chill the Dough (30 minutes)
This step is optional but highly recommended. Cover the bowl and refrigerate the dough for at least 30 minutes. Chilling solidifies the fat, which prevents the cookies from spreading too much in the oven. It also allows the flavors to meld. If you’re in a huge rush, you can skip this, but the cookies will be flatter and crispier. I usually chill them while I preheat the oven.
Step 6: Preheat and Scoop (5 minutes)
Preheat your oven to 350°F (175°C). Line two baking sheets with parchment paper. Use a cookie scoop or a tablespoon to portion the dough into balls. I use a 2-tablespoon scoop, which gives me about 24 cookies. Place them on the baking sheets, spacing them about 2 inches apart. They will spread, so give them room. If you’re using nuts, press a few into the top of each ball for a nice look.
Step 7: Bake (10-12 minutes)
Bake for 10-12 minutes. The cookies are done when the edges are golden brown but the centers still look soft and slightly underdone. They will firm up as they cool. If you bake them until the centers are firm, they’ll be crisp all the way through, which isn’t the goal here. Rotate the pans halfway through baking for even browning.
Step 8: Cool (10 minutes)
Let the cookies cool on the baking sheet for 5 minutes. This allows them to set. Then, transfer them to a wire rack to cool completely. If you try to move them too soon, they might break. Resist the urge to eat one hot! They’re delicious warm, but they’re best once they’ve cooled.
Expert Tips & Tricks
Here’s everything I’ve learned from making these cookies dozens of times. These tips will save you from my mistakes.
Watch the Butter Closely — Browning butter is easy to burn. Once you see those brown specks, get the butter out of the pan. The residual heat will continue to cook it. If it smells like burnt toast, you’ve gone too far, and you’ll need to start over. It’s better to be slightly under-browned than over-browned.
Don’t Skimp on Salt — Salt is not just for flavor; it balances the sweetness. I use kosher salt because it’s easier to control. If you use table salt, reduce the amount by half. The saltiness makes the brown butter flavor pop.
Use Old-Fashioned Oats — Instant oats will disintegrate. Rolled oats hold their shape and give that chewy texture. If you only have quick oats, you can use them, but the texture will be softer and less distinct. I stick to rolled oats for the best result.
Chill for Better Flavor — Even a short chill helps. But if you have time, chill the dough for 24 hours. The flavors deepen, and the cookies taste even more complex. I often make the dough the night before and bake it in the morning.
Underbake Slightly — This is the secret to chewiness. Pull them out when they look soft in the middle. They will continue to cook on the hot pan. If you wait until they look firm in the oven, they’ll be dry.
Common Mistakes to Avoid
- Mistake: Cookies spread too much. Fix: Make sure your butter is cooled properly. If the butter is too warm, the dough will be loose and spread. Also, check that your baking soda is fresh.
- Mistake: Cookies are too dry. Fix: You might be using too much flour. Spoon and level your flour, don’t scoop. Also, check your oven temperature with a thermometer; ovens can run hot.
- Mistake: Cookies are too cakey. Fix: You might have overmixed the dough or used too much baking powder. Mix just until combined, and measure your leavening agents carefully.
Variations & Substitutions
Once you’ve nailed the basic version, here’s how you can mix it up. I’ve tried all of these, and they all work.
Chocolate Chip Version — Swap the raisins for semi-sweet chocolate chips. This is a huge hit with kids. I use Ghirardelli chips because they melt beautifully. The brown butter and chocolate are a match made in heaven.
Peanut Butter Oatmeal — Swap ½ cup of the flour for creamy peanut butter. Add ½ cup of chocolate chips. This adds protein and a rich, savory-sweet flavor. My husband loves this variation.
Double Chocolate — Replace ¼ cup of the flour with cocoa powder. Add dark chocolate chips. This makes a fudgy, intense cookie. Great for chocolate lovers.
Gluten-Free — Use a 1:1 gluten-free flour blend. Make sure it contains xanthan gum, or add ½ teaspoon. The texture might be slightly more crumbly, but it’s still delicious. I’ve used Bob’s Red Mill blend with good results.
Dairy-Free — Use a high-quality vegan butter stick. Note that the browning process might look different, and the flavor won’t be exactly the same, but it’s still tasty. I’ve used Miyoko’s creamery butter with success.
Nutty Addition — Add ½ cup of toasted pecans or walnuts. Toast them in a dry pan for 2-3 minutes until fragrant. This adds a nice crunch and earthy flavor.
Serving & Storage
How to serve these cookies is pretty simple. I usually serve them on a platter with a glass of cold milk. They’re also great for packing in lunchboxes or taking on road trips. They hold up well in an airtight container.
Storage Instructions
- Room Temperature: Store in an airtight container for up to 5 days. Place a piece of bread in the container to keep them soft. The bread will harden, but the cookies will stay chewy.
- Refrigerator: Not recommended for cookies, as they can absorb odors and become stale. But if you live in a very hot and humid climate, you might need to refrigerate them.
- Freezing: You can freeze the dough balls! Scoop them onto a baking sheet, freeze until solid, then transfer to a bag. Bake from frozen, adding 1-2 minutes to the baking time. You can also freeze baked cookies for up to 3 months. Thaw at room temperature.
Reheating — If you want warm cookies, microwave one for 10-15 seconds. It brings back that fresh-baked softness. Avoid the oven unless you’re reheating a whole batch, as it might dry them out.
Nutrition Information
I’m not a nutritionist, but here’s the breakdown if you’re tracking. Please note that this is an estimate based on standard ingredients.
Per Serving (based on 24 cookies):
- Calories: 180
- Protein: 3g
- Carbs: 26g
- Fiber: 1g
- Sugar: 16g
- Fat: 8g
- Saturated Fat: 5g
- Cholesterol: 25mg
- Sodium: 150mg
What’s Good: These cookies provide some energy from the oats and sugar. They’re a treat, not a health food, but they’re better than many store-bought options because you control the ingredients.
What to Know: They are high in sugar and saturated fat due to the butter and sugars. Enjoy in moderation. If you’re watching your intake, try having one with a cup of tea or coffee.
Final Thoughts
So that’s my Chewy Brown Butter Oatmeal Raisin Cookies recipe! I’ve probably talked your ear off at this point, but when you make a recipe this often, you have a lot to say about it. These cookies have saved me more times than I can count. They’re my answer to “what should I bake?” when I want something comforting, impressive, and easy.
Make it yours! Try different add-ins, swap in your favorite nuts, or adjust the sweetness. The best recipes are the ones you adapt to your family’s tastes. If you make this, drop a comment and let me know what you think! I love hearing how recipes turn out in your kitchen. And if something doesn’t work, tell me that too—I’m here to help troubleshoot.
Happy baking! And I hope your kitchen smells half as good as mine does right now. If you’re looking for more easy baking ideas, you might also enjoy trying my Strawberry Cream Cheese Roll-Ups for a quick breakfast treat, or these Cheesy Broccoli and Chicken Fritters for a savory snack. And for a festive side dish, check out this Bacon Cheddar Ranch Pasta Salad.
Frequently Asked Questions
Q: Can I use melted butter instead of browning it?
A: You can, but you’ll miss out on that deep, nutty flavor that makes these cookies special. Browning the butter takes an extra 5 minutes but is worth it. If you’re in a huge rush, melted butter will work, but the cookies will be more traditional and less complex.
Q: Why did my cookies spread too much?
A: This usually happens if the butter was too warm when you mixed it, or if the dough wasn’t chilled. Make sure to cool the brown butter completely before adding it to the sugars. Also, chill the dough for at least 30 minutes before baking.
Q: Can I use instant oats?
A: I don’t recommend it. Instant oats are thinner and will turn mushy. Rolled oats give the best texture. If you must use instant, reduce the amount slightly, but the result won’t be as chewy.
Q: How do I store leftover cookies?
A: Store them in an airtight container at room temperature for up to 5 days. Add a slice of bread to keep them soft. For longer storage, freeze the dough balls or baked cookies.
Q: Can I double the recipe?
A: Yes, you can double everything. Just make sure you have a large enough bowl to mix the dough. You’ll also need to bake in multiple batches, so keep the dough chilled while you bake.
Q: Are these cookies safe for kids?
A: Yes, they’re great for kids! Just make sure the raisins are chopped if you have very young children to prevent choking. They’re also a hit at lunchboxes and after-school snacks.
Q: Can I add chocolate chips?
A: Absolutely! Swap the raisins for chocolate chips, or add both. The combination of brown butter, oats, raisins, and chocolate is incredible. I often do a mix of both for a “everything but the kitchen sink” cookie.
Pin This Recipe!
Chewy Brown Butter Oatmeal Raisin Cookies
- Total Time: 45 minutes
- Yield: 24 cookies 1x
Description
These chewy brown butter oatmeal raisin cookies are deeply caramelized, tender, and packed with nutty flavor. Made with simple pantry staples, they offer the perfect balance of crisp edges and soft centers.
Ingredients
- 1 cup (226g) unsalted butter
- 1 cup (200g) light brown sugar, packed
- ½ cup (100g) granulated white sugar
- 2 large eggs, room temperature
- 2 teaspoons vanilla extract
- 2 cups (250g) all-purpose flour
- 1 teaspoon baking soda
- ½ teaspoon baking powder
- 1 teaspoon kosher salt
- 1 teaspoon ground cinnamon
- 3 cups (270g) old-fashioned rolled oats
- 1 cup (140g) raisins
- ½ cup chopped walnuts or pecans (optional)
Instructions
- Brown the butter: Melt butter in a medium saucepan over medium heat. Stir occasionally until milk solids turn golden brown and the mixture smells nutty (5-7 minutes). Immediately pour into a heatproof bowl and cool for 10-15 minutes until liquid but not hot.
- Mix wet ingredients: In a large mixing bowl, whisk the cooled brown butter, brown sugar, and white sugar vigorously for 1-2 minutes until glossy. Add eggs one at a time, whisking well after each addition. Stir in vanilla extract.
- Combine dry ingredients: In a separate medium bowl, whisk together flour, baking soda, baking powder, salt, and cinnamon.
- Bring it together: Gradually add dry ingredients to wet ingredients. Mix with a wooden spoon or spatula until just combined. Do not overmix. Fold in rolled oats and raisins until evenly distributed.
- Chill dough: Cover the bowl and refrigerate dough for at least 30 minutes to solidify fat and prevent excessive spreading.
- Preheat and scoop: Preheat oven to 350°F (175°C). Line two baking sheets with parchment paper. Scoop dough into 2-tablespoon balls and place on sheets, spacing 2 inches apart.
- Bake: Bake for 10-12 minutes, rotating pans halfway through. Cookies are done when edges are golden brown but centers still look soft.
- Cool: Let cookies cool on the baking sheet for 5 minutes to set, then transfer to a wire rack to cool completely.
Notes
For best results, use old-fashioned rolled oats, not instant oats. Ensure the brown butter is cooled before adding eggs to avoid cooking them. Chilling the dough for 24 hours can deepen flavors. If cookies spread too much, ensure butter is fully cooled and baking soda is fresh. To keep cookies soft, store with a slice of bread in an airtight container.
- Prep Time: 30 minutes
- Cook Time: 10-12 minutes
- Category: Dessert
- Cuisine: American
Nutrition
- Serving Size: 1 cookie
- Calories: 180
- Sugar: 16
- Sodium: 150
- Fat: 8
- Saturated Fat: 5
- Carbohydrates: 26
- Fiber: 1
- Protein: 3
Keywords: brown butter cookies, oatmeal raisin cookies, chewy cookies, homemade cookies, easy baking, fall baking, winter baking



