Last Tuesday, I was staring into the back of the freezer, feeling that familiar mix of guilt and exhaustion. There was a bag of frozen nuggets that had been there since, well, I’m not even sure when. They were probably from before the pandemic started. I pulled them out, half-expecting my three-year-old to do a happy dance at the sight of those familiar, breaded shapes. Instead, he wrinkled his nose, pushed the plate away, and said, “These taste like cardboard, Mom.”
Ouch.
He wasn’t wrong. They were stale, overly salty, and tasted like processed meat wrapped in flour. I felt like a failure. I wanted to give him something healthy, something with real chicken, something that didn’t come in a box with a cartoon character on it. But I also didn’t have time to order takeout, and I definitely didn’t have time to stand over the stove frying oil for twenty minutes.
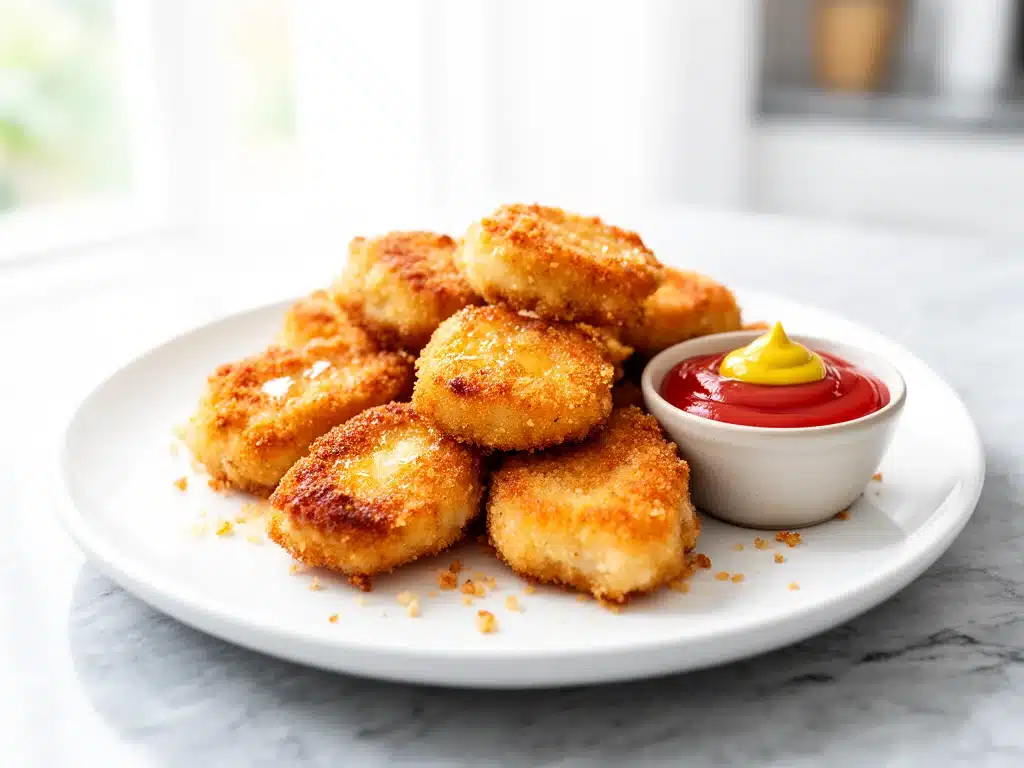
That night, I did something I should have done years ago. I bought a pack of chicken breasts, cut them up, and spent twenty minutes making a batch of homemade baked chicken nugget dippers. I used simple ingredients—panko breadcrumbs, a little parmesan, some spices—and baked them at 400°F. When I brought them to the table, my son took one bite. Then another. Then he asked for the whole plate.
It wasn’t just that they tasted better. It was that I knew exactly what was in them. No mystery powders. No weird preservatives. Just chicken, egg, and crunchy crumbs. That night changed our weeknight dinners. We’ve been making these homemade baked chicken nugget dippers at least twice a week ever since. They’re crispy, they’re juicy, and yes, they’re kid-approved.
If you’re tired of the frozen aisle and want to make something that actually tastes like real food, this is the recipe for you. It’s easier than you think, and it’s going to save your sanity (and your wallet) in the long run.
Why You’ll Love This Recipe
Look, I get it. You’re busy. You have a job, kids, laundry that never ends, and dinner needs to be on the table. The idea of making nuggets from scratch sounds like a lot of work. But here’s the thing: these homemade baked chicken nugget dippers are actually faster than waiting for the oven to heat up for frozen nuggets. Plus, once you make them, you’ll wonder why you ever bought the frozen kind.
Here’s why this recipe has taken over our kitchen:
- Actually Crispy (Without Deep Frying) — The secret is the panko breadcrumbs mixed with parmesan. It creates this shatteringly crisp coating that stays crunchy even after baking. I’ve tried regular breadcrumbs, but they just get soggy. Panko is non-negotiable.
- Healthy-ish Comfort Food — These are baked, not fried. That means way less oil and fat, but they still satisfy that craving for something salty and crunchy. My kids think they’re getting away with something bad, but I know they’re getting high-quality protein.
- Customizable for Picky Eaters — My son likes them plain. My daughter loves them with a little extra garlic powder. I can make a batch of mild ones and a batch of spicy ones in the same pan. No arguments at the dinner table.
- Freezer-Friendly — I make a double batch every Sunday. I freeze them on a baking sheet, then bag them up. When we need a quick lunch or a snack, I just pull out a handful and bake them. They reheat surprisingly well.
- Cost-Effective — A bag of frozen nuggets costs $8-$10 and feeds maybe three kids. A pound of chicken breast costs about $5 and makes a ton more nuggets. Plus, you’re using cheaper cuts of chicken (like tenders or cut breasts) that you can find on sale.
This is my go-to when I need dinner to just work. It’s reliable, it’s delicious, and it makes everyone happy. Even my husband, who claims he “doesn’t have time to cook,” asks for these when he’s home.
Ingredients You’ll Need
Here’s the best part: you probably have most of this already. This isn’t a recipe that requires a trip to three different specialty stores. It’s simple, pantry-friendly ingredients that come together quickly.
For the Chicken
Chicken breasts (1.5 lbs / 680g) — I use boneless, skinless chicken breasts. You can buy chicken tenders if you’re lazy, but breasts are cheaper and you can cut them into uniform pieces. Look for pieces that are about 1-inch thick so they cook evenly.
Buttermilk (1 cup / 240ml) — This is the secret weapon. Buttermilk tenderizes the chicken and adds a slight tang that balances the rich breading. If you don’t have buttermilk, mix 1 cup of milk with 1 tablespoon of lemon juice or white vinegar. Let it sit for 10 minutes. It’s not quite the same, but it works in a pinch.
Eggs (2 large) — These act as the glue for the breading. Whisk them well before dipping the chicken.
Salt and Pepper — To taste. I use about 1 teaspoon of kosher salt and ½ teaspoon of black pepper in the buttermilk mixture.
For the Crunchy Coating
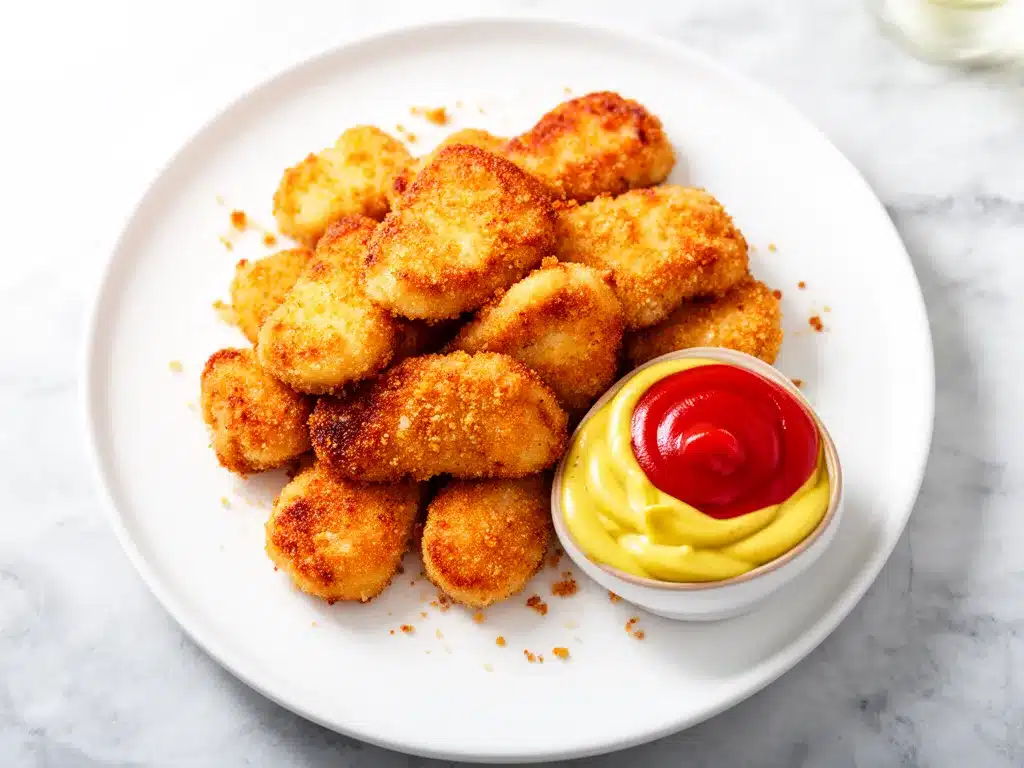
Panko breadcrumbs (1.5 cups / 150g) — This is crucial. Regular breadcrumbs are too dense. Panko is light, airy, and gets super crispy in the oven. I buy the Japanese-style panko because it holds up better. Look for it in the Asian aisle or the baking aisle.
Grated Parmesan cheese (½ cup / 50g) — This adds savory depth and helps the breadcrumbs stick. Freshly grated is best, but pre-grated works if you’re in a hurry. Don’t use the stuff in the green shaker can—it’s too dusty and doesn’t melt well.
Garlic powder (1 teaspoon) — Not fresh garlic, which can burn. Powder gives that classic nugget flavor without the risk of burnt bits.
Onion powder (1 teaspoon) — Adds a subtle sweetness that balances the savory garlic.
Smoked Paprika (½ teaspoon) — This is my secret ingredient. It adds a hint of smokiness that makes the nuggets taste like they were fried, not baked. If you don’t have smoked paprika, regular paprika works, but it won’t have that same depth.
Cayenne pepper (¼ teaspoon, optional) — If you like a little kick, add this. For kids, you can skip it or reduce it to a pinch.
Butter (melted) (2 tablespoons) — We brush these with melted butter before baking. It helps the breadcrumbs turn golden brown and adds richness. You can use olive oil, but butter tastes better.
Equipment Needed
You don’t need fancy equipment for this. Here’s what I actually use:
Three shallow bowls — You need one for the buttermilk, one for the egg wash, and one for the breadcrumb mixture. I use pie dishes or shallow casserole dishes. They’re wide enough to easily dip the chicken.
Wire cooling rack — This is the game-changer. I place a wire rack over a baking sheet and put the nuggets on the rack. This allows air to circulate underneath, so the bottom gets crispy too. If you don’t have a rack, you can bake them directly on the sheet, but they won’t be as crispy on the bottom.
Baking sheet — A standard half-sheet pan works fine. I line it with parchment paper for easy cleanup, though it’s not strictly necessary if you use a rack.
Pastry brush — For brushing the melted butter on top. I have a cheap silicone one from the dollar store that works perfectly.
Chef’s knife — For cutting the chicken into uniform pieces. Uniformity is key so they all cook at the same rate.
How to Make It: Step-by-Step
Alright, let’s make these homemade baked chicken nugget dippers! I’m walking you through exactly how I do it, including the little tricks I’ve picked up over the last two years.
Step 1: Prep the Chicken (5 minutes)
Start by cutting your chicken breasts into 1-inch pieces. Try to make them all roughly the same size so they cook evenly. If you have chicken tenders, you can skip this step and just cut them in half. Place the chicken pieces in a large bowl.
Step 2: Marinate the Chicken (10 minutes)
Whisk the buttermilk, salt, and pepper together in a bowl. Pour it over the chicken. Make sure all the pieces are coated. Let this sit for at least 10 minutes. If you have time, let it sit for up to 2 hours in the fridge. This tenderizes the meat and infuses it with flavor. I usually do this while I chop veggies for dinner.
Step 3: Set Up the Breading Station (5 minutes)
Get your three bowls ready. Bowl 1: The buttermilk chicken (leave it in here). Bowl 2: Whisk the two eggs. Bowl 3: Mix the panko, parmesan, garlic powder, onion powder, paprika, and cayenne. Stir the dry ingredients well so the spices are evenly distributed.
Step 4: Bread the Nuggets (10 minutes)
Take a piece of chicken out of the buttermilk, letting the excess drip off. Dip it into the egg wash, making sure it’s fully coated. Then, press it into the breadcrumb mixture. Use your hands to press the crumbs firmly onto the chicken. You want a thick, even coating. Don’t be shy—this is where the crunch comes from. Place the breaded nugget on the wire rack.
Repeat with the remaining chicken. Try to keep them in a single layer on the rack. If you have too many, do two batches. Crowding the pan will steam the nuggets instead of baking them, and you’ll lose that crispiness.
Step 5: Bake (15-18 minutes)
Preheat your oven to 400°F (200°C). Once it’s hot, brush the tops of the nuggets with melted butter. This helps them brown. Place the baking sheet in the oven and bake for 15-18 minutes. Flip the nuggets halfway through (around the 8-minute mark) to ensure even browning. They’re done when the coating is golden brown and the internal temperature of the chicken reaches 165°F (74°C).
Step 6: Serve (5 minutes)
Let them rest for 2-3 minutes before serving. This lets the coating set so it doesn’t fall off. Serve with your favorite dipping sauces. I love ranch, BBQ, and honey mustard. My kids love ketchup, but I’ve converted them to ranch, which is a win.
Total Time: About 35-40 minutes (10 minutes prep, 10 minutes marinating, 15-18 minutes baking).
Expert Tips & Tricks
Here’s everything I’ve learned from making these dozens of times. These tips will save you from my mistakes.
Don’t Skip the Buttermilk
I know it’s an extra step, but buttermilk is what makes the chicken juicy. Regular milk will make the coating slide off. If you’re in a hurry, the milk-and-lemon-juice hack works, but buttermilk is better. I keep a carton in my fridge just for this.
Press the Breadcrumbs
When you’re dredging the chicken, press the crumbs onto the meat. Don’t just roll it. You want them to stick. If a nugget comes out of the oven with bare spots, it means you didn’t press hard enough. I learned this the hard way when my first batch looked like patchwork quilt chicken.
Use a Wire Rack
I cannot stress this enough. If you bake them directly on the pan, the bottom gets soggy. The wire rack allows air to circulate, so the bottom gets crispy too. It’s the difference between “okay” and “amazing.”
Don’t Overcrowd the Pan
Leave space between the nuggets. If they’re touching, they’ll steam each other. I usually do two batches if I’m making a full pound of chicken. It’s worth the extra time.
Freezing Raw vs. Cooked
You can freeze these raw or cooked. I prefer freezing them raw. After breading, put the baking sheet in the freezer for 1 hour. Once they’re frozen solid, transfer them to a freezer bag. They’ll keep for up to 3 months. Bake them straight from frozen, adding 5-10 minutes to the cooking time. This is my Sunday prep strategy.
Variations & Substitutions
Once you’ve nailed the basic version, here’s how you can mix it up. I’ve tried all of these.
Spicy Chicken Nuggets
Add 1 teaspoon of cayenne pepper and 1 teaspoon of chili powder to the breadcrumb mixture. Serve with hot honey for dipping. My older kids love this version.
Herb-Crusted Nuggets
Swap the paprika for dried oregano and thyme. Add some fresh parsley to the breadcrumbs. This is a milder, more savory option that pairs well with lemon.
Gluten-Free Version
Use gluten-free panko breadcrumbs. They’re widely available now and work just as well. I’ve used brands like Schär and Bob’s Red Mill. The coating might be slightly darker, but the crunch is there.
Dairy-Free Option
Skip the parmesan and use olive oil instead of butter. Use a dairy-free milk alternative for the buttermilk substitute (like almond milk + lemon juice). The texture will be slightly different, but still tasty.
Chicken Tender Version
If you buy chicken tenders, you can skip the cutting step. Just marinate and bread them whole. They’ll cook faster, so check them at 12 minutes.
Serving & Storage
How to Serve
I usually serve these straight from the baking sheet at the dinner table. They look rustic and stay warm. But here are other ways I’ve enjoyed them:
- Chicken Nugget Tacos — Break them up and put them in soft tacos with lettuce, cheese, and salsa. It’s a fun twist.
- Nugget Salad Toppers — Cut them up and put them on top of a green salad. It’s like a crunchy chicken Caesar without the heavy dressing.
- Snack Time — Reheat a few in the air fryer for 3 minutes. Perfect afternoon snack.
Dipping Sauces
The classics are always right: Ranch, BBQ, Honey Mustard, Ketchup. But try these:
- Spicy Mayo — Mix mayo with sriracha and a squeeze of lime.
- Tangy Pickle Sauce — Mix mayo with chopped pickles and dill.
- Buffalo Sauce — Toss the nuggets in buffalo sauce after baking for a wing-like experience.
Storage Instructions
Refrigerator: Store leftovers in an airtight container for up to 4 days. They’ll lose some crispiness, but they’re still good.
Reheating: The best way to reheat is in an air fryer at 375°F for 3-4 minutes. This restores the crunch. If you don’t have an air fryer, use a toaster oven. Avoid the microwave—it makes them soggy. Ask me how I know. I’ve made that mistake.
Freezing: As mentioned, freeze raw nuggets on a baking sheet, then bag them. They keep for 3 months. Cooked nuggets can be frozen, but the texture suffers more after thawing. Raw freezing is better.
Nutrition Information
I’m not a nutritionist, but here’s the breakdown if you’re tracking. Note that this is an estimate and varies based on chicken size and exact ingredients.
Per Serving (based on 6 servings, about 6 nuggets each):
| Nutrient | Amount |
|---|---|
| Calories | 280 |
| Protein | 25g |
| Carbs | 18g |
| Fat | 10g |
| Fiber | 1g |
| Sodium | 450mg |
What’s Good:
- High protein from the chicken.
- Baked, so less fat than fried nuggets.
- Control over sodium and ingredients.
What to Know:
- Higher in carbs due to the breading.
- Contains dairy and gluten (unless modified).
- Sodium can be reduced by using less salt in the buttermilk and breading.
Look, these are comfort food. They’re not a diet recipe. But they’re way better than store-bought, and I know exactly what’s in them. When I want to make it lighter, I use more chicken and less breading, or I serve them with a side of steamed broccoli.
Final Thoughts
So that’s my go-to homemade baked chicken nugget dippers! I’ve probably talked your ear off at this point, but when you make a recipe this often, you have a lot to say about it.
This has saved weeknight dinners more times than I can count. It’s my answer to “what’s for dinner” when I’m tired, don’t want takeout, and still want something that tastes really good. My kids are happy, my husband’s happy, and I’m happy because I’m not stressed about cooking.
Make it yours! Try different spices, swap in your favorite dipping sauces, or add veggies to the breading (like grated zucchini, though that’s a different recipe entirely). The best recipes are the ones you adapt to your family’s tastes.
If you make this, drop a comment and let me know what you think! I love hearing how recipes turn out in your kitchen. And if something doesn’t work, tell me that too—I’m here to help troubleshoot.
Happy cooking! And I hope your kitchen smells half as good as mine does right now.
Frequently Asked Questions
Q: Can I use chicken tenders instead of breasts?
A: Absolutely! Chicken tenders are actually easier because they’re already thin and uniform. Just cut them in half if they’re too long. They’ll cook a bit faster, so check them at 12 minutes.
Q: Why are my nuggets soggy?
A: This usually happens for two reasons: you didn’t use a wire rack, or you overcrowded the pan. The nuggets need space and air circulation to get crispy. Also, make sure you’re pressing the breadcrumbs on firmly.
Q: Can I make these in an air fryer?
A: Yes! Air fryer nuggets are amazing. Cook at 375°F for 8-10 minutes, flipping halfway through. They cook faster and get even crispier. I do this when I only want to make a small batch.
Q: How do I reheat leftovers without them getting dry?
A: Avoid the microwave. Use an air fryer or toaster oven at 375°F for 3-5 minutes. This restores the crunch. If you must use the microwave, do it in 30-second bursts and let them sit for a minute after.
Q: Can I freeze the cooked nuggets?
A: You can, but the texture will suffer. They’ll be softer after thawing. Freezing them raw (before baking) is much better. They’ll retain their crispiness when baked from frozen.
Q: What dipping sauces go best with these?
A: The classics are always right: ranch, BBQ, honey mustard, and ketchup. But try spicy mayo or a tangy pickle sauce for something different. My kids love honey mustard, so that’s our go-to.
Q: Can I use regular breadcrumbs instead of panko?
A: You can, but the texture will be different. Regular breadcrumbs are denser and won’t get as crispy. Panko is light and airy, which is why it’s the gold standard for baked nuggets. I don’t recommend skipping it.
Pin This Recipe!
Homemade Baked Chicken Nugget Dippers: 5-Minute Kid-Friendly Recipe
- Total Time: 35-40 minutes
- Yield: 6 servings 1x
Description
Crispy, juicy, and kid-approved baked chicken nuggets made with simple ingredients like panko and parmesan. A healthier, cost-effective alternative to frozen nuggets that is ready in under 40 minutes.
Ingredients
- 1.5 lbs boneless, skinless chicken breasts (cut into 1-inch pieces)
- 1 cup buttermilk
- 2 large eggs
- 1 teaspoon kosher salt
- 1/2 teaspoon black pepper
- 1.5 cups panko breadcrumbs
- 1/2 cup grated parmesan cheese
- 1 teaspoon garlic powder
- 1 teaspoon onion powder
- 1/2 teaspoon smoked paprika
- 1/4 teaspoon cayenne pepper (optional)
- 2 tablespoons melted butter
Instructions
- Preheat oven to 400°F (200°C).
- Cut chicken breasts into 1-inch uniform pieces and place in a large bowl.
- Whisk buttermilk, salt, and pepper together, then pour over chicken. Marinate for at least 10 minutes (or up to 2 hours in the fridge).
- Set up a breading station with three shallow bowls: one with the marinated chicken, one with whisked eggs, and one with panko, parmesan, garlic powder, onion powder, paprika, and cayenne mixed together.
- Dip a piece of chicken into the egg wash, then press firmly into the breadcrumb mixture to coat evenly. Place on a wire rack set over a baking sheet.
- Repeat with remaining chicken, ensuring nuggets are in a single layer without crowding.
- Brush the tops of the nuggets with melted butter.
- Bake for 15-18 minutes, flipping halfway through, until the coating is golden brown and internal temperature reaches 165°F (74°C).
- Let rest for 2-3 minutes before serving.
Notes
For extra crispiness, use a wire rack to allow air circulation underneath the nuggets. Do not overcrowd the pan. You can freeze raw nuggets on a baking sheet before bagging them for later use. If using regular breadcrumbs instead of panko, the texture will be denser and less crispy.
- Prep Time: 10 minutes
- Cook Time: 15-18 minutes
- Category: Main Course
- Cuisine: American
Nutrition
- Serving Size: Approximately 6 nugg
- Calories: 280
- Sugar: 2
- Sodium: 450
- Fat: 10
- Saturated Fat: 3
- Carbohydrates: 18
- Fiber: 1
- Protein: 25
Keywords: chicken nuggets, baked chicken, kid-friendly recipes, healthy comfort food, weeknight dinner, panko chicken, homemade nuggets



