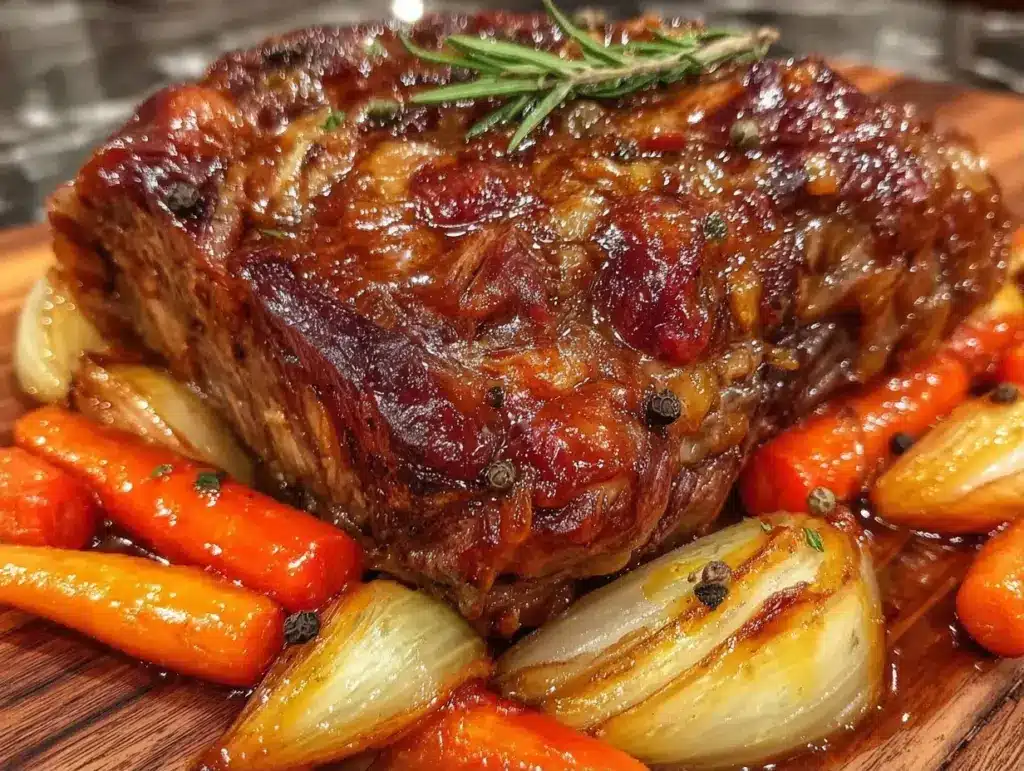
It was 4:45 PM on a Tuesday in October, and the sky was already turning that bruised purple color that screams “winter is coming.” I was standing in my kitchen, staring at a half-empty fridge and a to-do list that felt like it was growing teeth. My husband had a late meeting. The kids were home from school and making noises that suggested they were about to eat the drywall. I needed dinner. I needed it fast. I needed it to taste like someone cared about me, but I definitely did not care about cooking.
So I did what I always do when I’m stressed and hungry: I threw everything into my Dutch oven and walked away for twenty minutes. I wasn’t trying to be a chef. I was trying to survive the evening rush. But when I pulled that lid off, the smell hit me like a warm hug. It smelled like caramelized onions, rich beef broth, and comfort. It smelled like fall.
That accidental dinner turned into a ritual. Now, when the leaves start turning and the air gets crisp, my house smells like this cozy fall pot roast. And the best part? It’s a one-pan meal. One pan. That means one pot to wash at the end. No sautéing vegetables in three separate pans, no searing meat in a skillet, no juggling sides. Just dump, stir, and let the oven do the heavy lifting.
I’ve made this cozy fall pot roast at least ten times in the last month alone. It’s become my answer to that 5pm panic. It’s tender, it’s sweet from the carrots and onions, and it requires almost zero active effort from me. If you’re tired of complicated recipes that require a trip to three different stores, this is your new best friend. Let’s get this on the table.
Why You’ll Love This Recipe
I know what you’re thinking. Pot roast sounds like something your grandmother made on a Sunday that took all day. And sure, traditionally, it does. But this version? It’s streamlined for real life. Here’s why this cozy fall pot roast has taken over our weeknight rotation:
One Pan Magic — Seriously. One Dutch oven. I chop the veggies, I sear the meat (if I remember to, but it’s not strictly necessary for this method), I dump it all in, and I put it in the oven. Cleanup is a 30-second rinse. This is huge for me because I hate doing dishes more than I hate waking up early.
Takes Over While You Don’t — You have about 15 minutes of hands-on time. The rest? The oven does the work. I can do laundry, help with homework, or actually sit down for a glass of wine while this cooks. It’s the ultimate “set it and forget it” meal, but without the rubbery texture that slow cookers sometimes leave behind.
Carrots That Actually Taste Good — I’m not usually a carrot person. I’ll eat them, but I won’t fight for them. But in this cozy fall pot roast, the carrots caramelize in the beef juices and onions. They turn sweet, tender, and almost jammy. My kids ask for seconds of the carrots. I’m not joking. The onions melt into a savory sauce that you’ll want to spoon over everything.
Leftovers That Beat Takeout — This tastes even better the next day. The flavors meld together overnight. I pack this for lunch three days in a row, and it never gets boring. Plus, it’s cheaper than ordering delivery and way healthier.
Freezer Friendly — I make a double batch on Sundays. One goes in the freezer for a busy Wednesday, and one goes in the fridge for Thursday. It reheats beautifully. If you’re worried about meal prep, this is the easiest entry point. Just like my fall pumpkin chocolate chip bread, this is a recipe that saves your week when you’re running on empty.
Ingredients You’ll Need
Here’s the thing about pot roast: the quality of your ingredients matters, but you don’t need anything fancy. You probably have half of this in your pantry already. I’m particular about the beef, though. You want something that can handle low, slow heat.
For the Roast
Chuck roast (3-4 pounds / 1.5-2 kg) — This is non-negotiable. Chuck roast has the right amount of marbling. It breaks down and gets tender. Avoid lean cuts like sirloin; they’ll be dry and tough. Look for a roast with good white flecks of fat running through it. If your butcher can cut it for you, great. If not, ask them to trim the excess hard fat, but leave some for flavor.
Neutral oil (2 tablespoons) — I use vegetable or canola oil. Olive oil works, but I don’t want it to overpower the savory beef taste. Avocado oil is great if you have it, but it’s pricey for this.
For the Veggies
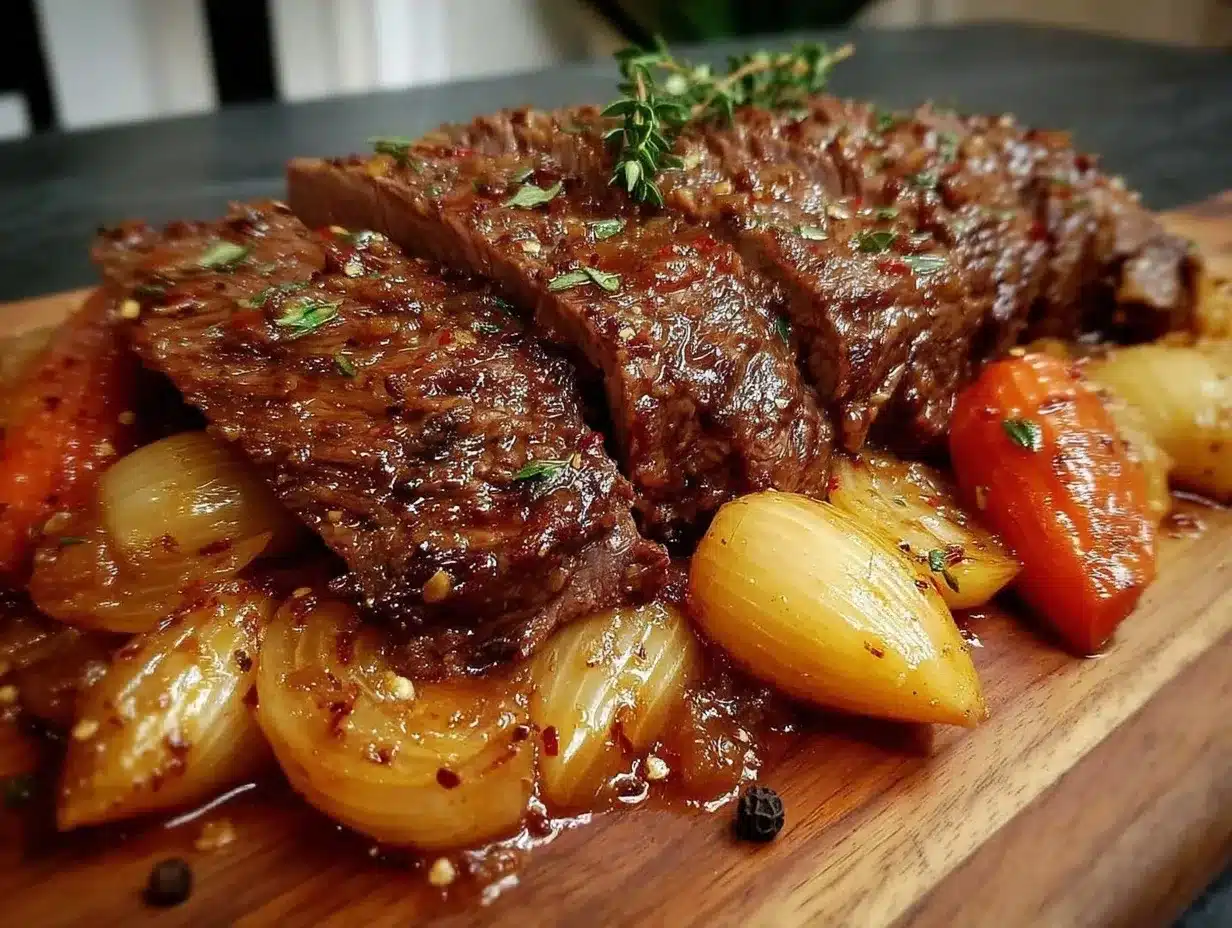
Yellow onions (2 large, chopped / about 400g) — Don’t skip the onions. They’re the base of the sauce. I chop them into big chunks, not fine dice. They’ll melt down into sweetness. Yellow onions are best here for their depth. Sweet onions are okay, but a bit too mild.
Carrots (1 pound / 450g, cut into 2-inch chunks) — I peel them and cut them into thick chunks. If you cut them too thin, they’ll turn to mush. I like them to hold their shape a bit. Organic if you can find them, since we’re eating the skins, but not strictly required.
Garlic (6 cloves, minced / about 2 tablespoons) — Fresh garlic only. No jarred stuff in this recipe. It tastes too metallic. Mince it finely so it distributes evenly. If you’re lazy, buy pre-peeled cloves, but mince them yourself.
Red potatoes (1 pound / 450g, quartered) — I use red potatoes because they hold up better than russets in a wet environment. They get creamy on the inside. Wash them well and quarter them. You don’t need to peel them; the skins add texture.
For the Sauce
Beef broth (2 cups / 480ml) — Low sodium is best so you can control the salt. I use Kitchen Basic or whatever is on sale. If you can’t find beef broth, use vegetable broth, but the flavor will be lighter.
Tomato paste (2 tablespoons) — This adds depth and richness, not tomato flavor. It’s an umami bomb. Don’t substitute with ketchup or sauce.
Worcestershire sauce (1 tablespoon) — This is the secret weapon. It adds that savory, tangy note that makes you go “what is that flavor?” A little goes a long way.
Red wine (1 cup / 240ml) — Dry red wine like Cabernet or Merlot. You don’t need expensive wine, but don’t use “cooking wine” from the vinegar aisle. If you don’t drink alcohol, substitute with extra beef broth and a splash of balsamic vinegar for acidity.
Dried thyme (2 teaspoons) — Fresh thyme works, but dried is more traditional for pot roast. Use about 1 teaspoon if using fresh sprigs.
Bay leaves (2 leaves) — Essential. Remove them before serving, or you’ll break a tooth. I keep a jar of old bay leaves that have been sitting since 2015, and they still work. Don’t judge me.
Salt and black pepper — To taste. I use about 1 tablespoon of kosher salt for the roast.
Equipment Needed
You don’t need a fancy kitchen for this. Here’s what I actually use:
Dutch oven (5-7 quart) — I use a 6-quart enameled cast iron Dutch oven. It goes from stove to oven seamlessly. If you don’t have one, a large heavy-bottomed pot works, but make sure it has an oven-safe lid. Glass lids are risky if the heat is high, so metal is better.
Sharp chef’s knife — For chopping onions and potatoes. Dull knives make you cry more—literally and emotionally.
Wooden spoon — For stirring. Silicone works too. Don’t use metal on enameled cast iron; it scratches the coating.
Cutting board — Any size. I use a large plastic one for easy cleanup.
Measuring cups and spoons — Standard stuff. Dollar store versions work fine.
Aluminum foil — Optional, if your pot lid doesn’t seal tightly. I usually don’t need it, but if your lid is loose, tent the pot with foil and then put the lid on to trap steam.
How to Make It: Step-by-Step
Alright, let’s make this! I’m walking you through exactly how I do it. It’s simple, but there are a few tricks to get that perfect tenderness.
Step 1: Prep Your Ingredients (10 minutes)
Before you turn on the stove, chop everything. Chop your onions into big chunks, cut your carrots into 2-inch pieces, and quarter your potatoes. Mince your garlic. Measure out your broth and wine. Having everything ready before you start cooking makes the process feel less chaotic. I know it seems fussy, but trust me.
Step 2: Sear the Roast (5-8 minutes)
Heat your Dutch oven over medium-high heat with the oil. Pat the chuck roast dry with paper towels—this is crucial for a good sear. If it’s wet, it steams instead of sears. Season the roast generously with salt and pepper. Place it in the hot pot. Let it sear for 3-4 minutes per side until it’s browned. Don’t move it around too much. You want a nice crust. This step adds flavor, but you don’t need to cook it through. Just brown it.
Step 3: Sauté the Aromatics (3 minutes)
Remove the roast from the pot and set it aside on a plate. In the same pot, add the onions and carrots. Cook them for 3-4 minutes, stirring occasionally. You want them to start softening and picking up some of that beefy flavor from the fond (the brown bits) at the bottom of the pot. Add the garlic and tomato paste in the last minute. Stir constantly so the garlic doesn’t burn. The tomato paste will darken slightly.
Step 4: Deglaze and Build Sauce (2 minutes)
Pour in the red wine. Use a wooden spoon to scrape up all those brown bits from the bottom of the pot. That’s pure flavor. Let the wine simmer for 1-2 minutes to cook off the alcohol smell. Add the beef broth, Worcestershire sauce, thyme, and bay leaves. Stir to combine.
Step 5: Combine and Roast (2.5 – 3 hours)
Place the seared roast back into the pot, on top of the vegetables. The liquid should come about halfway up the sides of the roast, not fully submerge it. If it’s too low, add a splash more broth. Cover the pot with the lid. Put it in a preheated 325°F (165°C) oven.
Let it cook for 2.5 to 3 hours. Don’t peek! Every time you open the lid, you lose heat. After 2.5 hours, check for tenderness. Poke it with a fork. If it slides out easily, it’s done. If it’s still tough, give it another 30 minutes. It should be fork-tender, not falling apart completely (unless you want shredded beef).
Step 6: Rest and Serve (10 minutes)
Remove the pot from the oven. Carefully lift out the roast and let it rest on a cutting board for 10 minutes. This lets the juices redistribute. If you cut it immediately, all the juice runs out. Meanwhile, the vegetables are still cooking in the sauce, which is perfect. Serve the roast sliced or chunked, with the veggies and plenty of sauce spooned over the top.
Total Time: About 3.5 to 4 hours (10 minutes active, 3.5 hours hands-off)
Expert Tips & Tricks
Here’s everything I’ve learned from making this dozens of times. These tips will save you from my mistakes.
Don’t Skip the Sear
I know it’s tempting to just dump the raw meat in. But searing creates the Maillard reaction, which adds that deep, savory flavor. It’s not just for looks. It makes a huge difference.
Scrape the Fond
That brown stuff stuck to the bottom of the pot? That’s gold. Deglazing with wine or broth releases it into the sauce. If you skip this, your sauce will be flat. Scrape it all up.
Low and Slow is Key
325°F is the sweet spot. If you cook it hotter, the meat tightens up and gets tough. If you cook it lower, it takes forever. This temperature breaks down the connective tissue without drying out the meat.
Check Tenderness, Not Time
Every roast is different. A 3-pound roast might be done in 2.5 hours, while a 4-pound one needs 3.5. Use a fork. If it resists, keep cooking. If it falls apart, you’re good.
Thicken the Sauce (Optional)
If you like a thicker sauce, mix 1 tablespoon of cornstarch with 2 tablespoons of cold water. Stir this into the pot during the last 15 minutes of cooking. It will thicken up nicely. I usually don’t bother, but it’s an option.
Common Mistakes
Mistake: Meat is tough.
Fix: It wasn’t cooked long enough. Keep cooking in 30-minute increments.
Mistake: Sauce is watery.
Fix: It wasn’t thickened enough, or you added too much broth. Reduce the liquid on the stove after removing the meat.
Mistake: Vegetables are mushy.
Fix: Cut them larger, or add potatoes/carrots in the last hour of cooking.
Variations & Substitutions
Once you’ve nailed the basic version, here’s how you can mix it up. I’ve tried all of these.
Slow Cooker Version
Yes, you can make this in a slow cooker. Sear the meat and sauté veggies first, then dump everything in the slow cooker. Cook on low for 8 hours or high for 4-5 hours. The texture will be slightly different, but still delicious. I use this method when I want to set it before I leave for work.
Pressure Cooker/Instant Pot
Sear meat, sauté veggies, add liquid. Cook on high pressure for 35-40 minutes, then natural release for 15 minutes. This cuts the time down to about 1 hour total. Great for busy weeknights. The veggies might be softer, but the meat is tender.
Veggie-Loaded
Add parsnips or turnips along with the carrots. They have a similar flavor profile and hold up well. I also throw in a few sprigs of fresh rosemary if I have them.
Gluten-Free
This recipe is naturally gluten-free! Just make sure your beef broth and Worcestershire sauce are certified gluten-free (some Worcestershire contains barley). Serve with mashed potatoes or crusty bread to soak up the sauce.
Different Proteins
You can use brisket, but it’s leaner and can dry out. Short ribs are amazing but expensive. Stick with chuck roast for the best balance of flavor, texture, and price.
Serving & Storage
How to Serve:
I usually serve this straight from the pot. It looks rustic and stays warm. Pair it with crusty bread for dipping, or over mashed potatoes, rice, or egg noodles. I also love it with a simple green salad to cut through the richness.
Leftovers:
Store in an airtight container in the fridge for up to 4 days. The flavors get better overnight. Reheat gently on the stove with a splash of broth or water to loosen the sauce. It also freezes well for up to 3 months. Thaw in the fridge overnight and reheat.
Make-Ahead:
You can prep all the veggies and sear the meat a day ahead. Store them separately in the fridge. When you’re ready, just add the liquid and cook. This saves even more time on the day of.
Nutrition Information
I’m not a nutritionist, but here’s the breakdown if you’re tracking. This is comfort food, so it’s hearty.
Per Serving (based on 6 servings):
- Calories: 450
- Protein: 35g
- Carbs: 25g
- Fiber: 4g
- Sugar: 8g
- Fat: 22g
- Saturated Fat: 8g
- Cholesterol: 90mg
- Sodium: 600mg
What’s Good:
High protein, good source of iron and potassium from the veggies. It’s filling and satisfying.
What to Know:
Higher in sodium and fat due to the broth and beef. Use low-sodium broth to reduce sodium. The fat comes from the chuck roast, which is where the flavor is. If you want to reduce fat, skim the top of the sauce after it cools.
Final Thoughts
So that’s my go-to cozy fall pot roast! I’ve probably talked your ear off at this point, but when you make a recipe this often, you have a lot to say about it. This has saved weeknight dinners more times than I can count. It’s my answer to “what’s for dinner” when I’m tired, don’t want takeout, and still want something that tastes really good. My kids are happy, my husband’s happy, and I’m happy because I’m not stressed about cooking.
Make it yours! Try different veggies, swap the wine for extra broth, or add more garlic (though more is always better in my opinion). The best recipes are the ones you adapt to your family’s tastes. If you make this, drop a comment and let me know what you think! I love hearing how recipes turn out in your kitchen. And if something doesn’t work, tell me that too—I’m here to help troubleshoot.
Happy cooking! And I hope your kitchen smells half as good as mine does right now.
Frequently Asked Questions
Can I use a different cut of meat?
You can, but chuck roast is the best for this. It has the right amount of fat to stay moist. Brisket is leaner and can dry out. Short ribs are delicious but expensive and have bones, which makes slicing harder. Stick with chuck for the best results.
Why did my pot roast turn out tough?
It probably wasn’t cooked long enough. Tough meat needs more time for the connective tissue to break down. Check it with a fork. If it resists, put it back in the oven for another 30-45 minutes. Don’t rush it!
Can I make this in a slow cooker?
Yes! Sear the meat and sauté veggies first, then dump everything in the slow cooker. Cook on low for 8 hours or high for 4-5 hours. The texture will be slightly different, but still delicious.
Can I freeze leftovers?
Absolutely. Store in an airtight container for up to 3 months. Thaw in the fridge overnight and reheat gently on the stove. The meat might be slightly softer after freezing, but it’s still great.
Can I use white wine instead of red?
You can, but red wine adds a deeper, richer flavor that pairs better with beef. If you use white wine, the sauce will be lighter and more acidic. It’s still good, just different. I prefer red.
What should I serve with pot roast?
Crusty bread, mashed potatoes, egg noodles, or rice are all great. I also like a simple green salad or roasted broccoli to balance the richness. It’s very versatile.
Can I double this recipe?
You can, but you’ll need a larger Dutch oven. Make sure the roast isn’t too crowded. If it’s stacked on top of itself, it won’t cook evenly. You might need to cook it in two batches.
Pin This Recipe!
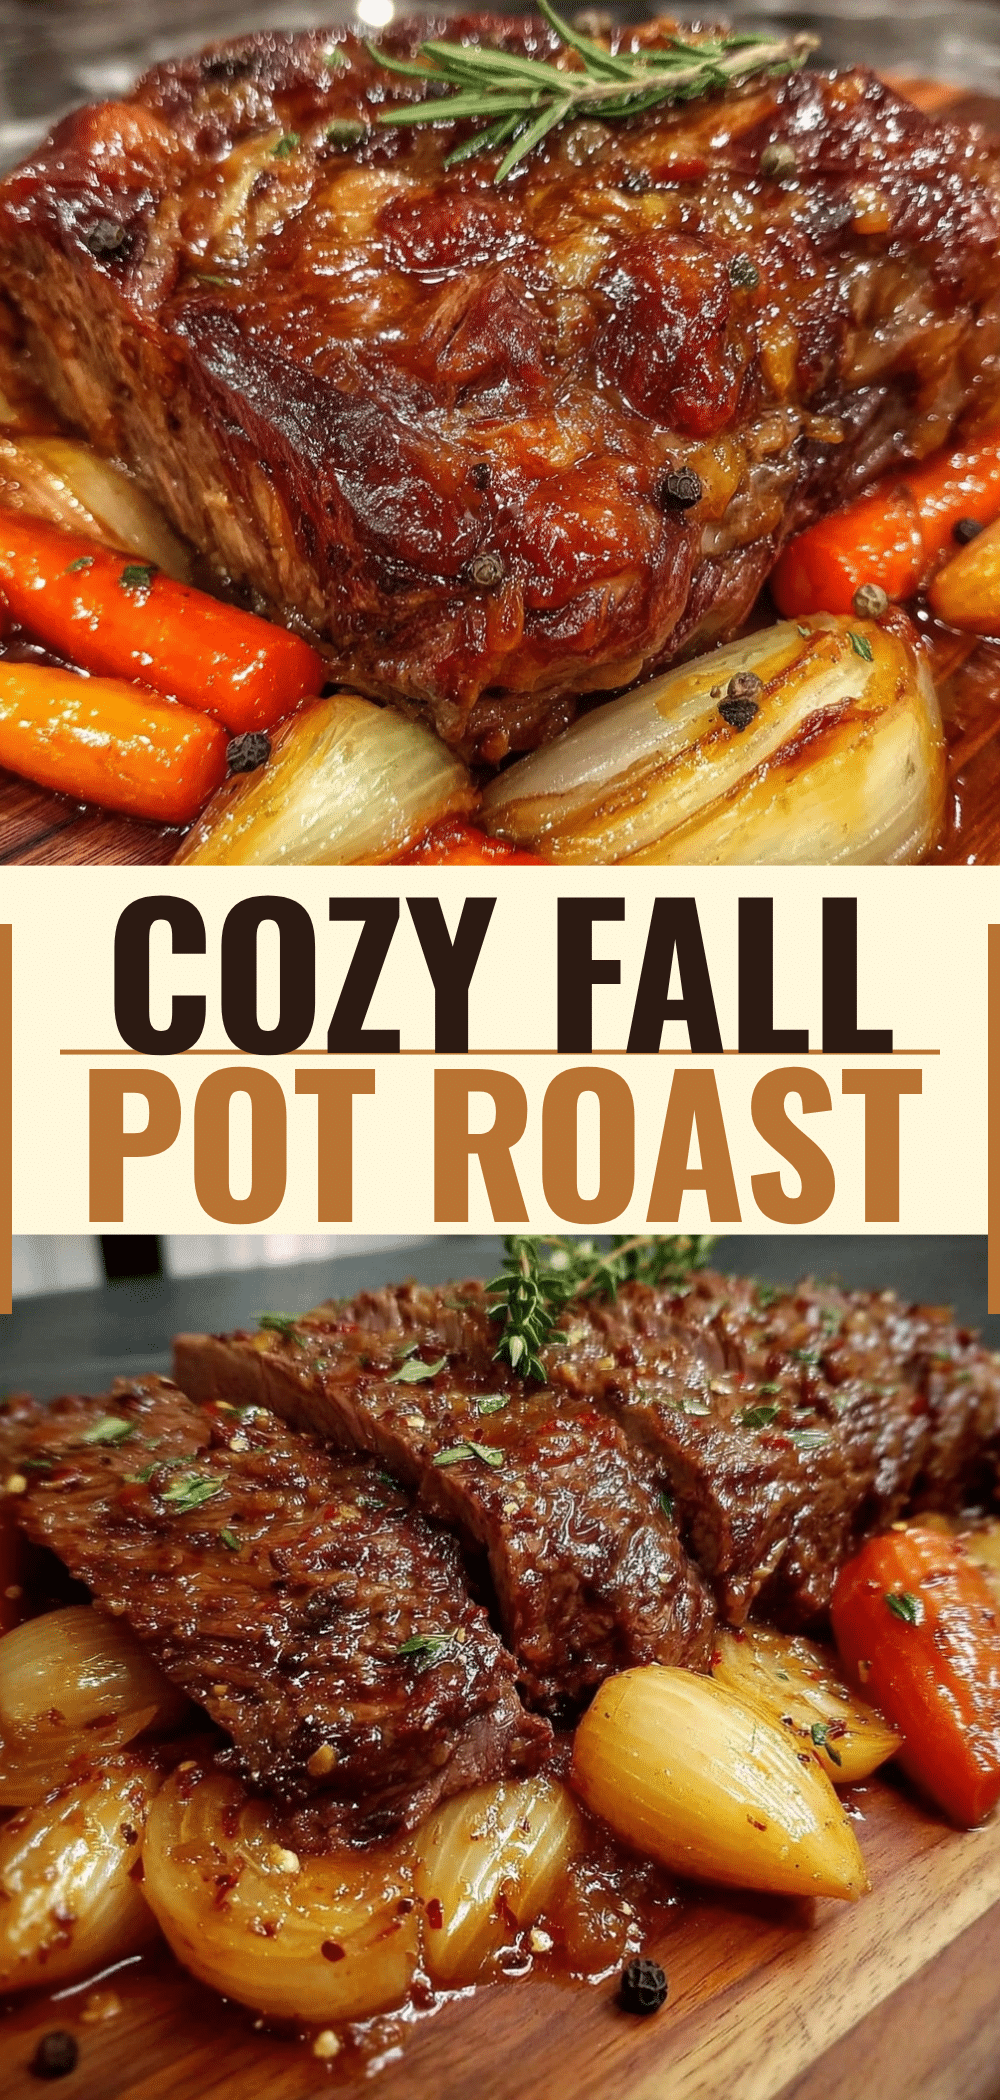
Cozy Fall Pot Roast: 1-Pan 5pm Win
- Total Time: 3 hours 15 minutes
- Yield: 6 servings 1x
Description
A streamlined, one-pan pot roast that is tender, flavorful, and perfect for busy weeknights. This recipe requires minimal active effort while the oven does the heavy lifting, resulting in a comforting meal with caramelized vegetables and rich sauce.
Ingredients
- 3–4 pounds chuck roast
- 2 tablespoons neutral oil (vegetable, canola, or avocado)
- 2 large yellow onions, chopped into big chunks
- 1 pound carrots, peeled and cut into 2-inch chunks
- 6 cloves garlic, minced
- 1 pound red potatoes, quartered
- 2 cups beef broth (low sodium preferred)
- 2 tablespoons tomato paste
- 1 tablespoon Worcestershire sauce
- 1 cup dry red wine (Cabernet or Merlot)
- 2 teaspoons dried thyme
- 2 bay leaves
- Salt and black pepper to taste
Instructions
- Preheat oven to 325°F (165°C).
- Chop onions, carrots, and potatoes. Mince garlic and measure liquids.
- Heat oil in a 5-7 quart Dutch oven over medium-high heat.
- Pat chuck roast dry and season generously with salt and pepper.
- Sear roast for 3-4 minutes per side until browned. Remove and set aside.
- In the same pot, sauté onions and carrots for 3-4 minutes until softened.
- Add garlic and tomato paste; stir for 1 minute until garlic is fragrant and paste darkens.
- Pour in red wine and scrape up brown bits from the bottom of the pot. Simmer for 1-2 minutes.
- Add beef broth, Worcestershire sauce, thyme, and bay leaves. Stir to combine.
- Return roast to the pot on top of vegetables. Liquid should come halfway up the roast.
- Cover with lid and place in oven. Cook for 2.5 to 3 hours until fork-tender.
- Remove roast from oven and let rest on a cutting board for 10 minutes.
- Slice or chunk the roast and serve with vegetables and sauce.
Notes
Do not skip the sear for maximum flavor. Ensure the roast is dry before searing to get a good crust. Check tenderness with a fork rather than relying solely on time. If the sauce is too thin, mix 1 tablespoon cornstarch with 2 tablespoons cold water and stir in during the last 15 minutes of cooking. This recipe is naturally gluten-free if using certified gluten-free broth and Worcestershire sauce.
- Prep Time: 15 minutes
- Cook Time: 3 hours
- Category: Main Course
- Cuisine: American
Nutrition
- Serving Size: 1 slice of roast wit
- Calories: 450
- Sugar: 8
- Sodium: 600
- Fat: 22
- Saturated Fat: 8
- Carbohydrates: 25
- Fiber: 4
- Protein: 35
Keywords: pot roast, fall recipes, one pan meal, weeknight dinner, chuck roast, slow cooked beef, comfort food, easy dinner



