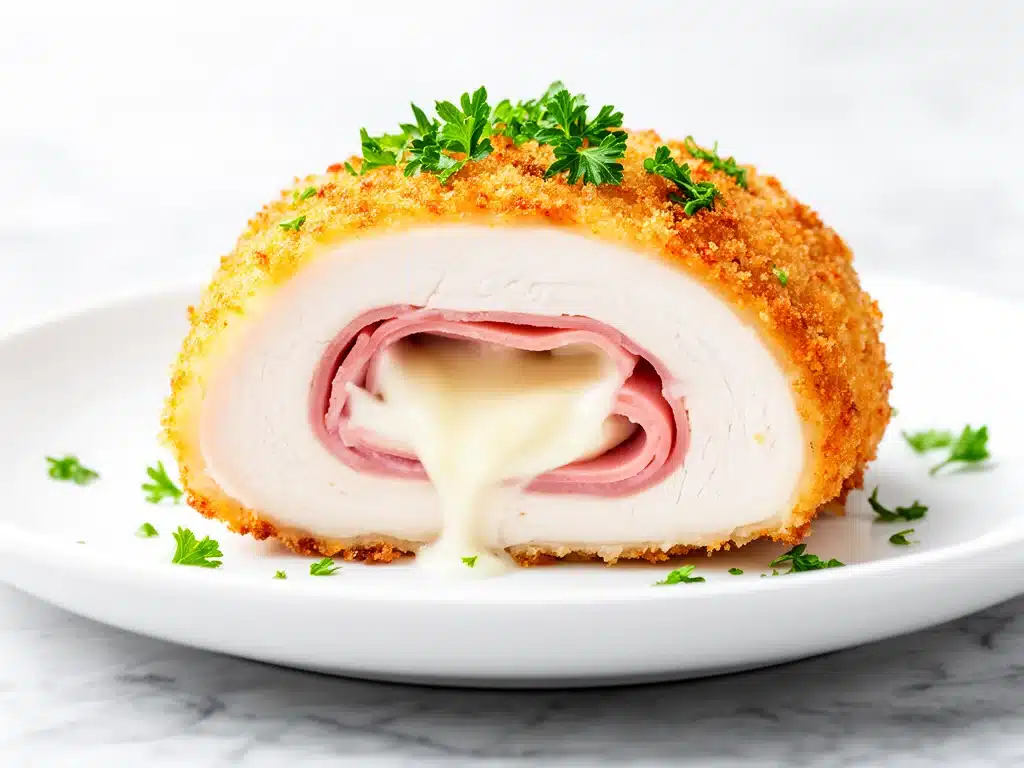
Three years ago, I attempted to make chicken cordon bleu for my anniversary dinner. I was ambitious, confident, and completely unprepared for the disaster that unfolded in my kitchen. I tried to stuff whole chicken breasts, roll them in flour and egg, and fry them in a skillet. What I ended up with was a chicken breast that was raw in the middle, burnt on the outside, and had a sad, soggy ham sticking out the side like a regretful tongue. My husband took one bite, politely chewed, and then we ordered pizza.
That night, I made a pact with myself: I would never attempt the traditional deep-fried method again unless I was in a professional kitchen with a deep fryer and a team of sous chefs. But I still craved that glorious combination of salty ham, gooey Swiss cheese, and tender chicken wrapped in a crispy, golden crust. So, I stopped trying to replicate the restaurant version and started trying to improve it.
After testing this crispy baked chicken cordon bleu recipe at least a dozen times (yes, I kept calling my husband back to taste-test), I finally found the sweet spot. The secret isn’t in the frying oil—it’s in the breading technique and the oven temperature. This version is baked, not fried, which means less mess, less guilt, and actually consistent results every single time. The crust stays crunchy even after sitting on the plate for a few minutes, and the inside stays juicy. It’s the kind of dinner that makes people think you spent hours in the kitchen, but you really just spent 15 minutes prepping and 25 minutes waiting.
If you’re someone who loves a good comfort food that feels fancy but doesn’t require a culinary degree, this is your recipe. It’s become a staple in our rotation, right up there with my cheesy broccoli and chicken fritters for when we need something hearty but fun. Let’s get into why this method works so much better than the old-school version.
Why You’ll Love This Baked Version
There are plenty of reasons to keep this crispy baked chicken cordon bleu recipe bookmarked, but here are the ones that actually matter to your weeknight sanity.
It’s Actually Crispy — Most baked chicken recipes end up with a soggy coating because the moisture from the chicken gets trapped. I solved this by using a double-dredge method with panko breadcrumbs. Panko absorbs less oil and creates air pockets, which means the crust stays crunchy in the oven. I’ve tested this against regular breadcrumbs, and there is no contest. The panko version is noticeably crispier and more satisfying.
Zero Oil Splatter — Let’s be real: frying chicken is messy. It’s dangerous. And cleaning the stove afterwards is a chore I avoid at all costs. Baking this on a wire rack over a sheet pan allows the hot air to circulate around the entire chicken breast, cooking it evenly without needing a pool of oil. You can even use parchment paper under the rack for easy cleanup. No more scrubbing burnt oil off your stovetop.
Restaurant-Quality Flavor — The combination of ham and Swiss cheese inside is classic for a reason. But the real magic happens when you add a touch of Dijon mustard to the chicken before rolling it. The mustard cuts through the richness of the cheese and adds a tangy depth that makes the dish feel sophisticated. It’s a small step that makes a huge difference in the final taste.
Great for Meal Prep — Unlike fried chicken, which gets soggy in the fridge, baked chicken cordon bleu reheats surprisingly well. I often make extra and reheat the pieces in the oven at 350°F for 10 minutes to restore that crispiness. It’s a great option for lunches, or even for freezing if you bake it partially first (more on that in the storage section).
Feels Like a Treat — This isn’t just dinner; it’s an event. It’s perfect for date nights, family gatherings, or just when you want to feel like a good cook without the stress. It pairs beautifully with roasted vegetables or a simple green salad. If you’re looking for other easy weeknight dinners that feel special, you might also enjoy my bacon cheddar ranch pasta salad as a side dish—it’s the perfect creamy, crunchy complement to the savory chicken.
Ingredients You’ll Need
One of the best things about this crispy baked chicken cordon bleu is how simple the ingredient list is. You don’t need anything exotic or hard to find. Here’s what you’ll need to make it right.
For the Chicken Base
Chicken breasts (4 large, boneless, skinless) — This is the foundation. I prefer large breasts because they’re easier to pound out evenly. Smaller ones can overcook before the inside is done. If your breasts are uneven in thickness, don’t worry—we’ll fix that in the prep steps.
Dijon mustard (2 tablespoons) — This is non-negotiable. It adds a tangy kick that balances the salty ham and rich cheese. Use a good quality Dijon; the flavor difference is noticeable. If you don’t have Dijon, whole-grain mustard works too, but it’s less sharp.
Ham slices (8 slices, deli-style) — Look for honey ham or spiral-sliced ham. Avoid the thick-cut deli ham if you can help it, as it’s harder to roll. You want two slices per breast, so eight slices total. If you can’t find ham, turkey ham is a decent substitute, though the flavor will be milder.
Swiss cheese (8 slices, about 8 ounces) — Authentic cordon bleu uses Gruyère, but Swiss cheese melts beautifully and has that classic nutty flavor. If you can find Gruyère, go for it! But standard Swiss works perfectly fine and is easier to find. Use slices, not shredded, so they lay flat and melt evenly.
For the Crispy Coating
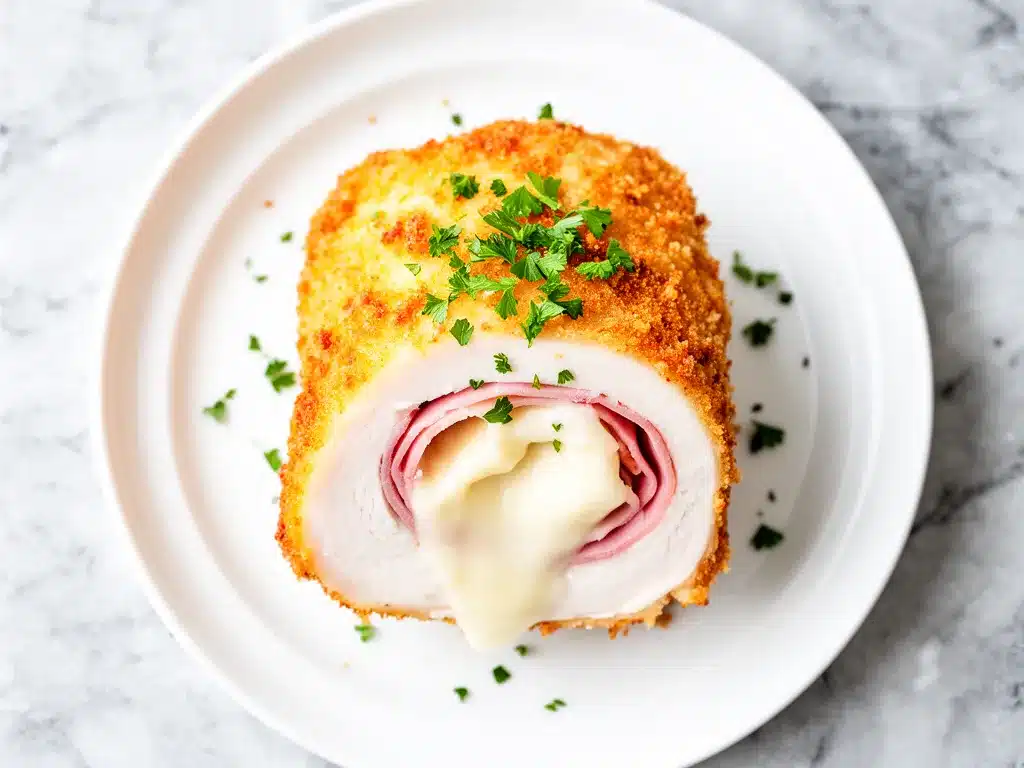
Panko breadcrumbs (1 cup / 100g) — This is the key to the crunch. Regular breadcrumbs are too dense. Panko creates that light, airy, crispy texture. I always buy the Japanese-style panko; it’s superior to the standard kind. If you can’t find it, you can pulse regular breadcrumbs in a food processor to break them up, but panko is worth the trip to the store.
Garlic powder (1 teaspoon) — Adds a savory depth to the breading. Don’t skip this; it complements the chicken and ham perfectly.
Onion powder (1 teaspoon) — Another flavor booster. It adds a subtle sweetness that balances the saltiness of the ham.
Dried parsley (1 teaspoon) — For color and a hint of freshness. It makes the golden crust look more appetizing.
Salt and black pepper (to taste) — Season the chicken and the breading generously. The ham is already salty, so you don’t need to overdo the salt, but the chicken itself needs seasoning.
Eggs (2 large, beaten) — These act as the glue for the breading. I add a splash of milk to the eggs to make the coating lighter and easier to spread.
Butter (2 tablespoons, melted) — Brushing the top with melted butter before baking helps the breadcrumbs brown evenly and adds a rich flavor. You can use olive oil if you prefer, but butter tastes better here.
Equipment Needed
You don’t need fancy gadgets for this. Here’s what I actually use in my kitchen.
Large baking sheet — I use a rimmed half-sheet pan. It needs to be big enough to hold all four chicken breasts with space between them for air circulation.
Wire rack — This is crucial. Placing the chicken on a wire rack over the baking sheet allows heat to circulate underneath, preventing the bottom from getting soggy. I use a standard cooling rack that fits inside my baking sheet. If you don’t have one, you can bake directly on the sheet, but the bottom won’t be as crispy.
Meat mallet or rolling pin — You need to pound the chicken breasts to an even ½-inch thickness. A meat mallet is ideal, but a heavy rolling pin or even a clean skillet works. This ensures even cooking and makes rolling easier.
Three shallow bowls — You’ll need one for flour, one for the egg wash, and one for the panko mixture. I use pie dishes or shallow cereal bowls. Having three separate stations makes the dredging process smooth and organized.
Parchment paper — I line the baking sheet with parchment paper before placing the wire rack on top. This catches any drips and makes cleanup a breeze. You can also spray the rack with non-stick cooking spray to prevent sticking.
Tongs — For flipping the chicken halfway through baking. Tongs give you better control than a spatula.
How to Make It: Step-by-Step
Alright, let’s make this! I’m walking you through exactly how I do it, including the little tricks I’ve picked up to ensure perfect results every time.
Step 1: Prep the Chicken (10 minutes)
Start by placing the chicken breasts between two sheets of plastic wrap or in a large zip-top bag. Using a meat mallet, rolling pin, or heavy skillet, pound the chicken until it’s an even ½-inch thickness. This is important for two reasons: it makes the chicken cook evenly, and it makes it easier to roll. Don’t pound it too thin, or it might tear when you roll it. Aim for uniform thickness.
Once pounded, pat the chicken dry with paper towels. Moisture is the enemy of crispiness, so getting the surface dry helps the breading stick better.
Step 2: Set Up Your Dredging Station (5 minutes)
Take your three shallow bowls. In the first, add ½ cup of all-purpose flour, seasoned with ½ teaspoon salt and ½ teaspoon black pepper. In the second, beat the 2 eggs with a splash of milk (about 1 tablespoon). In the third, mix the panko breadcrumbs with garlic powder, onion powder, dried parsley, and ½ teaspoon salt. Set these stations in a row so you can move from flour to egg to breadcrumbs smoothly.
Step 3: Dredge the Chicken (10 minutes)
Take a pounded chicken breast and dredge it in the flour mixture, shaking off any excess. Make sure it’s fully coated. Next, dip it into the egg wash, letting the excess drip off. Finally, press it firmly into the panko breadcrumb mixture. Use your hands to press the crumbs onto the chicken, ensuring they stick well. Place the breaded chicken on a clean plate. Repeat with the remaining chicken breasts.
Pro Tip: If the crumbs aren’t sticking, it’s usually because the chicken was too wet or the egg wash was too thin. Make sure the chicken is patted dry before flouring, and press the crumbs firmly into the surface.
Step 4: Assemble the Rolls (10 minutes)
Take a breaded chicken breast and lay it flat on a clean surface. Place two slices of ham in the center, slightly overlapping. Then, place two slices of Swiss cheese on top of the ham. Starting from one of the long ends, tightly roll the chicken up, tucking the filling inside as you go. The roll should be tight enough that the filling doesn’t fall out during baking. Secure the seam with a toothpick if needed, though if you roll it tightly enough, you might not need them.
Repeat with the remaining chicken breasts. You should have four tight rolls.
Step 5: Bake Until Golden (25-30 minutes)
Preheat your oven to 400°F (200°C). Line your baking sheet with parchment paper and place the wire rack on top. Lightly spray the rack with non-stick cooking spray. Place the chicken rolls on the rack, leaving space between them for air circulation. Brush the tops lightly with melted butter.
Bake for 25-30 minutes, flipping the chicken halfway through. The chicken is done when the internal temperature reaches 165°F (74°C) and the breading is golden brown. If the browning is happening too fast, you can tent the chicken with foil for the last few minutes.
Visual Cue: The chicken should look golden and crispy, and the cheese should be visibly melted inside (you can peek through the seam). If the breading is dark but the chicken isn’t cooked, lower the oven temperature to 375°F and bake for a few more minutes.
Step 6: Rest and Serve (5 minutes)
Remove the chicken from the oven and let it rest for 5 minutes before serving. This allows the juices to redistribute, keeping the chicken moist. Remove the toothpicks if you used them. Serve immediately while the crust is still crispy.
Expert Tips & Tricks
Here’s everything I’ve learned from making this dozens of times. These tips will save you from my mistakes.
Pound Evenly — This is the most common mistake people make. If one end of the chicken is thicker than the other, it will overcook on the thin end before the thick end is done. Take the time to pound it to a uniform ½-inch thickness. It makes a huge difference in texture.
Don’t Skip the Flour — Some recipes skip the flour and go straight to egg, but the flour creates a dry base that helps the egg adhere better. Without it, the breading can slide off during baking. Don’t skip this step.
Use a Wire Rack — I cannot stress this enough. Baking directly on the sheet pan results in a soggy bottom. The wire rack allows hot air to circulate underneath, crisping the entire roll. If you don’t have a rack, place the chicken on a bed of foil balls to elevate it slightly, but a rack is best.
Check the Temperature — Use a meat thermometer. Chicken cordon bleu can look done on the outside but be undercooked inside. The internal temperature should reach 165°F. If you don’t have a thermometer, cut into the thickest part to check for doneness, but this releases juices, so use it as a last resort.
Brush with Butter — Brushing the tops with melted butter before baking helps the breadcrumbs brown evenly and adds a rich flavor. It’s a small step that elevates the final dish.
Variations & Substitutions
Once you’ve nailed the basic version, here’s how you can mix it up. I’ve tried all of these.
Turkey Ham Version — If you’re watching sodium, turkey ham is a great substitute. It’s leaner and has a milder flavor. You might want to add a little more Dijon mustard to compensate.
Gruyère Cheese — For a more authentic and nutty flavor, use Gruyère instead of Swiss. It melts beautifully and has a deeper taste. It’s a bit more expensive, but worth it for special occasions.
Spinach Addition — Add a layer of fresh spinach leaves inside the roll with the ham and cheese. It adds a pop of color and nutrition. The spinach will wilt slightly during baking, which is perfect.
Gluten-Free — Use gluten-free panko breadcrumbs. Most brands work well, but check the label to ensure they’re certified gluten-free. The rest of the ingredients are naturally gluten-free.
Chicken Tenders — If you don’t want to roll the chicken, you can stuff chicken tenders instead. Lay them flat, add the ham and cheese, roll them up, and bread them as usual. This is a great option for kids or for a quicker prep.
Serving & Storage
How to Serve: I usually serve this with roasted asparagus or green beans, and maybe some garlic mashed potatoes. The chicken is rich, so a simple, crisp salad with a vinaigrette balances it well. If you’re hosting a dinner party, this looks stunning plated with a drizzle of extra Dijon mustard on the side.
Reheating: Leftovers can be stored in an airtight container in the fridge for up to 3 days. To reheat, place them in a 350°F oven for 10-15 minutes until heated through. This helps retain the crispiness. Avoid the microwave, as it will make the breading soggy.
Freezing: You can freeze the unbaked rolls. Bread them as usual, place them on a baking sheet, and freeze until solid. Then transfer to a freezer bag. When ready to cook, bake at 400°F for 30-35 minutes, adding a few extra minutes to the cooking time. Do not freeze baked leftovers, as the texture will suffer.
Nutrition Information
I’m not a nutritionist, but here’s the breakdown if you’re tracking. This is per serving (1 chicken roll).
- Calories: 450
- Protein: 40g
- Carbs: 15g
- Fiber: 1g
- Sugar: 1g
- Fat: 25g
- Saturated Fat: 10g
- Cholesterol: 120mg
- Sodium: 600mg
What’s Good: High in protein, relatively low in carbs (if you skip the breading, but we’re not doing that).
What to Know: Higher in sodium due to the ham and cheese. If you’re watching salt, look for low-sodium ham and cheese.
Final Thoughts
So that’s my go-to crispy baked chicken cordon bleu! I’ve probably talked your ear off at this point, but when you make a recipe this often, you have a lot to say about it. This has saved weeknight dinners more times than I can count. It’s my answer to “what’s for dinner” when I want something fancy but don’t have the energy to fry anything. My kids are happy, my husband’s happy, and I’m happy because I’m not stressed about cooking.
Make it yours! Try different cheeses, add spinach, or switch up the ham. The best recipes are the ones you adapt to your family’s tastes. If you make this, drop a comment and let me know what you think! I love hearing how recipes turn out in your kitchen. And if something doesn’t work, tell me that too—I’m here to help troubleshoot.
Happy cooking! And I hope your kitchen smells half as good as mine does right now.
Frequently Asked Questions
Can I use turkey instead of chicken?
You can, but turkey breasts are leaner and can dry out faster. If you use turkey, make sure to pound it to the same thickness and check the temperature frequently. I recommend using turkey thighs for more moisture, but the rolling technique is the same.
Why did my cheese leak out during baking?
This usually happens if the roll wasn’t tight enough or if the chicken tore during pounding. Make sure to pound the chicken evenly and roll it tightly. If you see cheese leaking, it’s not a disaster—it just means you’ll have extra cheesy crust. You can press it down with a fork during baking to help it seal.
Can I make this ahead of time?
Yes! You can assemble the rolls and refrigerate them for up to 24 hours before baking. Cover them tightly with plastic wrap. When you’re ready to cook, take them out of the fridge and bake as directed, adding 5 minutes to the cooking time since they’re starting cold.
What if I don’t have a wire rack?
If you don’t have a wire rack, you can bake the chicken directly on a parchment-lined baking sheet. To prevent sticking, make sure to spray the parchment with non-stick cooking spray. The bottom won’t be as crispy, but it will still be delicious. Alternatively, you can place crumpled balls of aluminum foil under the chicken to elevate it slightly.
Is there a way to make this lighter?
You can use turkey ham and part-skim mozzarella instead of Swiss cheese to reduce the fat and sodium. You can also skip the butter brush and use cooking spray instead. The panko breadcrumbs can be replaced with crushed cornflakes for a lighter crunch, though the texture will be different.
Can I double this recipe?
Absolutely! Double all the ingredients and use two baking sheets. Make sure not to overcrowd the sheets, as the chicken needs space for air circulation to crisp up. If you don’t have two sheets, bake in two batches.
Pin This Recipe!


Crispy Baked Chicken Cordon Bleu: Easy Recipe
- Total Time: 65 minutes
- Yield: 4 servings 1x
Description
A simplified, baked version of the classic chicken cordon bleu that delivers a crispy, golden crust without the mess of deep frying. This recipe uses a double-dredge panko method and a wire rack for even cooking, resulting in juicy chicken with melted Swiss cheese and ham.
Ingredients
- 4 large boneless, skinless chicken breasts
- 2 tablespoons Dijon mustard
- 8 slices deli-style ham (honey or spiral-sliced)
- 8 slices Swiss cheese (about 8 ounces)
- 1 cup (100g) panko breadcrumbs
- 1 teaspoon garlic powder
- 1 teaspoon onion powder
- 1 teaspoon dried parsley
- Salt and black pepper to taste
- 2 large eggs, beaten with a splash of milk
- 1/2 cup all-purpose flour
- 2 tablespoons melted butter
Instructions
- Preheat oven to 400°F (200°C). Line a large baking sheet with parchment paper and place a wire rack on top.
- Place chicken breasts between plastic wrap or in a zip-top bag. Pound them to an even 1/2-inch thickness using a meat mallet or rolling pin. Pat dry with paper towels.
- Set up three shallow bowls: one with flour seasoned with salt and pepper, one with beaten eggs and milk, and one with panko mixed with garlic powder, onion powder, parsley, and salt.
- Dredge each chicken breast in the flour, shaking off excess. Dip into the egg wash, then press firmly into the panko mixture to coat evenly.
- Lay a breaded chicken breast flat. Place two slices of ham and two slices of Swiss cheese in the center. Roll tightly from one long end, tucking in the filling. Secure with toothpicks if necessary.
- Place the rolled chicken on the wire rack. Brush the tops lightly with melted butter.
- Bake for 25-30 minutes, flipping halfway through, until the internal temperature reaches 165°F (74°C) and the crust is golden brown.
- Remove from oven and let rest for 5 minutes before serving.
Notes
For best results, ensure chicken is pounded to an even thickness to prevent uneven cooking. Use a wire rack to allow air circulation for a crispy bottom. If browning too quickly, tent with foil. Leftovers can be reheated in the oven at 350°F for 10-15 minutes to maintain crispiness.
- Prep Time: 35 minutes
- Cook Time: 30 minutes
- Category: Main Course
- Cuisine: American
Nutrition
- Serving Size: 1 chicken roll
- Calories: 450
- Sugar: 1
- Sodium: 600
- Fat: 25
- Saturated Fat: 10
- Carbohydrates: 15
- Fiber: 1
- Protein: 40
Keywords: chicken cordon bleu, baked chicken, crispy chicken, easy dinner, weeknight meals, ham and cheese chicken, panko chicken