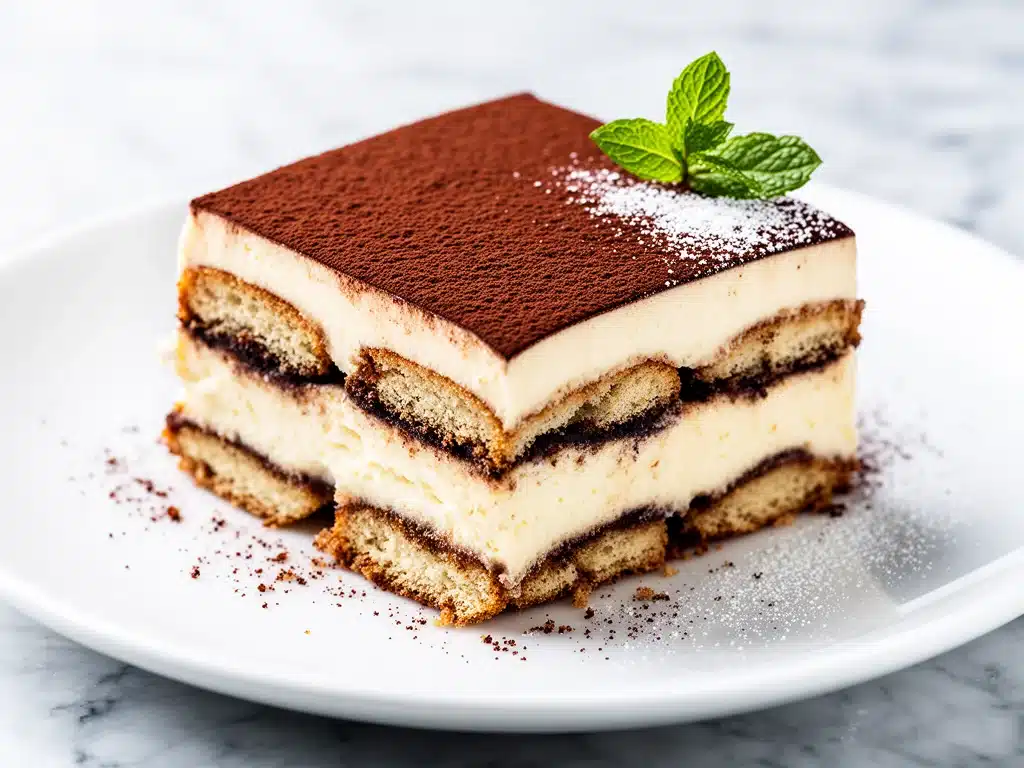
I have a confession to make. For years, I was a store-bought tiramisu loyalist. I know, I know. It sounds like a crime against Italian cuisine. But for a long time, I thought making tiramisu from scratch was too much work. I was intimidated by the mascarpone, the raw eggs, and the delicate balance of espresso that could easily turn your dessert into a bitter, soggy mess. I’d just grab the tub from the Italian market, eat half of it before getting home, and tell myself I was too busy to do it the “real” way.
That changed last winter. I was hosting a small dinner party for friends who are serious about their desserts. I wanted to impress, but I was also stressed about other dishes, like my bacon cheddar ranch pasta salad, which was taking up most of my mental energy. I decided to finally tackle the tiramisu. I followed a recipe that seemed simple enough, but when I dug in, it was grainy, too sweet, and lacked that signature coffee punch. My friends were polite, but I could see the disappointment in their eyes. I felt like a fraud.
So, I did what I always do when I mess up: I started over. And over. And over. I made this tiramisu at least seven times in two weeks. I tweaked the ratio of mascarpone to cream. I adjusted the sugar. I experimented with different types of ladyfingers. I even brewed the espresso three different ways to get the strength just right. And finally, on the eighth attempt, I took a bite and closed my eyes. It was perfect. Creamy, rich, not too sweet, with a deep, aromatic coffee flavor that lingered on the palate. The kind of dessert that makes people stop talking and just eat.
This is that recipe. The one that finally worked. It’s a classic tiramisu with espresso and mascarpone that impresses every time, but it’s also surprisingly approachable. You don’t need fancy equipment or years of training. You just need good ingredients, a little patience, and my hard-won tips to avoid the mistakes I made so you don’t have to. This dessert has become my go-to for impressing guests, celebrating small victories, or just because I want something elegant but not fussy. And honestly? It’s easier than you think.
Why You’ll Love This Classic Tiramisu
There are about ten reasons I keep making this tiramisu, but here are the big ones that have it on a permanent rotation in my kitchen.
Make-Ahead Magic — Seriously, this is the ultimate stress-buster. You assemble it the night before, and it just sits in the fridge. The flavors meld, the ladyfingers soften perfectly, and you’re done. I make this for Sunday dinners or last-minute guests because I know it will be ready when I am. No last-minute cooking, no stress.
Five Ingredients, Maximum Flavor — You don’t need a pantry full of weird spices or hard-to-find items. Mascarpone, espresso, ladyfingers, eggs, sugar, and cocoa powder. That’s it. Simple ingredients, but the way they come together is pure magic. It’s proof that you don’t need complexity to make something incredible.
Restaurant-Quality Texture — I’ve eaten tiramisu in high-end Italian restaurants, and this holds up. The cream is light but rich, the coffee is bold but not overpowering, and the cocoa adds a bitter contrast that balances the sweetness. It’s not just “good for homemade.” It’s genuinely great.
Customizable Sweetness — Some recipes are cloyingly sweet. This one lets you control the sugar level. I prefer it slightly less sweet to let the espresso shine, but you can adjust it to your taste. It’s your dessert, your rules.
No-Bake Convenience — You don’t need to turn on the oven. This is perfect for hot summer days or when you’re already cooking a big meal and don’t want to heat up the kitchen. It’s cool, refreshing, and elegant without the hassle.
This is my answer to “what’s for dessert?” when I want something that feels special but doesn’t require a team of chefs. It’s reliable, delicious, and always gets compliments. I’ve made this for everyone from my picky nephew to my foodie friends, and everyone asks for the recipe.
Ingredients You’ll Need
Here’s the best part: you probably have most of this already. This isn’t a recipe that requires a special trip to a specialty store. Most of it is pantry staples or things you can find at any grocery store.
For the Cream Filling
Mascarpone cheese (16 oz / 450g) — This is the star. Use full-fat, cold mascarpone. If it’s too warm, it can become grainy when you whip it. I buy the tub from the dairy section, not the specialty cheese counter. It’s the same thing, just cheaper.
Heavy cream (1 cup / 240ml) — Full-fat only. Don’t skimp here. You need the fat to whip it into soft peaks. If you use low-fat cream, it won’t hold its shape, and your tiramisu will be soupy. Trust me on this.
Egg yolks (6 large) — Yes, six yolks. They add richness and help stabilize the cream. I separate the eggs myself, but if you’re feeling lazy, you can buy pre-separated yolks. Just make sure they’re fresh.
Sugar (½ cup / 100g) — Granulated white sugar. I like it slightly less sweet, but if you have a sweet tooth, you can bump it up to ⅔ cup. I’ve tested both, and both work.
Vanilla extract (1 teaspoon) — Pure vanilla, not imitation. It adds a subtle warmth that complements the coffee. Don’t skip it.
Salt (a pinch) — Just a tiny pinch to balance the sweetness. It’s easy to forget, but it makes a difference.
For the Coffee Soak
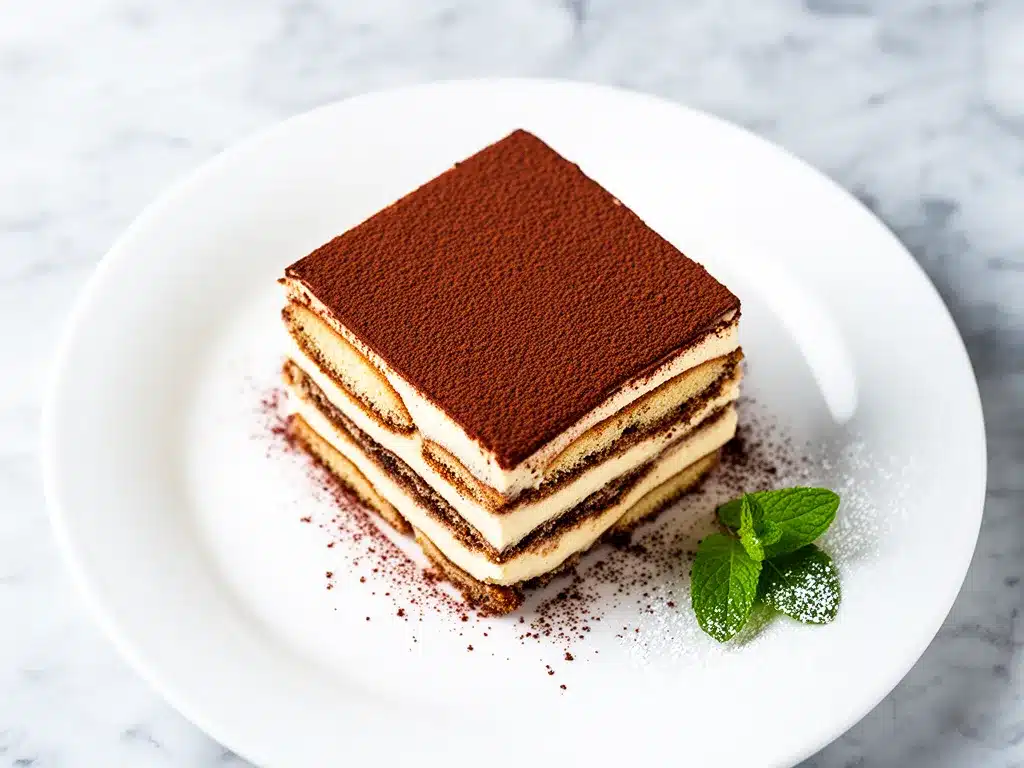
Espresso (1½ cups / 360ml, cooled) — Freshly brewed espresso is best. If you don’t have an espresso machine, strong brewed coffee works too. I use a French press for convenience. Let it cool completely before using—hot coffee will dissolve the ladyfingers instantly.
Dark rum or Marsala wine (2 tablespoons, optional) — I love the depth it adds, but it’s optional. If you’re making this for kids or non-drinkers, just skip it. The coffee flavor is strong enough on its own.
For Assembly
Ladyfingers (24-26 pieces) — Also known as savoiardi. Buy the ones in the long tube, not the round cookies. They’re designed to soak up coffee without falling apart. I usually buy two packages to be safe.
Unsweetened cocoa powder (for dusting) — Good quality cocoa makes a difference. I use Dutch-processed for a darker, richer color. It’s not just for decoration—it adds a bitter contrast to the sweet cream.
Dark chocolate shavings (optional) — I like to add these for extra richness and visual appeal. It’s not traditional, but it’s delicious.
Equipment Needed
You don’t need fancy equipment for this. Here’s what I actually use.
9×13 inch baking dish — Glass or ceramic works best. It needs to be deep enough to hold the layers without spilling. I use a Pyrex dish because it’s easy to see through and clean.
Electric mixer — Hand mixer or stand mixer. You need to whip the cream and yolks, so a hand mixer is perfect. I’ve tried doing it by hand, and it takes forever. Save yourself the effort.
Mixing bowls — Two large bowls. One for the yolks and sugar, one for the cream. Make sure they’re clean and dry.
Whisk — For mixing the yolks and sugar until pale. A balloon whisk works best.
Spatula — Silicone spatula for folding the cream into the mascarpone. You want to be gentle to keep the air in the mixture.
Small bowl — For the coffee soak. Any small bowl works.
Sieve or sifter — For dusting the cocoa powder. A fine-mesh sieve gives the most even dusting. I use a regular spoon if I’m in a hurry, but the sieve looks better.
Sharp knife — To trim the ladyfingers if needed. Sometimes they’re too big for the dish, and you need to cut them to fit.
How to Make It: Step-by-Step
Alright, let’s make this! I’m walking you through exactly how I do it, including the little tricks I’ve picked up over my eight attempts.
Step 1: Brew and Cool the Espresso (10 minutes)
Start by brewing your espresso or strong coffee. I use about 1½ cups. Let it cool to room temperature, then put it in the fridge to chill completely. This is crucial. If the coffee is warm, it will dissolve the ladyfingers too quickly, and your tiramisu will be a soggy mess. I usually brew it the night before so it’s ready to go.
Step 2: Whip the Egg Yolks and Sugar (3-4 minutes)
In a large bowl, whisk the egg yolks and sugar together until they’re pale yellow and thick. This takes about 3-4 minutes with an electric mixer. The mixture should ribbon when you lift the whisk. This step incorporates air and dissolves the sugar, which is key for the texture. Don’t skip it.
Step 3: Beat the Heavy Cream (2-3 minutes)
In a separate clean, dry bowl, whip the heavy cream until it forms soft peaks. You want it to hold its shape but still be creamy. Don’t over-whip it into stiff peaks, or it will be grainy when you fold it in. Soft peaks are perfect.
Step 4: Combine Mascarpone with Yolks
Add the cold mascarpone cheese to the yolk mixture. Beat on low speed until just combined. Be careful not to overmix here. The mascarpone can separate if you beat it too much. Just mix until it’s smooth.
Step 5: Fold in the Cream
Gently fold the whipped cream into the mascarpone mixture using a spatula. Do this in two or three additions, folding gently to keep the air in the mixture. You’re looking for a smooth, uniform cream. Don’t stir vigorously. Gentle folds only.
Step 6: Prepare the Coffee Soak
Combine the cooled espresso with the rum or Marsala wine (if using) in a shallow bowl. You’ll use this to dip the ladyfingers. Have everything ready before you start assembling.
Step 7: Assemble the Tiramisu (10 minutes)
Quickly dip each ladyfinger into the coffee mixture. Don’t soak them—just a quick dip on each side. They should be moist but not soggy. Arrange them in a single layer in the bottom of your 9×13 dish. Spread half of the cream mixture over the ladyfingers. Repeat with another layer of dipped ladyfingers and the remaining cream. Smooth the top with a spatula.
Step 8: Chill and Dust (4 hours minimum)
Cover the dish with plastic wrap and refrigerate for at least 4 hours, but overnight is best. This gives the flavors time to meld and the ladyfingers to soften. Before serving, dust the top generously with unsweetened cocoa powder using a sieve. Add chocolate shavings if you like. Slice with a sharp knife and serve.
Expert Tips & Tricks
Here’s everything I’ve learned from making this dozens of times. These tips will save you from my mistakes.
Keep Everything Cold — Mascarpone and cream are temperature-sensitive. If they’re too warm, they’ll separate or become grainy. Keep them in the fridge until the moment you use them. I even chill my mixing bowls for 10 minutes before whipping the cream.
Don’t Over-Soak the Ladyfingers — This is the most common mistake. Ladyfingers are like sponges. If you soak them too long, they’ll fall apart and your tiramisu will be watery. Dip them quickly—half a second on each side is enough.
Use Fresh Eggs — Since you’re using raw egg yolks, make sure they’re fresh and from a reliable source. If you’re worried about raw eggs, you can pasteurize them by whisking them over a double boiler until they reach 160°F, then cool them before using. I usually just buy pasteurized eggs for peace of mind.
Let It Chill Overnight — I know you want to eat it right away, but patience pays off. The longer it chills, the better it tastes. The flavors meld, and the texture becomes more cohesive. I’ve made it with just 2 hours of chill time, and it’s good. But overnight? It’s incredible.
Dust the Cocoa Just Before Serving — If you dust it too early, the cocoa will absorb moisture from the cream and look patchy. Dust it right before you serve for the best presentation.
Variations & Substitutions
Once you’ve nailed the basic version, here’s how you can mix it up. I’ve tried all of these.
Alcohol-Free Version — Skip the rum or Marsala and use extra espresso. The flavor is still amazing, just less complex. Perfect for kids or non-drinkers.
Chocolate Tiramisu — Add 2 tablespoons of cocoa powder to the cream mixture. It’s rich and chocolatey, and my kids love it.
Strawberry Tiramisu — Layer fresh sliced strawberries between the cream and ladyfingers. It’s lighter and fruity. I’ve made this for spring parties, and it’s a hit.
Gluten-Free — Use gluten-free ladyfingers. They’re available in most grocery stores. The rest of the recipe is naturally gluten-free.
Lower-Sugar Version — Reduce the sugar to ¼ cup and use a sugar substitute. It’s less sweet but still delicious. I’ve made this for friends who are watching their sugar intake.
Using Leftover Coffee — If you have leftover cold brew or iced coffee, you can use that instead of espresso. Just make sure it’s strong enough.
Serving & Storage
How to Serve: I usually serve this straight from the dish, sliced into squares. It looks elegant and rustic. I pair it with a simple green salad or some fresh fruit to balance the richness. For a fancy touch, add a dollop of whipped cream and a chocolate shard on top.
Side Dishes: I’ve served this with my strawberry cream cheese roll-ups for a brunch, and it worked surprisingly well. The lightness of the roll-ups balances the heaviness of the tiramisu.
Storage: Store in the refrigerator, covered with plastic wrap, for up to 3 days. It actually tastes better on the second day as the flavors continue to meld. Do not freeze it. The cream will separate, and the texture will be ruined.
Reheating: Do not reheat. Tiramisu is meant to be served cold. If it’s been in the fridge for a while, just let it sit at room temperature for 10 minutes before serving to take the chill off.
Nutrition Information
I’m not a nutritionist, but here’s the breakdown if you’re tracking. This is a rich, indulgent dessert, so portion control is key.
Per Serving (based on 12 servings):
- Calories: 320
- Protein: 6g
- Carbs: 28g
- Fiber: 1g
- Sugar: 18g
- Fat: 22g
- Saturated Fat: 13g
- Cholesterol: 120mg
- Sodium: 80mg
What’s Good: It’s relatively low in sodium and provides some protein from the eggs and cheese. The cocoa has antioxidants.
What to Know: It’s high in calories, sugar, and saturated fat due to the cream, cheese, and sugar. It’s a treat, not a health food. Enjoy it in moderation.
My Take: Look, this is dessert. It’s meant to be indulgent. It’s way better than store-bought, costs less, and you know exactly what’s in it. When I make it, I make sure to have small slices and savor them. It’s worth the calories.
Final Thoughts
So that’s my classic tiramisu recipe! I’ve probably talked your ear off at this point, but when you make a recipe this often, you have a lot to say about it. This has saved my dinner parties more times than I can count. It’s my answer to “what’s for dessert?” when I want something that feels special but doesn’t require a team of chefs. My friends are happy, my family is happy, and I’m happy because I’m not stressed about cooking.
Make it yours! Try different liqueurs, add chocolate, or experiment with fruit. The best recipes are the ones you adapt to your tastes. If you make this, drop a comment and let me know what you think! I love hearing how recipes turn out in your kitchen. And if something doesn’t work, tell me that too—I’m here to help troubleshoot.
Happy cooking! And I hope your kitchen smells half as good as mine does right now.
Frequently Asked Questions
Can I use instant coffee instead of espresso?
You can, but it won’t be as flavorful. Instant coffee can work in a pinch, but it often lacks the depth and aroma of fresh espresso. If you use instant, dissolve 2-3 tablespoons in 1½ cups of hot water and let it cool. Fresh espresso is worth the effort.
Why is my tiramisu watery?
This usually happens if you soaked the ladyfingers too long. Remember, a quick dip is all you need. If they’re too saturated, they’ll release water into the cream. Also, make sure your mascarpone and cream are cold. If they’re warm, the mixture can separate and become watery.
Can I make this ahead of time?
Yes! This is actually better when made ahead. Assemble it the night before and let it chill overnight. The flavors meld, and the texture improves. It will keep in the fridge for up to 3 days.
Can I use whipped cream instead of mascarpone?
No, mascarpone is essential for the authentic texture and flavor. Whipped cream is too light and won’t provide the same richness. If you can’t find mascarpone, cream cheese mixed with a little cream is a substitute, but it won’t be the same.
Is it safe to eat raw egg yolks?
If you’re concerned about raw eggs, you can use pasteurized eggs, which are available in most grocery stores. Alternatively, you can pasteurize the eggs yourself by whisking them over a double boiler until they reach 160°F, then cooling them before using. This kills any bacteria while keeping the eggs safe to eat.
How do I get a smooth cocoa dusting?
Use a fine-mesh sieve or sifter. Tap it gently over the tiramisu to create an even layer. If you use a spoon, the cocoa will clump. A sieve gives you that professional, restaurant-quality look.
Can I freeze tiramisu?
I don’t recommend it. The cream and mascarpone will separate when thawed, and the texture will be grainy. It’s best enjoyed fresh or stored in the fridge for a few days. If you need to make it ahead, refrigerate it instead of freezing.
Pin This Recipe!
Classic Tiramisu Recipe: Best 15-Minute Homemade Dessert
- Total Time: 4 hours 15 minutes
- Yield: 12 servings 1x
Description
A classic, no-bake Italian dessert featuring layers of espresso-soaked ladyfingers and a rich, creamy mascarpone filling. This recipe is approachable, make-ahead friendly, and delivers restaurant-quality texture with simple ingredients.
Ingredients
- 16 oz (450g) full-fat mascarpone cheese, cold
- 1 cup (240ml) heavy cream, cold
- 6 large egg yolks
- ½ cup (100g) granulated white sugar
- 1 teaspoon pure vanilla extract
- 1 pinch salt
- 1½ cups (360ml) freshly brewed espresso, cooled completely
- 2 tablespoons dark rum or Marsala wine (optional)
- 24–26 ladyfingers (savoiardi)
- Unsweetened cocoa powder, for dusting
- Dark chocolate shavings (optional)
Instructions
- Brew the espresso and let it cool to room temperature, then chill in the refrigerator until completely cold.
- In a large bowl, whisk egg yolks and sugar together with an electric mixer until pale yellow, thick, and ribbon-like (about 3-4 minutes).
- In a separate clean, dry bowl, whip the heavy cream until soft peaks form.
- Add the cold mascarpone to the yolk mixture and beat on low speed until just combined and smooth.
- Gently fold the whipped cream into the mascarpone mixture in two or three additions using a spatula until uniform.
- Combine the cooled espresso and optional rum/Marsala in a shallow bowl.
- Quickly dip each ladyfinger into the coffee mixture (half a second per side) and arrange in a single layer at the bottom of a 9×13 inch dish.
- Spread half of the cream mixture over the ladyfingers.
- Repeat with a second layer of dipped ladyfingers and the remaining cream, smoothing the top.
- Cover with plastic wrap and refrigerate for at least 4 hours, preferably overnight.
- Before serving, dust generously with unsweetened cocoa powder using a sieve and add chocolate shavings if desired.
Notes
Keep all dairy ingredients cold to prevent separation. Do not soak ladyfingers too long or they will become soggy. For safety, use pasteurized eggs if concerned about raw yolks. The dessert tastes best after chilling overnight.
- Prep Time: 15 minutes
- Cook Time: 0 minutes
- Category: Dessert
- Cuisine: Italian
Nutrition
- Serving Size: 1 slice
- Calories: 320
- Sugar: 18
- Sodium: 80
- Fat: 22
- Saturated Fat: 13
- Carbohydrates: 28
- Fiber: 1
- Protein: 6
Keywords: tiramisu, italian dessert, no-bake, mascarpone, espresso, ladyfingers, make-ahead dessert, classic tiramisu



