Last weekend, I was staring at a half-empty pantry, feeling that familiar Sunday night dread. You know the one. It’s 5:30 PM, the kids are asking what’s for dinner, and the idea of turning on the stove for more than twenty minutes felt physically painful. Usually, I’d cave and order takeout. But this time, I had a bag of red grapes, a wedge of brie, and a block of cheddar staring at me from the fridge.
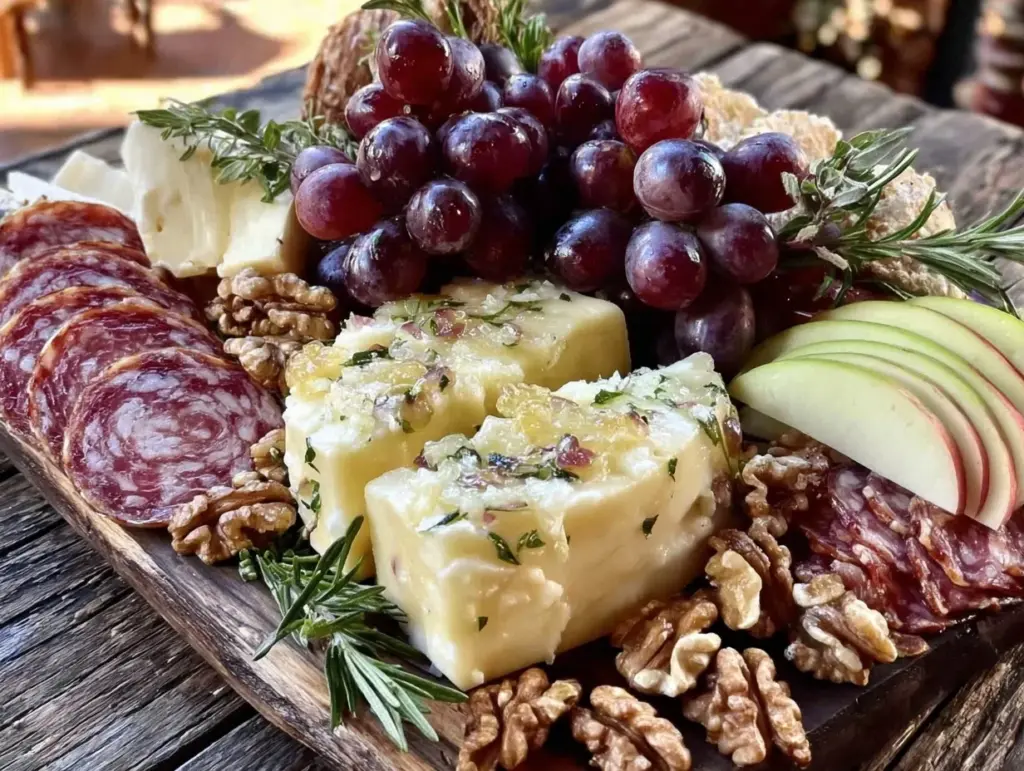
I decided to throw together a Fall Charcuterie Board instead of cooking a hot meal. The plan was simple: cheese, crackers, fruit, and maybe some nuts. But then I looked at those grapes. They looked a little sad, didn’t they? Just sitting there. So, I did something reckless. I tossed them in a bowl with honey, rosemary, and a pinch of cayenne, and threw them in the oven.
Here’s the thing. I’ve made dozens of charcuterie boards over the years. I’ve bought expensive meats and fancy crackers. But nothing, and I mean nothing, prepared my guests quite like those honey roasted grapes did. When I pulled the tray out, the grapes had burst open, turning into little bursts of sweet-tart jammy goodness. The honey had caramelized on the edges, and the rosemary infused everything with this warm, autumnal scent that filled the whole house.
My husband took one bite of a grape on a cracker with sharp cheddar and actually stopped talking. That’s the moment you know you’ve won. We skipped the takeout menu entirely. We spent the next two hours grazing, drinking wine, and picking the brains of my friend Sarah about her upcoming wedding. The board wasn’t just food; it was the event. And the secret? It really is just that one trick: roasting the grapes. It transforms a simple snack into something that tastes like you spent hours in the kitchen, when you really just put on some music and let the oven do the work.
If you’re tired of the same old cheese and cracker routine, or if you want a centerpiece that actually sparks conversation, this Fall Charcuterie Board with Honey Roasted Grapes is your answer. It’s better than takeout, easier than you think, and absolutely perfect for the cooler weather when you want comfort without the heavy meal.
Why You’ll Love This Recipe
I’ve made this board for everything from casual Tuesday night dinners to my husband’s birthday party, and it never fails. There are a few reasons why this specific setup has become my go-to, especially when the weather turns crisp.
The Honey Roasted Grapes Are the Star
Seriously, the grapes steal the show. Raw grapes are fine, but roasted? They’re a revelation. The heat breaks down the cell walls, concentrating the sugar and creating a jammy texture that pairs perfectly with salty cheeses. It’s a texture contrast that makes people close their eyes and go, “Wait, what is this?” Trust me, they’ll be asking for the recipe within minutes.
Zero Cooking Stress
This isn’t a recipe where you’re standing over a stove stirring risotto or flipping pancakes. You prep the board while the grapes roast. That’s it. You can have this ready in under 20 minutes of active time. I’ve assembled this board while helping my son with math homework. It’s that low-effort, high-reward kind of win.
Perfect for Any Season (But Especially Fall)
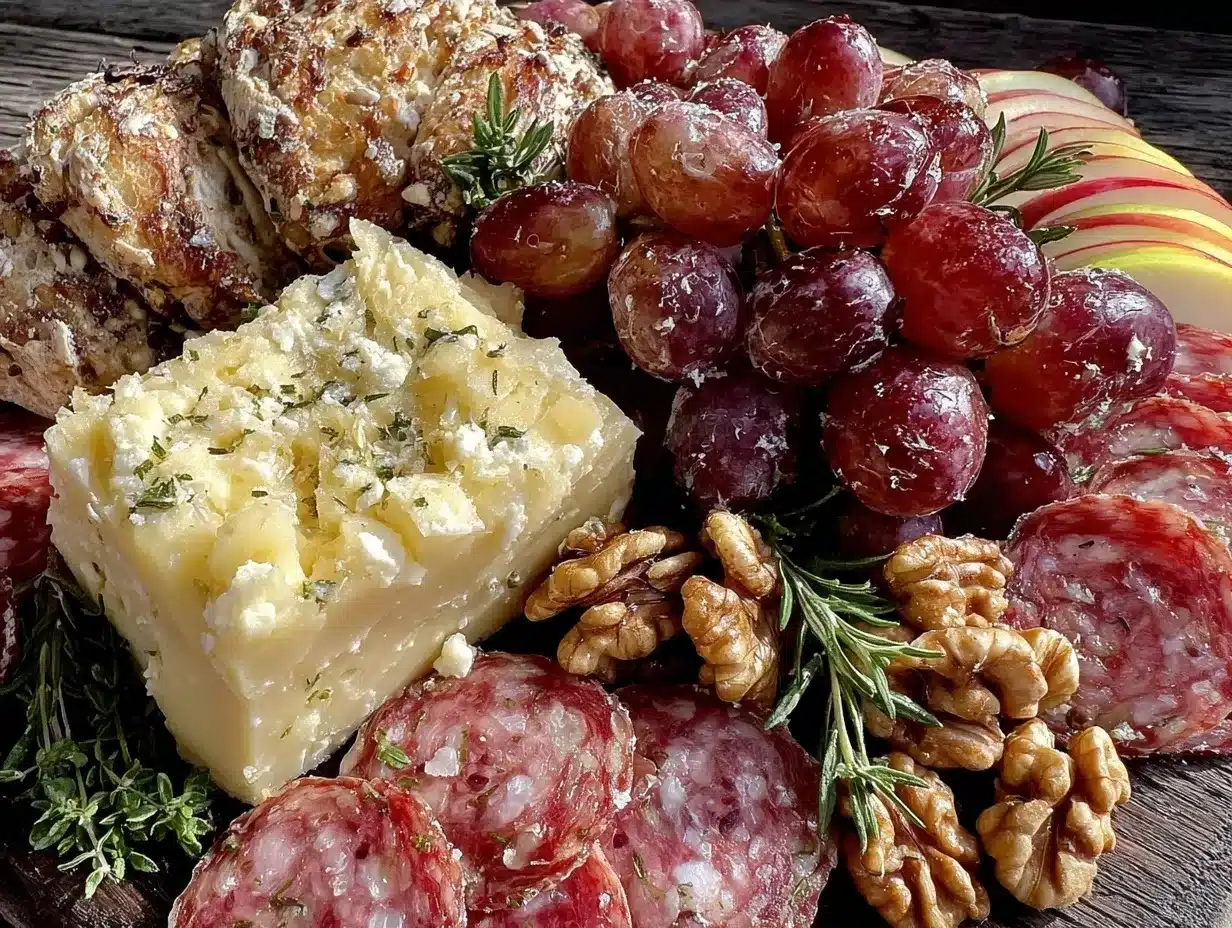
While we’re calling it a Fall Charcuterie Board, this works year-round. But in the fall, the flavors just sing. The warmth of the rosemary and thyme complements the roasted grapes, and the sturdy cheeses hold up against the cooler air. It feels seasonal without being overly complicated.
It’s a Conversation Starter
Unlike a plate of food where everyone eats and then talks, a board encourages interaction. People stand around, grab different combinations, and share what they’re eating. “Have you tried the brie with the fig jam?” “Oh, you need to try this grape on the prosciutto.” It creates a relaxed, social atmosphere that’s hard to beat on a weeknight.
Makes Amazing Leftovers
Let’s be real: I always make too much. But with a board, leftovers aren’t sad. The leftover grapes? Delicious on a morning yogurt bowl. The leftover cheese and crackers? Perfect for a mid-afternoon snack. Nothing goes to waste, and you get a second meal out of the effort.
This is my go-to when I need dinner to just work. No complicated techniques, no weird ingredients, just reliable, delicious food that makes everyone happy.
Ingredients You’ll Need
Here’s the best part: you probably have most of this already. A charcuterie board is all about what you have on hand, but a few key items make the difference between “okay” and “wow.” I’m particular about the cheese selection and the grapes, so pay attention to those.
For the Honey Roasted Grapes
Red or Green Grapes (2 pounds / 900g) — I prefer red because they’re sweeter and look prettier when they burst, but green works if you want a tart contrast. Make sure they are firm and not mushy. Wash them and pat them completely dry; water is the enemy of caramelization.
Extra Virgin Olive Oil (1 tablespoon) — Just a light toss. You don’t want them swimming, just coated. I use a decent quality oil here because you’ll taste it.
Honey (3 tablespoons) — This is the glue. It caramelizes and creates that sticky, delicious coating. I use regular clover honey, but wildflower adds a nice floral note if you have it.
Fresh Rosemary (2 sprigs) — The piney, woody flavor of rosemary cuts through the sweetness of the honey. Strip the needles off the stem and chop them finely. Don’t skip this; it’s the “fall” element.
Sea Salt and Black Pepper — A pinch of each. Yes, salt on fruit? It balances the sugar and enhances the flavor. Trust me.
Cayenne Pepper (¼ teaspoon) — Optional, but highly recommended. Just a tiny kick to keep it from being too sweet. It wakes up the palate.
For the Board
Hard Cheese (8-10 ounces) — I like a sharp cheddar or an aged gouda. These hold their shape well and offer a strong flavor contrast to the soft cheeses. Cut into cubes or slices.
Soft Cheese (8 ounces) — Brie or Camembert is classic. Let it come to room temperature before serving, or the flavor is muted. I usually take it out of the fridge about an hour before guests arrive.
Cured Meats (6-8 ounces) — Prosciutto, salami, or soppressata. I buy pre-sliced to save time, but if you have a sharp knife, slicing it yourself looks fancier. Fold the prosciutto into rosettes for that pretty look.
Crackers (1 box) — Water crackers are neutral and let the cheese shine. Sesame seed crackers add crunch. I usually grab two different kinds for variety.
Fresh Figs or Pears (2-3) — Sliced pears or halved fresh figs add another layer of fresh fruit. If figs are out of season, stick with more grapes or add some apple slices (toss with lemon juice so they don’t brown).
Nuts (½ cup) — Walnuts or pecans are perfect for fall. Toast them lightly in a dry pan for extra flavor.
Fig Jam or Honey (½ cup) — A small bowl of jam on the side for dipping. Or just drizzle extra honey over the board at the end.
Personal Tip: I always buy the block of cheese and slice it myself. Pre-sliced cheese has been sitting in a package and loses its texture. Plus, it’s cheaper. And for the grapes, buy them the day before if you can. They’ll be fresher.
Equipment Needed
You don’t need fancy equipment for this. Here’s what I actually use.
Baking Sheet — A standard 10×15 or 12×18 sheet pan. I line it with parchment paper for easy cleanup. You don’t need a special roasting pan; any flat pan works.
Small Bowl — For tossing the grapes with oil, honey, and spices. A mixing bowl is fine, but a small one is easier to handle.
Sharp Knife — For slicing the cheese and fruit. A dull knife makes a mess, especially with soft cheeses like brie. I use my chef’s knife for everything.
Cheese Board or Platter — This is your canvas. I love a large wooden board, but a clean marble slab or even a large white platter works. Just make sure it’s big enough to hold everything without overcrowding.
Small Bowls or Ramekins — For the jam, nuts, or extra honey. These add height and visual interest to the board.
Whisk — Just to mix the honey and spices easily.
Optional but nice: A small cheese knife for spreading soft cheese. And a wine opener, obviously. You can’t have a charcuterie board without wine.
How to Make It: Step-by-Step
Alright, let’s make this! I’m walking you through exactly how I do it, including the little tricks I’ve picked up. The process is simple: roast the grapes, then assemble the board. The order matters because you want the grapes warm and the cheese at room temperature.
Step 1: Prep the Grapes (5 minutes)
Wash the grapes thoroughly and pat them completely dry with paper towels. This is crucial. If they’re wet, they’ll steam instead of roast, and you won’t get that caramelized honey coating. Toss them in a bowl with the olive oil, honey, chopped rosemary, salt, pepper, and cayenne. Make sure every grape is coated. It’ll look messy, but that’s good.
Step 2: Roast the Grapes (15-20 minutes)
Preheat your oven to 400°F (200°C). Spread the grapes in a single layer on the parchment-lined baking sheet. Don’t crowd them; they need space to roast. Put them in the oven and roast for 15-20 minutes. Watch them closely in the last few minutes. You want the skins to blister and burst, and the honey to bubble and darken slightly. They’re done when they look jammy and slightly shriveled. Remove from the oven and let them cool for 5 minutes. They’ll continue to cook slightly from residual heat.
Step 3: Prep the Cheese and Fruit (10 minutes)
While the grapes are roasting, get your board ready. Take your brie or camembert out of the fridge. If it’s cold, the flavor won’t pop. Slice your hard cheese into cubes or triangles. Slice the pears or halve the figs. Arrange these on your board. Don’t worry about perfection yet; you’ll fill in the gaps later.
Step 4: Assemble the Board (10 minutes)
Now for the fun part. Place your cheeses on the board. Add the cured meats, folding them into nice folds or rosettes. Scatter the nuts in small piles. Add the crackers in a fan shape or stacked. Place the small bowls of jam and honey strategically around the board. Finally, add the roasted grapes. They should still be slightly warm, which is perfect. Tuck them in among the cheeses and meats.
Step 5: Final Touches
Drizzle a little extra honey over the board if you like. Add any fresh herbs like rosemary sprigs for garnish. Step back and admire your work. It’s ready to serve.
Total Time: About 30-40 minutes, mostly hands-off.
Built-in Troubleshooting:
Grapes not bursting? Your oven might be cooler than 400°F. Check them at 15 minutes. If they’re not blistering, give them 5 more minutes.
Honey burning? Honey burns fast. If you see dark smoke, take them out immediately. Next time, lower the heat to 375°F.
Cheese too soft? If your room is hot, the brie might get too runny. Serve it sooner rather than later, or keep it in the fridge until the last minute.
Expert Tips & Tricks
Here’s everything I’ve learned from making this dozens of times. These tips will save you from my mistakes.
The Grape Ratio is Key
I used to use too much honey, and the grapes were just sticky messes. The 3 tablespoons for 2 pounds is the sweet spot. You want a glaze, not a syrup. If you like it sweeter, add a little extra at the end, but start with less.
Room Temperature Cheese
This is the biggest mistake people make with cheese boards. Cold cheese tastes bland and waxy. Take your cheeses out at least an hour before serving. It’s worth the wait. The fats release the flavors, and the texture becomes creamy and inviting.
Visual Balance
Think about colors and textures. You want a mix of reds (grapes, prosciutto), greens (rosemary, pears), whites (cheese, crackers), and browns (nuts, crackers). If your board looks too monochromatic, add a pop of color. A few pomegranate seeds or some fresh mint leaves can brighten it up.
Don’t Overcrowd
It’s tempting to pack every inch of the board, but leave some empty space. It looks more elegant and makes it easier for guests to grab items without knocking things over. Aim for about 80% full.
Toast Your Nuts
Raw nuts are fine, but toasted nuts are better. Put them in a dry pan over medium heat for 3-4 minutes, shaking frequently, until they smell nutty. Let them cool before adding to the board. This simple step adds so much flavor.
Variations & Substitutions
Once you’ve nailed the basic version, here’s how you can mix it up. I’ve tried all of these.
Vegetarian Option
Simply omit the cured meats. Add more cheese and maybe some marinated artichoke hearts or roasted red peppers for protein and flavor. It’s still a full, satisfying board.
Gluten-Free
Use gluten-free crackers or rice cakes. Everything else is naturally gluten-free. I’ve used Mary’s Gone Crackers and they work great.
Dairy-Free
Use dairy-free cheese alternatives. They’ve gotten much better in recent years. I like Violife or Miyoko’s for melting and flavor. Pair with nuts, fruits, and meats for a balanced board.
Spring Version
Skip the rosemary and cayenne. Use fresh basil or thyme with the grapes. Add strawberries or raspberries instead of figs. It’s lighter and brighter.
Winter Version
Add dried cranberries or apricots. Use a stronger cheese like aged manchego. The flavors are deeper and heartier.
Serving & Storage
I usually serve this straight from the board at the dinner table or on the coffee table—it looks rustic and stays warm. But here are other ways I’ve enjoyed it:
How to Serve
Place the board in the center of the table. Provide small plates and forks for guests who want to build their own bites. It’s interactive and fun.
Side Dishes
This is usually the main event, so you don’t need much else. But if you’re serving it as an appetizer before a meal like ground beef stroganoff, it’s perfect. It also pairs well with a light soup like homemade chicken noodle soup on a cold day.
Wine Pairing
Not a wine expert, but my wine-snob friend says a crisp Pinot Grigio or a light-bodied Pinot Noir works great. The acidity cuts through the cheese, and the fruit notes complement the grapes.
Storage Instructions
Refrigerator: Store leftover cheese and meats in airtight containers for up to 3 days. The grapes will lose their texture if stored, so eat them within 24 hours. They’ll keep in the fridge, but they’ll get softer.
Reheating: Don’t reheat the board. The cheese will sweat and the crackers will get soggy. If you have leftover roasted grapes, eat them cold or at room temperature. They’re still delicious.
Freezing: Do not freeze this board. The cheese and grapes will not hold up. Make it fresh.
Pro Tip: If you’re making the board ahead, prep the grapes and store them in the fridge. Let them come to room temperature before serving. Assemble the board 30 minutes before guests arrive so the cheese has time to warm up.
Nutrition Information
I’m not a nutritionist, but here’s the breakdown if you’re tracking. This is a grazing board, so portions vary, but here’s an estimate per serving (assuming 6 servings).
| Nutrient | Per Serving |
|---|---|
| Calories | 350 |
| Protein | 12g |
| Carbs | 30g |
| Fiber | 2g |
| Sugar | 20g |
| Fat | 18g |
| Sodium | 400mg |
What’s Good: High in protein from cheese and meats. Good source of calcium. The grapes provide antioxidants.
What to Know: Higher in calories and fat due to cheese and meats. Contains gluten if using standard crackers. Moderate sodium.
My Take: Look, this is a treat. It’s not a salad. But it’s way better than processed snacks, and you control the quality of ingredients. When I want to make it lighter, I use less meat and more veggies, but usually? I just enjoy it.
Final Thoughts
So that’s my go-to Fall Charcuterie Board with Honey Roasted Grapes! I’ve probably talked your ear off at this point, but when you make a recipe this often, you have a lot to say about it.
This has saved weeknight dinners more times than I can count. It’s my answer to “what’s for dinner” when I’m tired, don’t want takeout, and still want something that tastes really good. My kids are happy, my husband’s happy, and I’m happy because I’m not stressed about cooking.
Make it yours! Try different add-ins, swap in your favorite vegetables, adjust the honey (though more is always better in my opinion). The best recipes are the ones you adapt to your family’s tastes.
If you make this, drop a comment and let me know what you think! I love hearing how recipes turn out in your kitchen. And if something doesn’t work, tell me that too—I’m here to help troubleshoot.
Happy cooking! And I hope your kitchen smells half as good as mine does right now.
Frequently Asked Questions
Q: Can I use white grapes instead of red?
A: Absolutely. White grapes are less sweet and more tart, which gives a different flavor profile. I like red for the visual pop, but green or white work just as well. Just adjust the honey slightly if they’re very tart.
Q: Why did my grapes turn into mush?
A: You probably roasted them too long. Grapes cook fast. Check them at 15 minutes. They should be blistered and bursting, not completely collapsed. If they’re too soft, reduce the time next time.
Q: Can I make the board ahead of time?
A: You can prep the components, but don’t assemble the whole thing more than 30 minutes before serving. The crackers will get stale, and the cheese will dry out. Assemble right before guests arrive for the best experience.
Q: What kind of cheese is best for beginners?
A: Stick to three types: one hard (cheddar), one soft (brie), and one blue (if you like it). These are widely loved and easy to find. You can’t go wrong with this combination.
Q: Can I use store-bought honey roasted grapes?
A: You can, but they’re usually expensive and not as good as homemade. Plus, making them takes 15 minutes. It’s worth the effort to get that fresh rosemary and perfect caramelization.
Q: How do I store leftover roasted grapes?
A: Store them in an airtight container in the fridge for up to 2 days. They’ll be softer, but still delicious. Eat them on yogurt or oatmeal for breakfast.
Q: Can I double this recipe for a party?
A: Yes! Double the grapes and roast them in two batches if your oven is small. For the board, just use a larger platter or two smaller boards. The ratios stay the same.
Pin This Recipe!
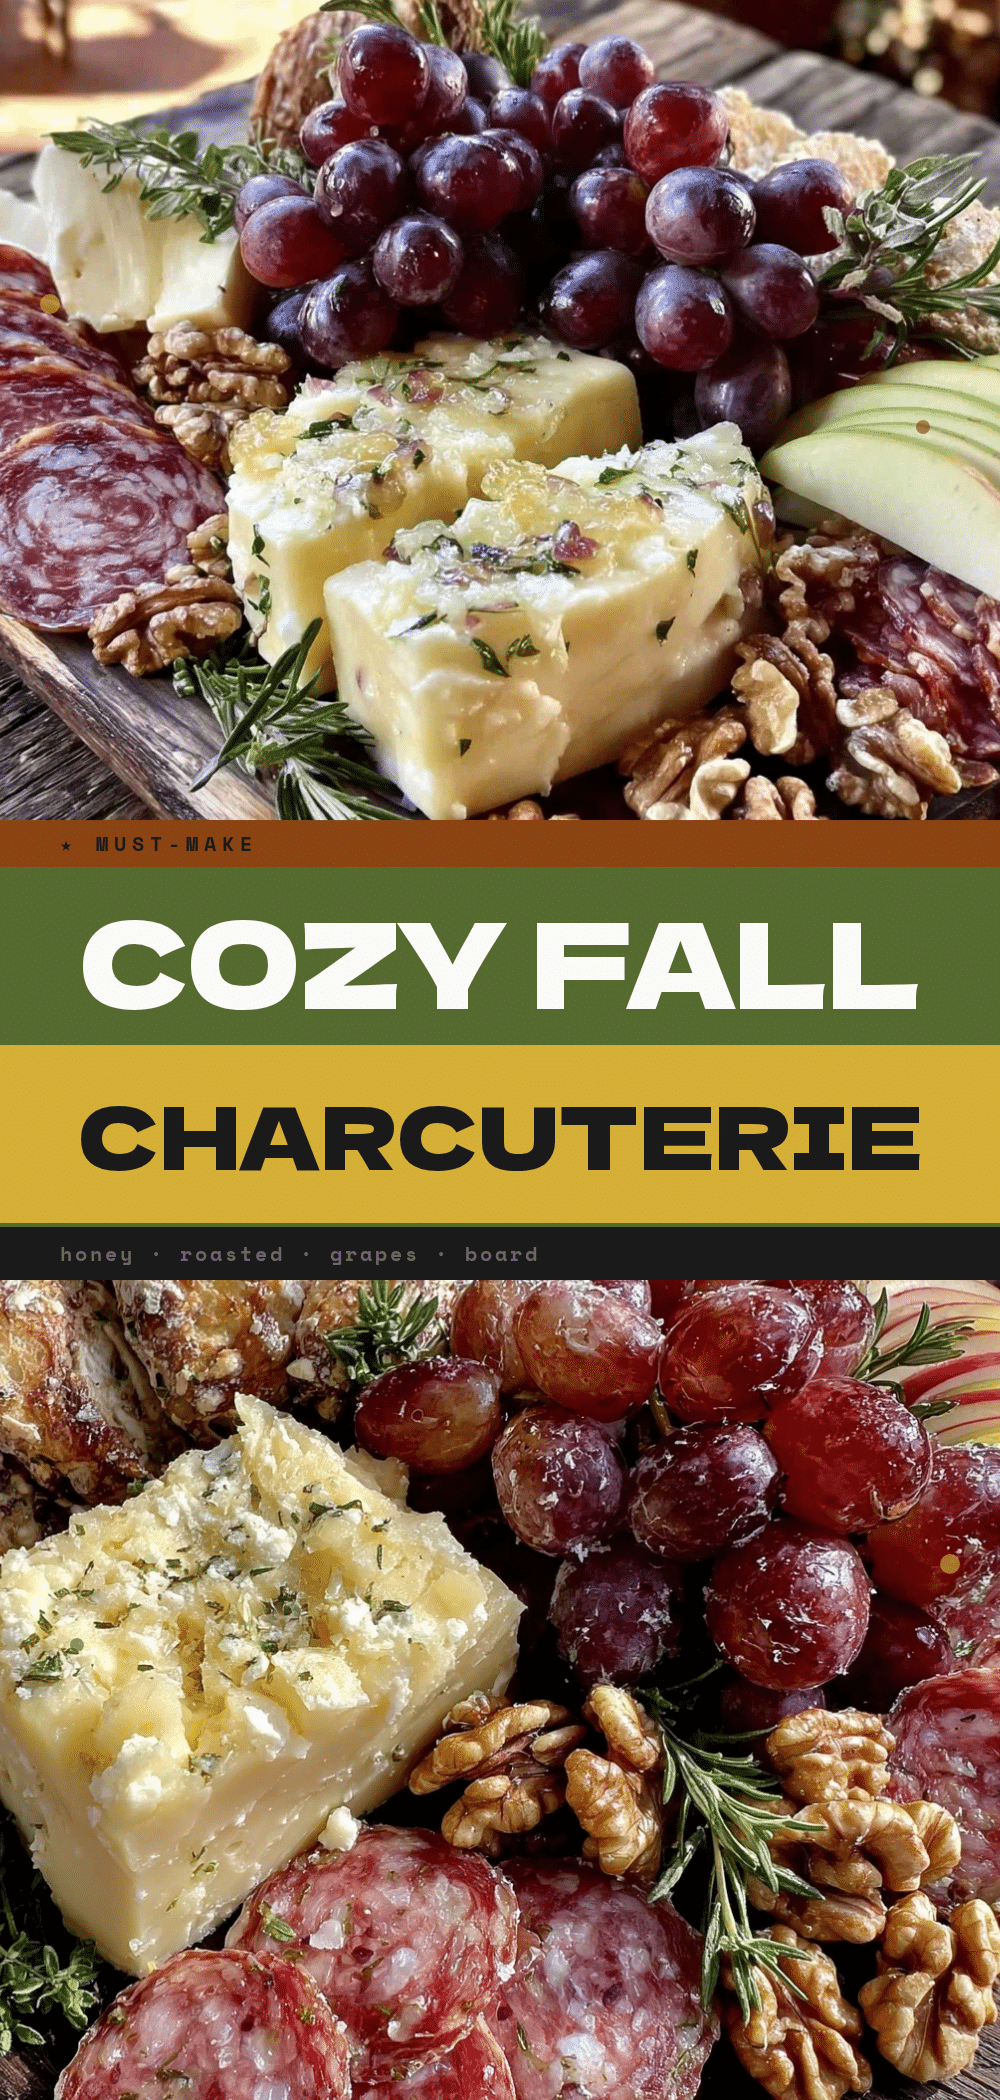
Fall Charcuterie Board with Honey Roasted Grapes
- Total Time: 35 minutes
- Yield: 6 servings 1x
Description
A stress-free, elegant charcuterie board featuring the star ingredient: honey-roasted grapes that burst with sweet-tart flavor. Perfect for weeknight dinners or entertaining, this recipe requires minimal active time and delivers maximum impact.
Ingredients
- 2 pounds red or green grapes
- 1 tablespoon extra virgin olive oil
- 3 tablespoons honey
- 2 sprigs fresh rosemary, needles stripped and chopped
- Pinch of sea salt
- Pinch of black pepper
- 1/4 teaspoon cayenne pepper (optional)
- 8–10 ounces hard cheese (sharp cheddar or aged gouda)
- 8 ounces soft cheese (Brie or Camembert)
- 6–8 ounces cured meats (prosciutto, salami, or soppressata)
- 1 box crackers (water crackers or sesame seed)
- 2–3 fresh figs or pears, sliced
- 1/2 cup nuts (walnuts or pecans)
- 1/2 cup fig jam or extra honey for serving
Instructions
- Preheat oven to 400°F (200°C). Line a baking sheet with parchment paper.
- Wash grapes thoroughly and pat them completely dry with paper towels to ensure caramelization.
- In a small bowl, toss grapes with olive oil, honey, chopped rosemary, salt, pepper, and cayenne until evenly coated.
- Spread grapes in a single layer on the prepared baking sheet.
- Roast for 15-20 minutes, watching closely near the end, until skins blister and burst and honey bubbles. Remove from oven and let cool for 5 minutes.
- While grapes roast, remove soft cheese from the fridge to come to room temperature.
- Slice hard cheese into cubes or triangles. Slice pears or halve figs.
- Arrange cheeses, cured meats (folded into rosettes), nuts, crackers, and fresh fruit on a large board or platter.
- Place small bowls of jam or honey on the board.
- Add the warm, roasted grapes to the board, tucking them among the other items.
- Drizzle with extra honey if desired and garnish with fresh rosemary sprigs.
Notes
[‘Ensure grapes are completely dry before roasting to prevent steaming.’, ‘Cheese should be at room temperature for best flavor and texture.’, ‘Toast nuts in a dry pan for enhanced flavor.’, ‘Do not overcrowd the baking sheet when roasting grapes.’, ‘Honey burns easily; lower oven temperature to 375°F if necessary.’, ‘Assemble the board no more than 30 minutes before serving to keep crackers crisp.’]
- Prep Time: 15 minutes
- Cook Time: 20 minutes
- Category: Appetizer
- Cuisine: American
Nutrition
- Serving Size: Approximately 6 serv
- Calories: 350
- Sugar: 20
- Sodium: 400
- Fat: 18
- Carbohydrates: 30
- Fiber: 2
- Protein: 12
Keywords: charcuterie board, honey roasted grapes, fall appetizer, easy entertaining, cheese board, weeknight dinner, no-cook meal, party food