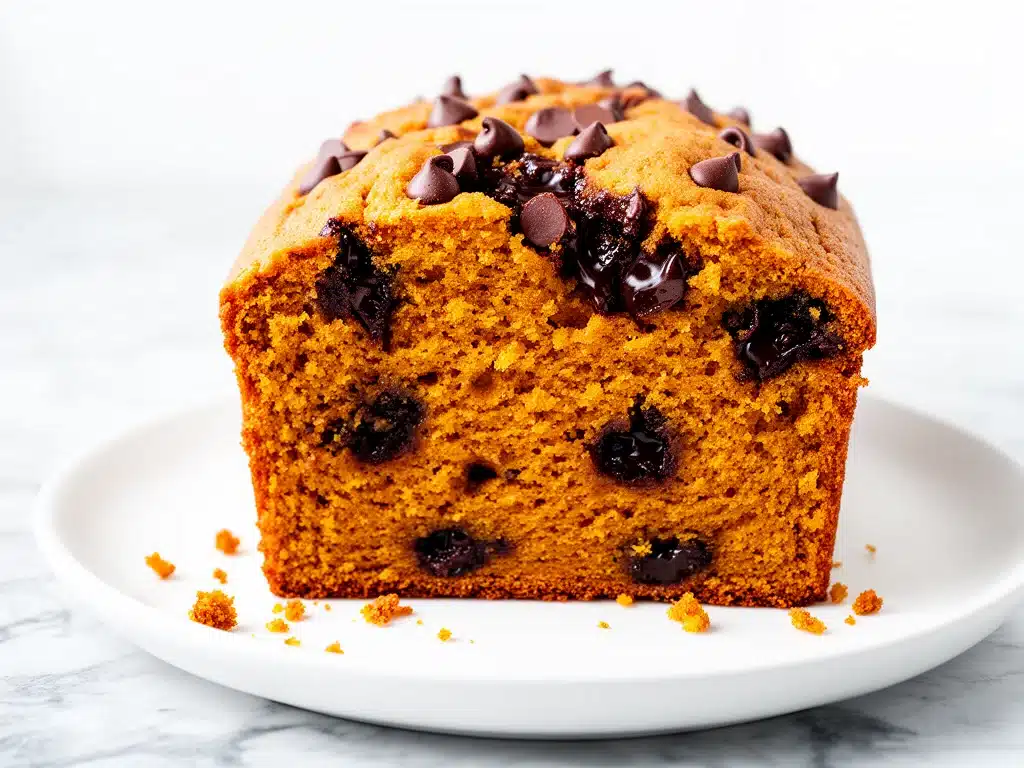
There was a Tuesday in October a few years ago when the rain wouldn’t stop. It was that specific kind of gray, dreary afternoon that makes you want to cancel all plans, order takeout, and hide under a weighted blanket. I was staring into my pantry, looking at a can of pumpkin puree that had been sitting there since September, wondering if I should just throw it out. I didn’t want to bake a cake. I didn’t want to make cookies. I wanted something warm, something that smelled like a hug, and something that could handle the chaos of my three kids running around the house.
So I threw together what I thought would be a mediocre quick bread. I dumped in the pumpkin, some brown sugar, a cup of chocolate chips (because why be modest?), and just hoped for the best. Twenty minutes later, the smell hit me. It wasn’t just “baking”; it was the scent of cinnamon, nutmeg, and toasted walnuts wafting through every room in the house. My kids stopped fighting. My husband came in from the garage, wiped his hands on his jeans, and asked, “Is that… pumpkin bread?”
That was the moment I knew I had struck gold. This fall pumpkin chocolate chip bread has since become the anchor of our autumn routine. I’ve made it at least fifteen times since that rainy Tuesday. Sometimes I add extra chocolate. Sometimes I swap the walnuts for pecans. Sometimes I make it gluten-free. But the core recipe? It stays the same. It’s the one bread I make on repeat because it never fails to make my kitchen smell like a cozy cabin in the woods.
If you’ve been looking for a reason to fire up your oven this season, this is it. It’s moist, it’s spiced, it’s sweet but not overly so, and it freezes beautifully. Let’s get into why this loaf is worth your time, and more importantly, how to make it perfectly every single time.
Why You’ll Love This Pumpkin Bread
I’m not saying this is the best bread in the world (though my mother-in-law might disagree), but it is the most reliable. Here’s why this fall pumpkin chocolate chip bread deserves a permanent spot in your recipe rotation:
- It Uses One Bowl — Seriously. I’m not exaggerating. You mix the wet ingredients, you mix the dry, you combine them, and you bake. No stand mixer needed. No creaming butter and sugar for twenty minutes. If you can whisk, you can make this. I’ve made it while holding a toddler on my hip. It’s that easy.
- Perfectly Moist Texture — Many pumpkin breads turn out dense or dry. This one? It’s tender. The combination of pumpkin puree and a bit of oil keeps it incredibly moist for days. I’ve eaten leftovers five days later, and they still tasted fresh. That’s rare for quick breads.
- Balance of Sweet and Spice — It’s not a dessert bomb. It’s sweet enough to satisfy a chocolate craving but spiced enough to feel like fall. The cinnamon and nutmeg are prominent but don’t overpower the natural sweetness of the pumpkin. It’s the perfect breakfast-with-a-side-of-coffee treat.
- Freezer-Friendly — This is the game-changer. I make two loaves at once. One for immediate gratification, and one for the freezer. When November hits and I’m tired, I just pull a loaf out, let it thaw on the counter, and toast a slice. It tastes just like day one. This strategy has saved my sanity more than once.
- Customizable Add-ins — Love nuts? Add them. Hate nuts? Skip them. Want double chocolate? Add cocoa powder. Want to make it lighter? Swap half the oil for applesauce. This recipe is a canvas. I’ve made versions with cranberries and white chocolate chips that are absolutely divine.
So basically, if you want a bread that is easy, delicious, versatile, and makes your house smell amazing, this is the one. It’s better than store-bought, cheaper than bakery, and honestly, it’s just plain satisfying to pull a golden loaf out of the oven.
Ingredients You’ll Need
Here’s the best part: you probably have most of these ingredients already. This isn’t a recipe that requires a trip to three different specialty stores. It’s pantry-friendly. I’m particular about a few things here, but for the most part, this is simple stuff.
For the Wet Mix
Pumpkin puree (1 cup / 240g) — Listen to me closely: do not use pumpkin pie filling. That stuff has sugar and spices in it already, and it will mess up the balance. Use 100% pure pumpkin puree. I like the Libby’s brand because it’s consistent, but any plain puree works. If you’re feeling fancy, roast your own pumpkin, but honestly? The canned stuff is fine. I’m not judging.
Vegetable oil (½ cup / 120ml) — I use vegetable or canola oil because it keeps the bread moist. You *can* use melted butter, but the texture will be slightly different—more cake-like, less tender. I prefer oil for this specific loaf. If you want a healthier option, you can use half applesauce, but the bread won’t be as rich.
Eggs (2 large) — Room temperature is best. If I forget, I just run them under warm water for a minute. They incorporate better into the batter.
Vanilla extract (1 teaspoon) — Use real vanilla. Not the imitation stuff. It makes a noticeable difference in the flavor depth. I keep a bottle of Nielsen-Massey on my counter.
For the Dry Mix
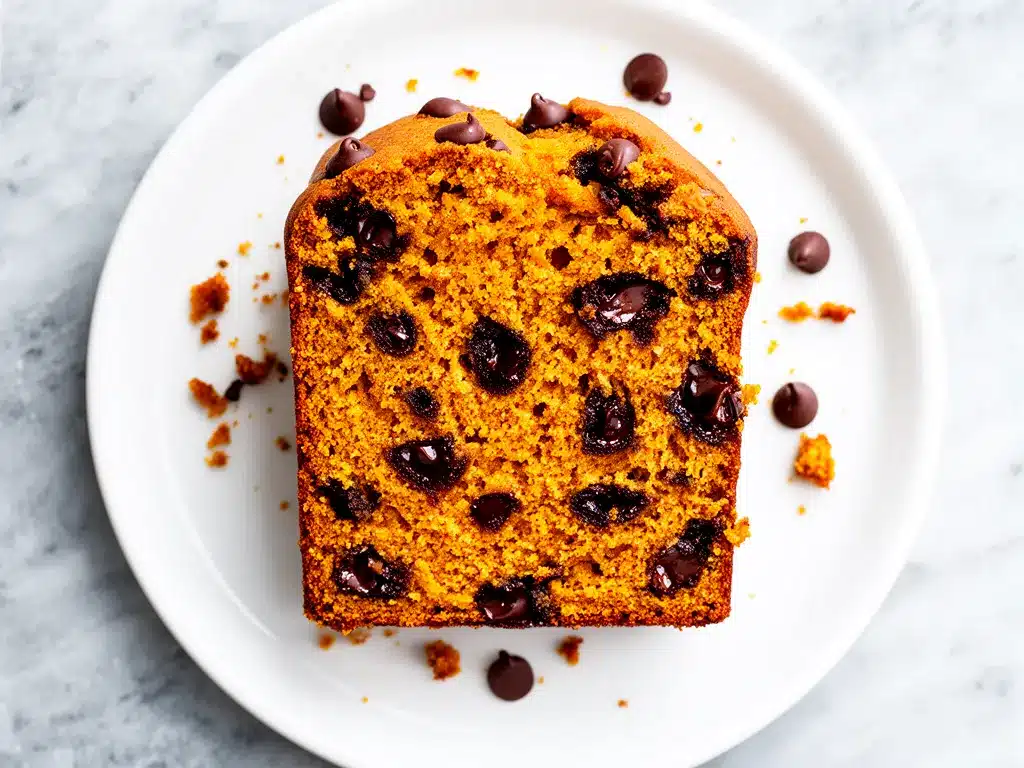
All-purpose flour (2 cups / 250g) — Don’t over-measure! Spoon the flour into your measuring cup and level it off. Packing it down will make your bread dense and tough. If you want to use gluten-free flour, a 1-to-1 blend works perfectly here.
Baking soda (1 teaspoon) — This is what makes it rise. Make sure it’s not expired. I test mine every six months or so. If it doesn’t fizz when you add vinegar, toss it.
Baking powder (½ teaspoon) — Just a little extra lift. Again, check the date.
Salt (½ teaspoon) — Essential. It balances the sweetness. Don’t skip it.
Cinnamon (2 teaspoons) — Ground cinnamon. Fresh is better, but I’ve used older jars and it still tastes fine. Just avoid that dusty, old jar from 2018.
Nutmeg (½ teaspoon) — Freshly grated is amazing, but pre-ground is totally fine. A little pinch goes a long way.
Ground ginger (½ teaspoon) — This is the secret ingredient. It adds a warm, spicy kick that pairs perfectly with pumpkin. If you don’t have it, you can skip it, but I recommend keeping it on hand for fall baking.
The Mix-Ins
Dark brown sugar (1 cup / 200g) — Packed. Brown sugar adds moisture and a caramel-like depth. Light brown sugar works too, but dark is better for that rich fall flavor.
Chocolate chips (1 cup / 170g) — Semi-sweet or dark chocolate chips are my go-to. They don’t make it too sweet. I like Ghirardelli or Nestlé Toll House. If you want to get fancy, use chocolate chunks instead of chips. They create those gooey pockets of chocolate in every bite.
Walnuts or pecans (½ cup, chopped) — Optional, but I highly recommend them. They add crunch and texture. If you’re allergic or just hate nuts, skip them. The bread is still great without them.
Equipment Needed
You don’t need fancy gadgets for this. Here’s what I actually use:
- Two 9×5-inch loaf pans — Standard size. Make sure they’re greased and lined with parchment paper for easy removal. I use parchment because it prevents sticking and makes cleanup a breeze.
- Mixing bowls — Two medium bowls. One for wet, one for dry. You can use one large bowl if you’re lazy, but two is easier to keep organized.
- Whisk — For mixing the dry ingredients and beating the wet ones. A silicone whisk is nice because it doesn’t scratch the bowl.
- Spatula — For folding in the chocolate chips and nuts. A rubber spatula works best to scrape the sides of the bowl.
- Cooling rack — Essential. Let the bread cool in the pan for 10 minutes, then transfer to a rack. This prevents the bottom from getting soggy.
- Measuring cups and spoons — Standard stuff. I use metal measuring spoons because they’re durable.
Optional but nice: A kitchen scale for precision, especially if you’re doing gluten-free baking. But volume measurements work fine here if you’re careful.
How to Make It: Step-by-Step
Alright, let’s make this! I’m walking you through exactly how I do it, including the little tricks I’ve picked up over the years.
Step 1: Prep Your Pans and Oven (5 minutes)
Preheat your oven to 350°F (175°C). Grease your two 9×5-inch loaf pans with butter or cooking spray. Line the bottoms with parchment paper for easy removal. This step is crucial—if you don’t line the pans, you’ll struggle to get the bread out without breaking it. I learned this the hard way with my first batch.
Step 2: Mix the Wet Ingredients (3 minutes)
In a large bowl, whisk together the pumpkin puree, vegetable oil, eggs, and vanilla extract until smooth. The mixture should look uniform and creamy. If there are lumps of pumpkin, keep whisking. It takes about a minute. Set this aside.
Step 3: Mix the Dry Ingredients (2 minutes)
In a separate medium bowl, whisk together the flour, baking soda, baking powder, salt, cinnamon, nutmeg, and ginger. Make sure there are no clumps of baking soda or spices. This ensures even distribution of leavening and flavor.
Step 4: Combine Wet and Dry (2 minutes)
Pour the dry ingredients into the wet ingredients. Gently fold them together using a spatula. Stop as soon as the flour disappears. Do not overmix! Overmixing develops gluten, which makes the bread tough. It’s okay if there are a few small streaks of flour. We want tender, not chewy.
Step 5: Fold in the Mix-Ins (1 minute)
Stir in the chocolate chips and nuts (if using). Be gentle. Just enough to distribute them evenly. If you want a chocolate-swirled effect, reserve some chips and sprinkle them on top after pouring the batter into the pans.
Step 6: Bake (50-60 minutes)
Divide the batter evenly between the two prepared loaf pans. Bake for 50-60 minutes. The bread is done when a toothpick inserted into the center comes out clean or with just a few moist crumbs. Do not overbake, or the bread will be dry. If the top is browning too quickly, tent it with aluminum foil for the last 10 minutes.
Step 7: Cool and Slice (30 minutes)
Let the loaves cool in the pans for 10 minutes. Then, transfer them to a wire rack to cool completely. This takes about 30 minutes. Resist the urge to slice it hot—it will be gummy. Wait. Patience is a virtue, especially with bread.
Expert Tips & Tricks
Here’s everything I’ve learned from making this dozens of times. These tips will save you from my mistakes.
- Don’t Overmix the Batter — I can’t stress this enough. Mix until just combined. If you stir like you’re making pancakes, you’ll get dense bread. Gentle folds only.
- Check Your Oven Temperature — Ovens lie. If your bread is burning on top but raw in the middle, your oven is too hot. Use an oven thermometer to verify. I keep one on my oven rack.
- Room Temperature Ingredients — Eggs and vanilla at room temperature incorporate better. If you’re in a hurry, warm the eggs in hot water for a few minutes.
- Use a Toothpick Test — Don’t rely on time alone. Every oven is different. Check at 50 minutes. If the toothpick comes out clean, it’s done. If it has wet batter, give it 5 more minutes.
- Freeze for Later — Wrap cooled loaves tightly in plastic wrap, then in foil. They’ll last up to 3 months in the freezer. Thaw overnight on the counter.
Common mistakes to avoid:
- Soggy Bottoms — Caused by not cooling on a rack. Always use a wire rack.
- Dry Bread — Overbaking. Check early and often.
- Dense Bread — Overmixing or old leavening agents. Check your baking soda and powder dates.
Variations & Substitutions
Once you’ve nailed the basic version, here’s how you can mix it up. I’ve tried all of these.
- Gluten-Free — Use a 1-to-1 gluten-free flour blend. Add ½ teaspoon of xanthan gum if your blend doesn’t include it. The texture is almost identical to regular flour.
- Dairy-Free — Use coconut oil instead of butter (if using butter) and dairy-free chocolate chips. The rest is naturally dairy-free.
- Lower Sugar — Reduce the brown sugar to ¾ cup. It’s still sweet enough from the pumpkin and chocolate.
- Cranberry Pecan — Swap chocolate chips for dried cranberries and pecans. It’s tart and nutty. Delicious with tea.
- Maple Walnut — Use maple syrup instead of brown sugar. Add walnuts. It’s simpler and less sweet.
Dietary modifications:
- Vegan — Use flax eggs (2 tablespoons ground flaxseed + 6 tablespoons water) and coconut oil. Use dairy-free chocolate chips.
- Oil-Free — Replace oil with applesauce. The bread will be slightly less moist but still good.
Serving & Storage
How to serve this fall pumpkin chocolate chip bread:
- Warm Slices — Toast a slice and top with cream cheese or butter. It’s like a breakfast pastry.
- With Coffee — Pair it with a dark roast or chai latte. It’s the perfect autumn combo.
- As a Gift — Wrap a loaf in cellophane with a ribbon. Add a handwritten note. It’s a thoughtful, homemade gift.
Storage instructions:
- Counter — Store in an airtight container for up to 3 days. It stays moist.
- Fridge — Store for up to 5 days. It might dry out slightly, so wrap it well.
- Freezer — Wrap tightly and freeze for up to 3 months. Thaw on the counter.
Pro tip: If leftovers are drying out, microwave a slice for 10 seconds. It revives the moisture instantly.
Nutrition Information
I’m not a nutritionist, but here’s the breakdown if you’re tracking. This is per slice (assuming 10 slices per loaf).
| Nutrient | Amount |
|---|---|
| Calories | 280 |
| Fat | 12g |
| Carbs | 40g |
| Fiber | 2g |
| Sugar | 22g |
| Protein | 4g |
What’s good: It’s not a health food, but it’s better than a cupcake. The pumpkin adds some fiber and vitamins. The chocolate is a treat, but not excessive.
What to know: Higher in sugar and carbs. If you’re watching your intake, enjoy a smaller slice or pair it with protein (like a hard-boiled egg) to balance the meal.
Final Thoughts
So that’s my go-to fall pumpkin chocolate chip bread! I’ve probably talked your ear off at this point, but when you make a recipe this often, you have a lot to say about it.
This bread has saved my mornings, my afternoons, and my evenings. It’s my answer to “what should I bake?” when I want something comforting but not complicated. My kids love it, my husband loves it, and my friends beg me for the recipe. It’s just that good.
Make it yours! Try different mix-ins, adjust the spices, or make it gluten-free. The best recipes are the ones you adapt to your family’s tastes. And if you make this, drop a comment and let me know what you think! I love hearing how recipes turn out in your kitchen.
Happy baking! And I hope your kitchen smells half as good as mine does right now.
Frequently Asked Questions
Can I use pumpkin pie filling instead of puree?
No. Pumpkin pie filling already has sugar, spices, and thickeners. It will throw off the balance of the recipe and make the bread too sweet and dense. Stick to 100% pure pumpkin puree.
Why did my bread turn out dense?
Most likely, you overmixed the batter. Once you add the dry ingredients, mix until just combined. Also, check your baking soda and powder—they might be expired. If they’re old, they won’t leaven the bread properly.
Can I freeze this bread?
Yes! Wrap cooled loaves tightly in plastic wrap and then in foil. They’ll last up to 3 months in the freezer. Thaw overnight on the counter. It tastes just like fresh.
Can I make this gluten-free?
Absolutely. Use a 1-to-1 gluten-free flour blend. The texture is almost identical to regular flour. If your blend doesn’t have xanthan gum, add ½ teaspoon.
How do I keep the bread moist?
Don’t overbake. Check it at 50 minutes. Also, the oil in the recipe helps keep it moist. If you want to be extra safe, wrap the cooled loaf in plastic wrap while it’s still slightly warm. This traps the moisture.
Can I add other mix-ins?
Yes! Try dried cranberries, chopped apricots, or white chocolate chips. Just stick to 1 cup total mix-ins so the batter isn’t overloaded.
Pin This Recipe!
Fall Pumpkin Chocolate Chip Bread
- Total Time: 1 hour 10 minutes
- Yield: 2 loaves (20 slices) 1x
Description
A moist, spiced quick bread loaded with chocolate chips and optional nuts. This easy one-bowl recipe is perfect for autumn, freezer-friendly, and customizable for various dietary needs.
Ingredients
- 1 cup (240g) pure pumpkin puree
- 1/2 cup (120ml) vegetable oil
- 2 large eggs, room temperature
- 1 teaspoon vanilla extract
- 2 cups (250g) all-purpose flour
- 1 teaspoon baking soda
- 1/2 teaspoon baking powder
- 1/2 teaspoon salt
- 2 teaspoons ground cinnamon
- 1/2 teaspoon ground nutmeg
- 1/2 teaspoon ground ginger
- 1 cup (200g) dark brown sugar, packed
- 1 cup (170g) semi-sweet or dark chocolate chips
- 1/2 cup chopped walnuts or pecans (optional)
Instructions
- Preheat oven to 350°F (175°C). Grease two 9×5-inch loaf pans and line bottoms with parchment paper.
- In a large bowl, whisk together pumpkin puree, vegetable oil, eggs, and vanilla extract until smooth.
- In a separate medium bowl, whisk together flour, baking soda, baking powder, salt, cinnamon, nutmeg, and ginger.
- Pour dry ingredients into wet ingredients and gently fold together with a spatula until just combined. Do not overmix.
- Fold in chocolate chips and nuts (if using).
- Divide batter evenly between the two prepared loaf pans.
- Bake for 50-60 minutes, or until a toothpick inserted into the center comes out clean. Tent with foil if browning too quickly.
- Let loaves cool in pans for 10 minutes, then transfer to a wire rack to cool completely before slicing.
Notes
Do not use pumpkin pie filling; use 100% pure pumpkin puree. Do not overmix the batter to avoid dense bread. For gluten-free, use a 1-to-1 gluten-free flour blend. Store in an airtight container for up to 3 days or freeze for up to 3 months.
- Prep Time: 10 minutes
- Cook Time: 50-60 minutes
- Category: Dessert
- Cuisine: American
Nutrition
- Serving Size: 1 slice
- Calories: 280
- Sugar: 22
- Sodium: 250
- Fat: 12
- Saturated Fat: 3
- Carbohydrates: 40
- Fiber: 2
- Protein: 4
Keywords: pumpkin bread, chocolate chip bread, fall recipe, quick bread, autumn baking, gluten-free option, freezer-friendly